


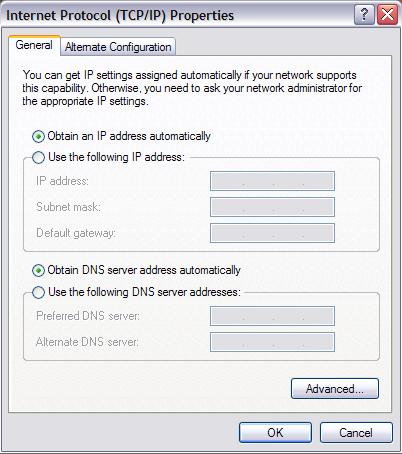
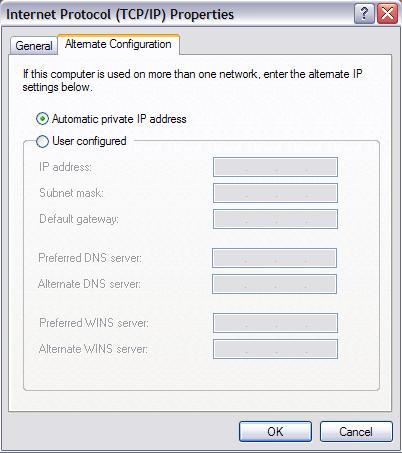
Automatic DHCP
Physical Setup Instructions (Any OS)
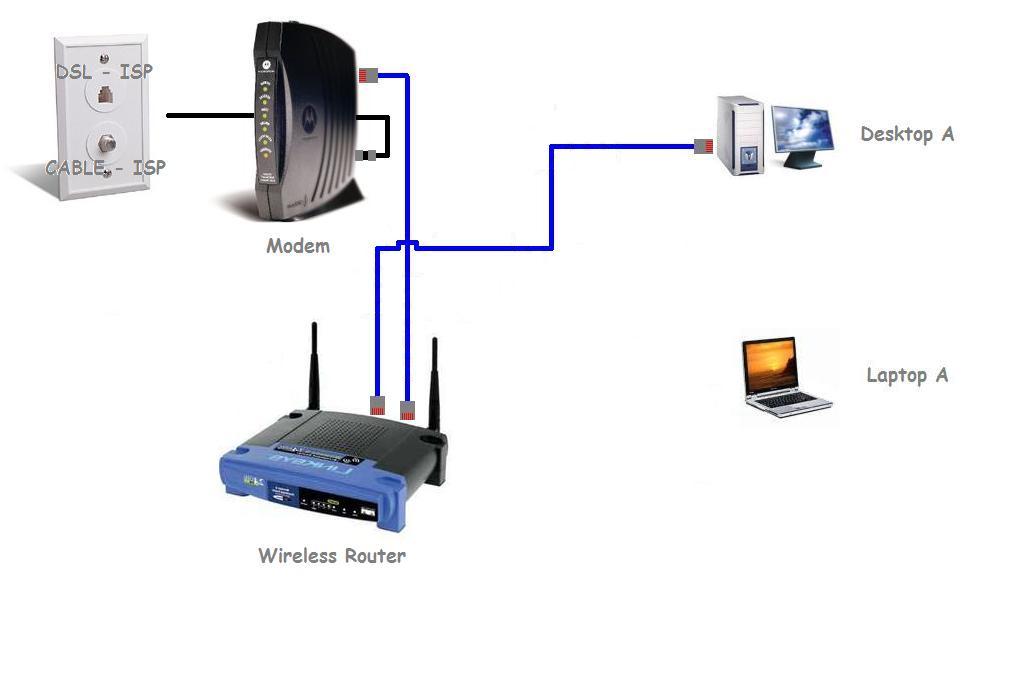
In this guide I will be using this Setup, as I have found the most common in residences.
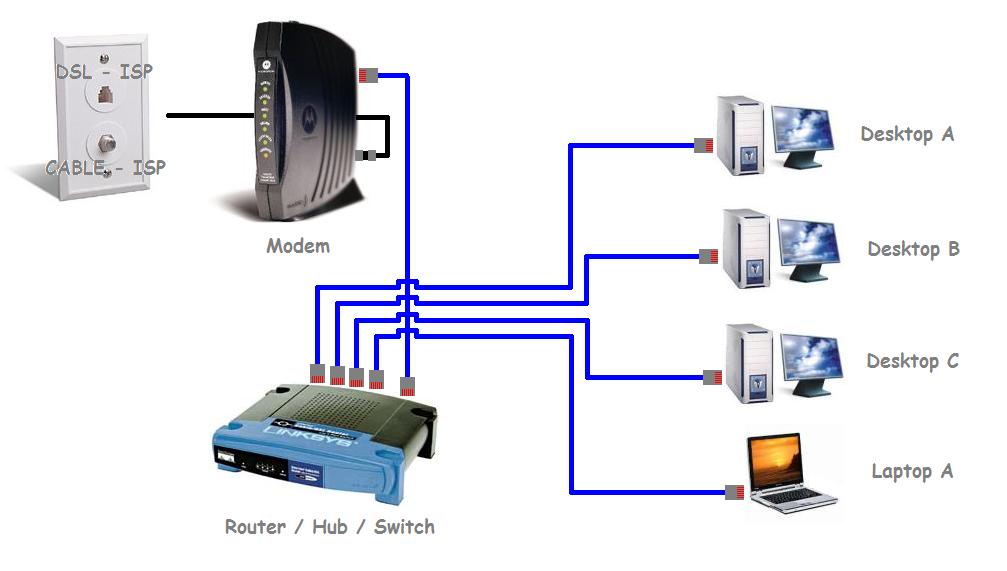
If you need help setting up your Wired Home network on four PCs please follow the steps below. Any Combination of four total Desktop or Laptop PCs may be used in this setup.
1. Turn off all the Computers
2. Unplug Power from the Modem
3. Unplug Power from the Router
4. Connect the Modem to the wall plate using a standard Coax Jumper (for Cable) or Standard Cat3 Jumper for DSL.
5. Connect the Router port (WAN, WLAN, or Internet) to the Modem using a standard CAT5 Jumper
6. Connect a standard CAT5 Jumper to Port 1 on the Router and connect the other end of the jumper to the Ethernet Port on the back of Desktop A
7. Connect a standard CAT5 Jumper to Port 2 on the Router and connect the other end of the jumper to the Ethernet Port on the back of Desktop B
8. Connect a standard CAT5 Jumper to Port 3 on the Router and connect the other end of the jumper to the Ethernet Port on the back of Desktop C
9. Connect a standard CAT5 Jumper to Port 4 on the Router and connect the other end of the jumper to the Ethernet Port on the back of Laptop A
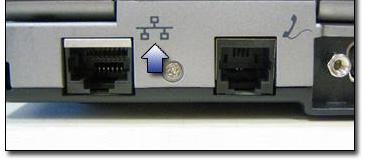
**The Ethernet port on a desktop or laptop has this symbol near it:
11. Plug Power into the Modem and wait for it to SYNC all the way up
12. Plug Power into the Router and wait for it to SYNC all the way up
Go to Wired Home Network OS Setup, for the next steps.
Edited by admin, 20 August 2007 - 09:51 AM.


 Sign In
 Create Account
