


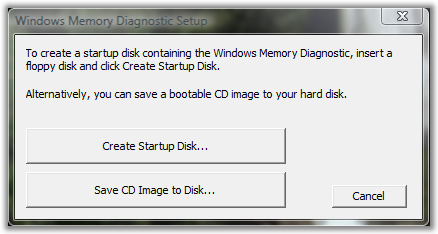
When the downloaded file is opened, the creation software will start and you will be presented with a license agreement...accept that and you will see the options to create a bootable floppy diskette or to copy the CD image to a location on your computer as shown below.
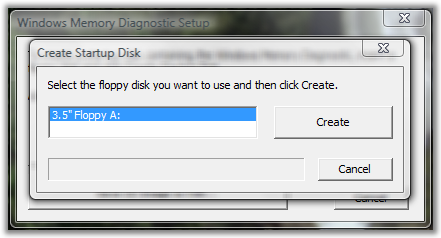
When the "Create Startup Disk..." button is clicked, you will be prompted to select the floppy drive to use to create the disk. In the majority of cases, there will be only one choice and it will be selected by default as shown in the example below. Insert a diskette into the floppy drive and click on the "Create" button.
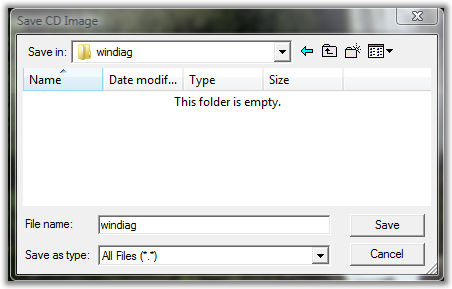
When the "Save CD Image to Disk..." button is clicked, you will be prompted to save the CD image to a location on your computer. Save it to a location you will remember such as your My Documents folder or the desktop. In the example below, I've created a folder on the desktop named windiag to save the file to.
Once the image has been saved to a location on your computer, you can use your burning software to burn the image to a cd. If your software doesn't support burning ISO Images or you do not have burning software installed, you can use a tool like ISO Recorder which will add a "Copy Image to CD" option to the right click context menu. You can simply right click on the saved image and choose that option...the burning tool will open.
Use the disk you create to boot the computer. The diagnostics will run automatically and will continue to do so until it is terminated. It should be left to run for a minimum of four complete passes. If you have the time, an hour or two is better.
If the RAM module(s) is good, each test in each pass will display a green "Succeeded" message in the Pass field as shown in the image below.
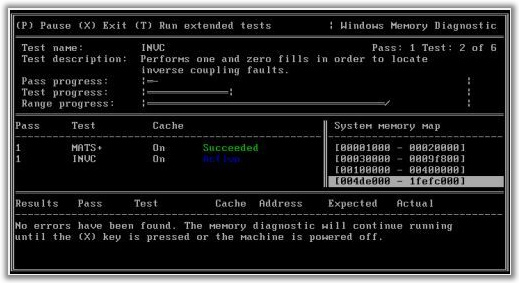
If the RAM module(s) is bad, one or more passes will display a red "Failed" message in the Pass field as shown in the image below.
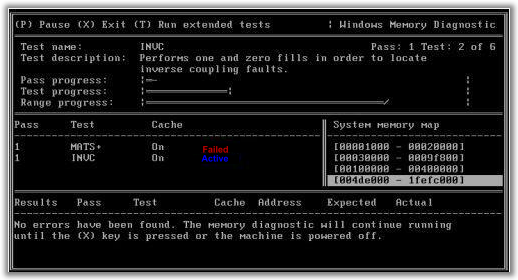
Any failure in any test may indicate a bad module. If there is more than one module installed on the machine when a failure is indicated, remove all but one module and begin the test again, testing each module by itself until the failing module is found.
To terminate the diagnostics, remove the disk and press the X key or power the machine off.
Other things to try when faced with suspected memory problems:
- Set the BIOS Fail Safe Defaults in Setup.
- Reset the CMOS. (Advanced)
- Adjust RAM voltage/timing. (Advanced)


 Sign In
 Create Account
