

 This topic is locked

Your latest logs are showing me that your Harddrive has a bad block. This may be a sign of your Hard drive failing, and it may be wise for you to backup your data in the event that it should malfunction and stop working unexpectedly.
Hard-Drive Maintenance/Repair:
Note: for the CHKDSK portion you may refer to this tutorial
Here and follow the instructions for Graphical Mode if you so wish.
- Click Start >> Run... then type in CMD and click on OK.
- At the Command Prompt C:\ > type the following:
- CD C:\ and hit the Enter/Return key.
- Type in CHKDSK C: /R and hit the Enter/Return key.
- When prompted with:
CHKDSK cannot run because the volume is in use by another process
Would you like to schedule this volume to be checked next time the system
restarts (Y/N)
- Hit the Y key then at the Command Prompt C:\ >
- Type in EXIT and and hit the Enter/Return key.
- Now Reboot(Restart) your computer.
Note: Upon Reboot(Restart) the CHKDSK(check-disk) will start and carry out the repairs required.
You should see a screen like this just after the POST (Power on Self Test) screen:
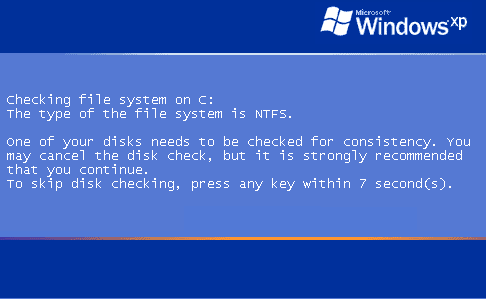
Note: Do not touch either the keyboard or Mouse, otherwise the Check-Disk will be canceled and you computer will continue to boot-up as normal.
NEXT:
OTL Fix
We need to run an OTL Fix
- Please reopen
 on your desktop.
 - Copy and Paste the following code into the
 textbox. Do not include the word "Code"
:Services :OTL DRV - (catchme) -- File not found O16 - DPF: {8FFBE65D-2C9C-4669-84BD-5829DC0B603C} http://fpdownload.macromedia.com/get/flash...t/ultrashim.cab (Reg Error: Key error.) O16 - DPF: {E2883E8F-472F-4FB0-9522-AC9BF37916A7} http://platformdl.adobe.com/NOS/getPlusPlus/1.6/gp.cab (Reg Error: Key error.) O16 - DPF: ActiveGS.cab http://activegs.freetoolsassociation.com/ActiveGS.cab (Reg Error: Key error.) O37 - HKCU\...exe [@ = exefile] -- Reg Error: Key error. File not found [3 C:\WINDOWS\System32\*.tmp files -> C:\WINDOWS\System32\*.tmp -> ] [1 C:\WINDOWS\*.tmp files -> C:\WINDOWS\*.tmp -> ] [1 C:\*.tmp files -> C:\*.tmp -> ] :Files C:\I386\GTDownDE_87.ocx :Commands [purity] [emptytemp] [EMPTYFLASH] [start explorer] [Reboot] - Push

- OTL may ask to reboot the machine. Please do so if asked.
- Click
 .
. - A report will open. Copy and Paste that report in your next reply.
- If the machine reboots, the log will be located at C:\_OTL\MovedFiles\mmddyyyy_hhmmss.log, where mmddyyyy_hhmmss is the date of the tool run.
NEXT:
Java Outdated
Your Java is out of date. Older versions have vulnerabilities that malicious sites can use to exploit and infect your system. Please follow these steps to remove older version Java components and update:
- Download the latest version of Java Runtime Environment (JRE) Version 6 and save it to your desktop.
- Look for "JDK 6 Update 20 (JDK or JRE)".
- Click the "Download JRE" button to the right.
- Select your Platform: "Windows".
- Select your Language: "Multi-language".
- Read the License Agreement, and then check the box that says: "Accept License Agreement".
- Click Continue and the page will refresh.
- Under Required Files, check the box for Windows Offline Installation, click the link below it and save the file to your desktop.
- Close any programs you may have running - especially your web browser.
- Check (highlight) any item with Java Runtime Environment (JRE or J2SE) in the name.
- Click the Remove or Change/Remove button and follow the onscreen instructions for the Java uninstaller.
- Repeat as many times as necessary to remove each Java versions.
- Reboot your computer once all Java components are removed.
- Then from your desktop double-click on jre-6u20-windows-i586.exe to install the newest version.
- If using Windows Vista and the installer refuses to launch due to insufficient user permissions, then Run As Administrator.
- When the Java Setup - Welcome window opens, click the Install > button.
- If offered to install a Toolbar, just uncheck the box before continuing unless you want it.
-- Java is updated frequently. If you want to be automatically notified of future updates, just turn on the Java Automatic Update feature and you will not have to remember to update when Java releases a new version.
Note:
The Java Quick Starter (JQS.exe) adds a service to improve the initial startup time of Java applets and applications.
To disable the JQS service if you don't want to use it, go to Start > Control Panel > Java > Advanced > Miscellaneous and uncheck the box for Java Quick Starter.
Click Ok and reboot your computer.
NEXT
Clean Java Cache & Temporary Files
- After the install is complete, go into the Control Panel (using Classic View) and double-click the Java Icon. (looks like a coffee cup)
- On the General tab, under Temporary Internet Files, click the Settings button.
- Next, click on the Delete Files button
- There are two options in the window to clear the cache - Leave BOTH CheckedApplications and AppletsTrace and Log Files
- Click OK on Delete Temporary Files Window
Note: This deletes ALL the Downloaded Applications and Applets from the CACHE. - Click OK to leave the Temporary Files Window
- Click OK to leave the Java Control Panel.
NEXT:
Please download JavaRa and unzip it to your desktop.
***Please close any instances of Internet Explorer before continuing!***
- Double-click on JavaRa.exe to start the program.
- From the drop-down menu, choose English and click on Select.
- JavaRa will open; click on Remove Older Versions to remove the older versions of Java installed on your computer.
- Click Yes when prompted. When JavaRa is done, a notice will appear that a logfile has been produced. Click OK.
- A logfile will pop up. Please save it to a convenient location and post it in your next reply.
NEXT:
Update Adobe Reader
Earlier versions of Adobe Reader have known security flaws so it is recommended that you update your copy
- Go to Start > Control Panel > Add/Remove Programs
- Remove ALL instances of Adobe Reader
- Re-boot your computer as required.
- Once ALL versions of Adobe Reader have been uninstalled, visit: <<here>> and download the latest version of Adobe Reader
NEXT:
Security Check
Download Security Check by screen317 from here or here.
- Save it to your Desktop.
- Double click SecurityCheck.exe and follow the onscreen instructions inside of the black box.
- A Notepad document should open automatically called checkup.txt; please post the contents of that document.


 Sign In
 Create Account
