
Edited by MiaHess, 06 January 2011 - 11:29 AM.

Replacing CMOS Battery
Started by
MiaHess
, Jan 06 2011 11:28 AM
#1

 Posted 06 January 2011 - 11:28 AM
MiaHess
-
- Member
-

- 12 posts
Member

#2
Posted 06 January 2011 - 11:35 AM
rshaffer61
-

- Moderator
-

- 34,114 posts
Moderator
You probably need to enter the bios and Disable Floppy Drive Seek and take the floppy drive out of the boot sequence.
Make sure you save the changes before exiting by clicking F10.
Also since you changed the CMOS Battery double check the Date and Time to make sure they are correct as this will cause update issues with your OS and other software.
Make sure you save the changes before exiting by clicking F10.
Also since you changed the CMOS Battery double check the Date and Time to make sure they are correct as this will cause update issues with your OS and other software.
#3
Posted 06 January 2011 - 11:42 AM
MiaHess
- Topic Starter
-
- Member
-
- 12 posts
Member
Hi Thanks for your help. How do I Disable the Floppy Drive Seek and also I've been changing the time in the bios and everytime I restart the computer it changes back to the wrong time.
#4
Posted 06 January 2011 - 11:48 AM
rshaffer61
-
- Moderator
-
- 34,114 posts
Moderator
Usually in the General Area or it could be in the Advanced area.
You say you keep having to change the date and time everytime but are you Saving the settings as I stated above before exiting the bios?
If your bios does not have a Save and Exit feature then you MUST click F10 to Save the settings.
Then exit and the system should reboot.
If you have done this then I suspect a faulty cmos battery again.
#5
Posted 06 January 2011 - 12:27 PM
MiaHess
- Topic Starter
-
- Member
-
- 12 posts
Member
Thank you very much for your help.
#6
Posted 06 January 2011 - 12:28 PM
rshaffer61
-
- Moderator
-
- 34,114 posts
Moderator
Did you find the settings that need to be changed?
#7
Posted 06 January 2011 - 12:38 PM
MiaHess
- Topic Starter
-
- Member
-
- 12 posts
Member
I managed to disable the floppy so now I only get the low battery voltage error at startup and I saved the time and date but I still have that problem. I replaced the battery, this will be my fourth time.
#8
Posted 06 January 2011 - 12:48 PM
rshaffer61
-
- Moderator
-
- 34,114 posts
Moderator
Hmm boot into windows and please do the following.
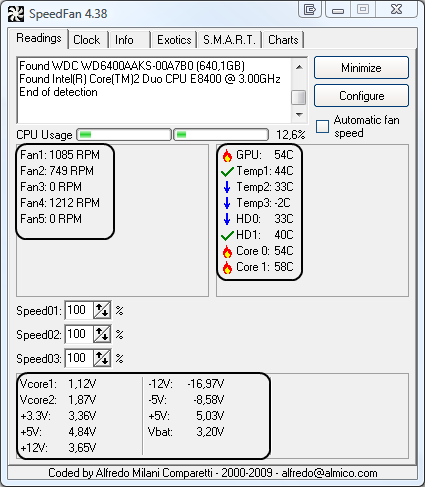
Download Speedfan (The download link is to the right), and install it. Once it's installed, run the program and post here the information it shows.
The information I want you to post is the stuff that is circled in the example picture I have attached.
To make sure we are getting all the correct information it would help us if you were to attach a screenshot like the one below of your Speedfan results.
To do a screenshot please have click on your Print Screen on your keyboard.
- It is normally the key above your number pad between the F12 key and the Scroll Lock key
- Now go to Start and then to All Programs
- Scroll to Accessories and then click on Paint
- In the Empty White Area click and hold the CTRL key and then click the V
- Go to the File option at the top and click on Save as
- Save as file type JPEG and save it to your Desktop
- Attach it to your next reply
#9
Posted 06 January 2011 - 03:43 PM
MiaHess
- Topic Starter
-
- Member
-
- 12 posts
Member
Sorry I stepped out for a while. I will try your suggestion and will get back to you in a litle while.
Thanks
Thanks
#10
Posted 06 January 2011 - 05:39 PM
MiaHess
- Topic Starter
-
- Member
-
- 12 posts
Member
Attached is a copy of the speedfan results.
#11
Posted 06 January 2011 - 05:42 PM
MiaHess
- Topic Starter
-
- Member
-
- 12 posts
Member
sorry I thought I attached it.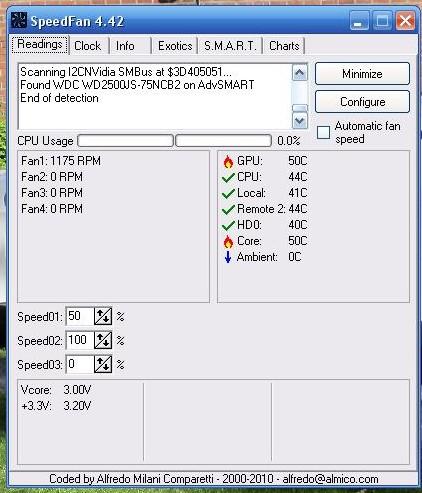

#12
Posted 06 January 2011 - 06:00 PM
rshaffer61
-
- Moderator
-
- 34,114 posts
Moderator
OK though it gave me some of the info it didn't have it all so lets try this one.
Motherboard Info:
Download SIW from HERE and get the Standalone English version
It will install itself and when finished
Then Click on SIW Icon to run program
On the left side click on the Motherboard directory and then on the right, copy and paste the information in your next reply
On the left side click on the Sensors directory and then on the right, copy and paste the information in your next reply
http://www.gtopala.c...w-download.html
#13
Posted 06 January 2011 - 06:15 PM
MiaHess
- Topic Starter
-
- Member
-
- 12 posts
Member
Property Value
Manufacturer Dell Inc.
Model 0XH241
Serial Number ..CN137405CS009C.
North Bridge NVIDIA nForce4 SLI Intel Edition Revision A3
South Bridge NVIDIA nForce4 MCP Revision A3
CPU Intel® Pentium® D CPU 3.00GHz
Cpu Socket Socket 775 LGA
System Slots 6 PCI
Memory Summary
Maximum Capacity 8192 MBytes
Memory Slots 4
Error Correction None
Warning! Accuracy of DMI data cannot be guaranteed
I can't seem to copy and paste the sensor info
#14
Posted 06 January 2011 - 06:34 PM
rshaffer61
-
- Moderator
-
- 34,114 posts
Moderator
Can you get a screenshot of it?I can't seem to copy and paste the sensor info
#15
Posted 06 January 2011 - 07:30 PM
MiaHess
- Topic Starter
-
- Member
-
- 12 posts
Member
Print screen worked out for me.
Attached Thumbnails


Similar Topics
0 user(s) are reading this topic
0 members, 0 guests, 0 anonymous users
As Featured On:


 Sign In
 Create Account
