Jump to content

Welcome to Geeks to Go - Register now for FREE

Need help with your computer or device? Want to learn new tech skills? You're in the right place!
Geeks to Go is a friendly community of tech experts who can solve any problem you have. Just create a free account and post your question. Our volunteers will reply quickly and guide you through the steps. Don't let tech troubles stop you. Join Geeks to Go now and get the support you need!

How it Works Create Account
Photo

Can not uninstall older version of winzip and install newer version


  • Please log in to reply

#16
rshaffer61

rshaffer61

    Moderator

  • Moderator
  • 34,114 posts

OK that may be a malware infection that i will need to have you take care of but I will do what I can here first to help.

First thing is we need to clean up the temp and useless files that are taking up space on your system.


Download Autoruns from the link in my signature below:

1: Extract the Autoruns Zip file contents to a folder.
2: Double-click the  "Autoruns.exe".
3: Click on the "Everything" tab
4: Click the Options at the top of the Window. In the new little window click the box that states Hide Microsoft Services  
5: Go to File then to Export As or Save in some versions.
6: Save the file as AutoRuns.txt file instead of the default .arn to a known location like your Desktop.
7: Attach to your next reply.
8: DO NOT do anything till we have had a chance to study the log and reply with suggestions as to what to remove.


  • 0

Advertisements


#17
shajoe44

shajoe44

    Member

  • Topic Starter
  • Member
  • PipPipPip
  • 262 posts

Attached File  AutoRuns.txt   44.48KB   192 downloads


  • 0

#18
rshaffer61

rshaffer61

    Moderator

  • Moderator
  • 34,114 posts

Open Autoruns, click on "Logon" tab, and UN-check:
 

+ "SelectRebates"

+ "vProt"

+ "AvgRemover"


When done restart computer and then:


Download TFC by OldTimer to your desktop

  • Please double-click TFC.exe to run it. (Note: If you are running on Vista, right-click on the file and choose Run As Administrator).
  • It will close all programs when run, so make sure you have saved all your work before you begin.
  • Click the Start button to begin the process. Depending on how often you clean temp files, execution time should be anywhere from a few seconds to a minute or two.  Let it run uninterrupted to completion.
  • Once it's finished it should reboot your machine. If it does not, please manually reboot the machine yourself to ensure a complete clean.


Download Auslogics Defrag from the link in my signature below. Auslogics Defrag in my opinion is better because:

It does a more comprehensive job at Defragging
It will actually show you what it is doing
At the end of working it will show you how much speed you picked up
You can view a online log of the files that Auslogics defragged

Please do not run any other Auslogics programs other then this one as they may cause unwanted results.


  • 0

#19
shajoe44

shajoe44

    Member

  • Topic Starter
  • Member
  • PipPipPip
  • 262 posts

OK  done with everything you asked


  • 0

#20
shajoe44

shajoe44

    Member

  • Topic Starter
  • Member
  • PipPipPip
  • 262 posts

Attached File  AutoRuns.txt   44.48KB   180 downloads


  • 0

#21
rshaffer61

rshaffer61

    Moderator

  • Moderator
  • 34,114 posts

Can you post the following for me please.


Go to Start then to Run
Type in compmgmt.msc and click Enter
On left side click on Disk Management
On right side you will see you hard drive.
Male sure the window is open all the way on the top right so I can see all the info it has.
Now I need you to take a screenshot and attach it to your next reply. Do the following to take a screenshot while the above is open and showing on your desktop.

To do a screenshot please have click on your Print Screen on your keyboard. It is normally the key above your number pad between the F12 key and the Scroll Lock key
Now go to Start and then to All Programs
Scroll to Accessories and then click on Paint
In the Empty White Area click and hold the CTRL key and then click the V
Go to the File option at the top and click on Save as
Save as file type JPEG or PNG and save it to your Desktop
Make sure the window is open all the way so I can see everything on the top right window.


Attach it to your next reply


  • 0

#22
shajoe44

shajoe44

    Member

  • Topic Starter
  • Member
  • PipPipPip
  • 262 posts

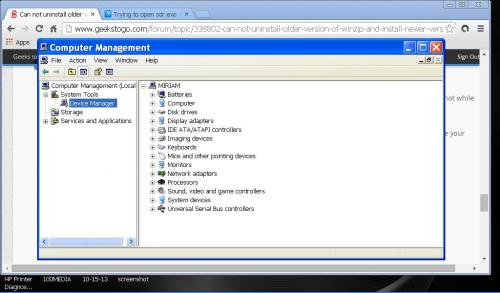
Device Mgmt.JPG


  • 0

#23
rshaffer61

rshaffer61

    Moderator

  • Moderator
  • 34,114 posts

I don't think you went far enough because it looks like you didn't click on storage on the left to see the actual drives on the right window.


  • 0

#24
shajoe44

shajoe44

    Member

  • Topic Starter
  • Member
  • PipPipPip
  • 262 posts

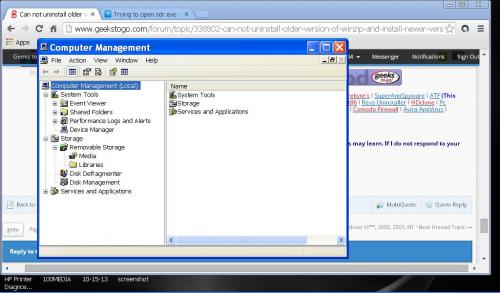
Storage.JPG


  • 0

#25
rshaffer61

rshaffer61

    Moderator

  • Moderator
  • 34,114 posts

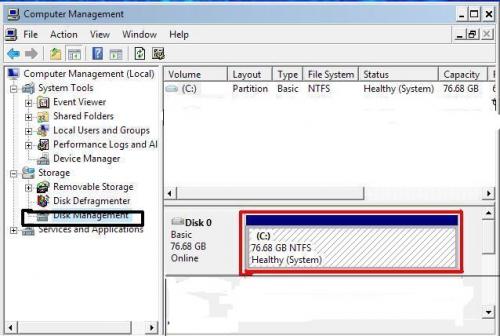
Still not far enough. Now click on the line that says "Disk Management" on the left and let the large window populate. Then make sure everything can be seen on the right wight window and get a new screenshot.

What I need to see is like the picture below.


Computer Mangement.JPG


  • 0

Advertisements


#26
shajoe44

shajoe44

    Member

  • Topic Starter
  • Member
  • PipPipPip
  • 262 posts

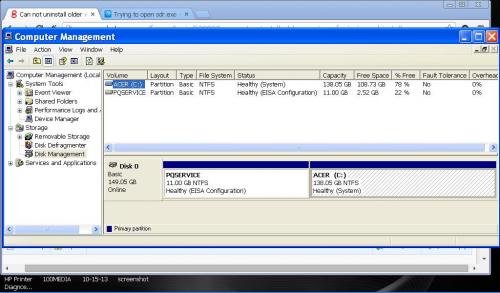
Disk Mgmt.JPG


  • 0

#27
rshaffer61

rshaffer61

    Moderator

  • Moderator
  • 34,114 posts

Perfect that is what I was looking for. Your drive looks great for free space now at 78%.

Did it take TLC and defrag long to complete?


  • 0

#28
shajoe44

shajoe44

    Member

  • Topic Starter
  • Member
  • PipPipPip
  • 262 posts

Not too long.


  • 0

#29
rshaffer61

rshaffer61

    Moderator

  • Moderator
  • 34,114 posts

OK how is the system running now after all this?


  • 0

#30
shajoe44

shajoe44

    Member

  • Topic Starter
  • Member
  • PipPipPip
  • 262 posts

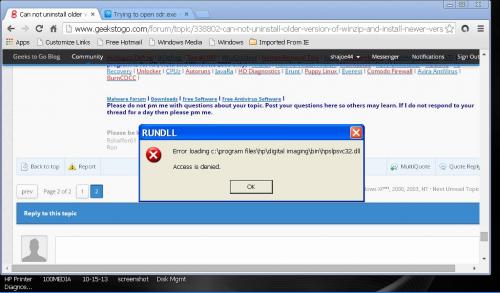
error message.JPG


still getting this error message


  • 0


Similar Topics

0 user(s) are reading this topic

0 members, 0 guests, 0 anonymous users

As Featured On:

Microsoft Yahoo BBC MSN PC Magazine Washington Post HP