


So many times do we see someone who has either a duff hard drive which requires replacement, or has a system so corrupted that there is no available rescue.
That means all data files, music, video's, photographs, and the complete operating system, is or will be lost.
If a full backup is available then that backup can be used to return the computer to a fully working one again.
The best way to create a full backup is to create a system image and store that on an external hard drive.
There are many ways to do this and quite a few of them are by way of programs either paid for or free versions which in the main take a lot of the hard work of creating backups out of your hands.
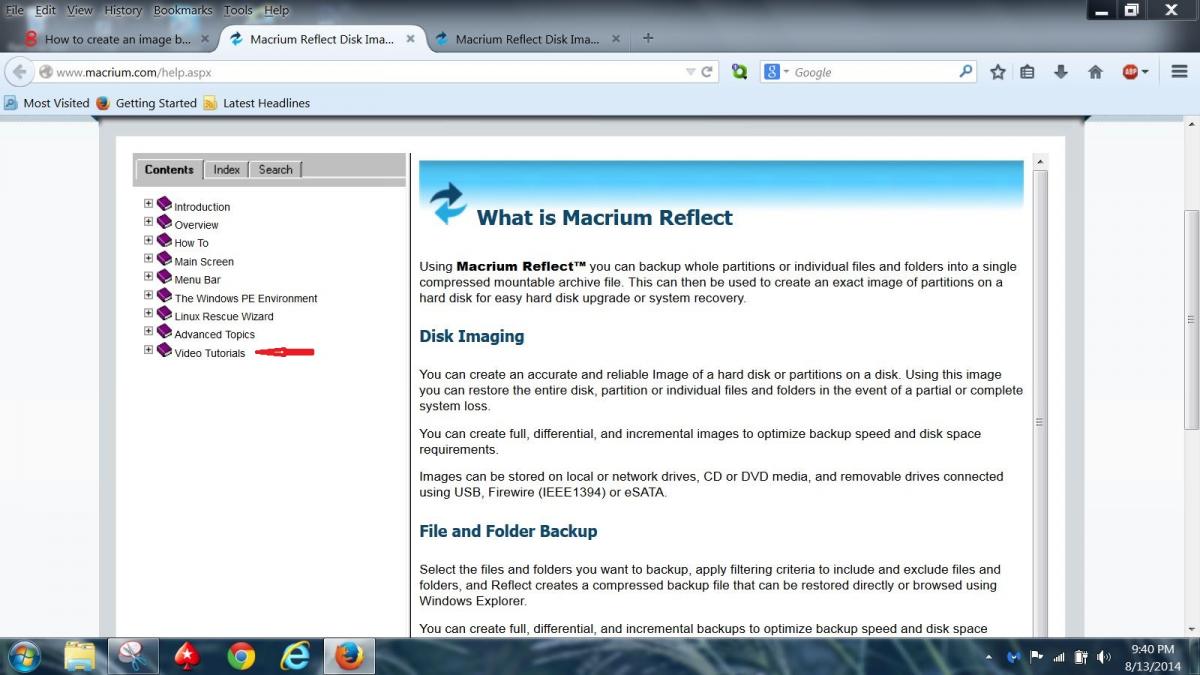
One such is Macrium Reflect. This can be downloaded free, or if you want the extras, you can get the paid for version. Download the free version from here=
http://filehippo.com...macrium_reflect
The download link goes to filehippo.com don't worry, it is safe to download from them.
This is a complete tutorial on how to use Macrium Reflect to create an image or complete copy of your computer by what is stored on its hard drive.
First and most importantly is an external hard drive, ideally as big or bigger than the hard drive already inside your computer. If your computer has a hard drive of say 250 GB, then that is the minimum size of external hard drive you need.
Next is a CD or DVD disk, and hopefully your computer has a disk drive fitted to use this disk. If not then you can either use a USB pen drive or a USB external DVD read/write drive. Though external disk drives are a bit more expensive.
We will deal first with the external hard drive, if it is new and never been used we need to check if it is the right format, so plug it into your computer, now some drives are self powered from the USB port, others come with an adapter to power them from the mains, if mains powered, make sure this is also connected.
Once the computer has recognised and installed the new drive, click on the close for any windows that pop up, we don't need them. Next click on "Start" then "My Computer" or just "Computer" if Windows Vista or 7.
The new hard drive will show there with its name and perhaps model number also with its own drive letter, in this case below, no name just drive (K:). Right click on it and select "properties" this window should appear, take a look at what it says for "File System" if as in the picture below it says NTFS, then no further action is needed. Take no notice of the disk size here, it is only for demonstration purposes.
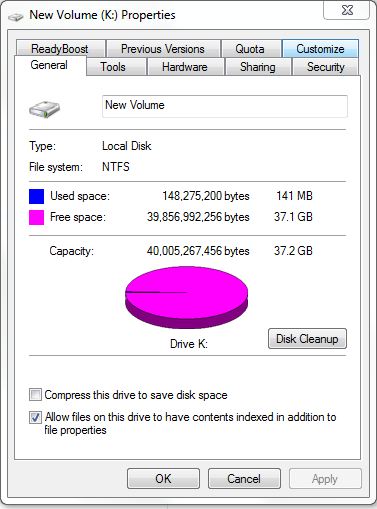
If on the other hand it says FAT32 or other type of system, we will have to format it to NTFS.
If the drive has been used for other things already, say pictures or other files, they must be copied or moved to somewhere else if you wish to save them, you can copy or move them to your computer temporarily if you wish as formatting to NTFS will delete them.
Close the last window, then right click on the drive again, but this time choose format, this window will appear.
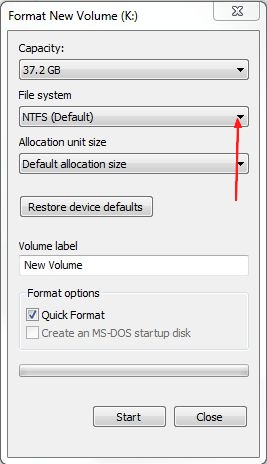
Click the drop down menu and select NTFS as shown as default here, then click Start, depending on how big the drive is the time taken can be a few seconds or several minutes.
Once you are sure the drive is now NTFS, You now need to open the drive by double clicking on it, or right click and choose open, then create a folder and name it, as a suggestion "My Backups" or as I did, I chose "Macrium Image Laptop". We can then leave that and close all windows for now.
Now for Macrium reflect itself, and also the CD or DVD required. you should follow all as above to download and install Macrium Reflect, once installed, open it.
You will see this window first, if not or something different, click the tab "disk Image" (Blue arrow).
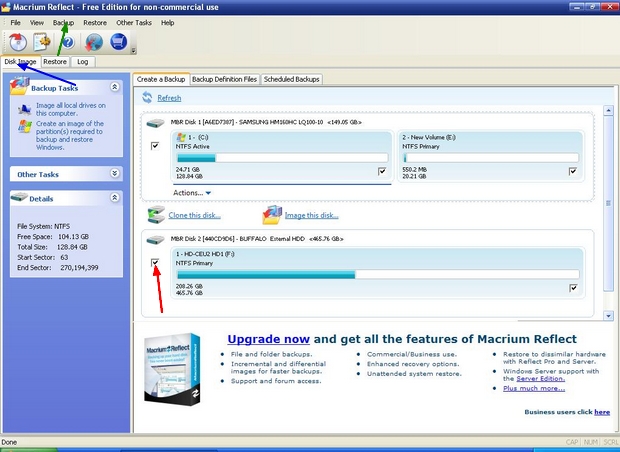
Between File and the disk tab, (Blue arrow) is a CD/DVD symbol, click on that and then follow instructions to download either the Linux file or the Windows PE file. The linux file is pretty basic but will work for ordinary backup restoring providing it will recognise and find both your external hard drive and the backup files within your backups folder on that external drive. (For whatever reason, in my case it couldn't)
The better one is the Windows PE (Custom) file.
However be warned, the Windows PE is a massive file and takes a long time to download if the net is busy unless you have a very fast connection. Once downloaded, again follow instructions for burning the file to a CD Whichever file you have chosen.
I strongly recommend the creation of the Windows PE disk as I found sometimes hardware is not compatible or supported by the Linux disk.
Once you click on the CD/DVD disk symbol you will see this window open.

To burn the Linux disk, make sure there is a blank CD in the CD or CD/DVD write drawer, then click the circle next to Linux, then click on the “Next”
This window opens, and for now ignore the “Advanced” button, you should only need that if there is a compatibility problem.
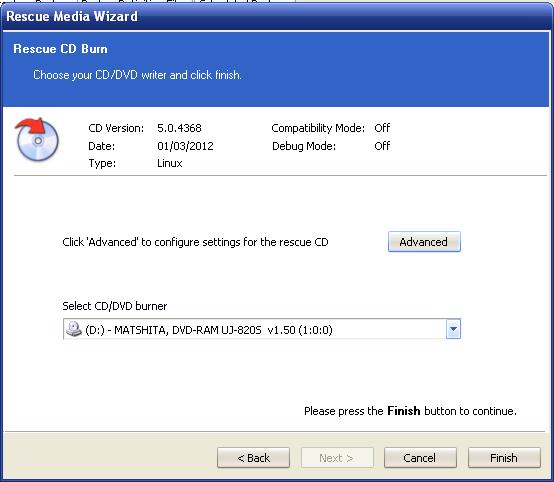
Click the finish button and it will start the burn cycle straight away, once finished, you should see this and the drawer should eject,
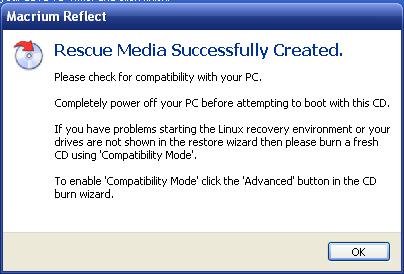
That covers the Linux rescue disk and creation. I will at this point ask you to try it and see if your external hard drive is found. If not you can try the advanced and compatibility as described in that last screen shot above.
Or I seriously recommend taking the time to download and burn the Windows PE based rescue disk.
Go back to the “Rescue Media Wizard” as above and click the dot into the circle next to Windows PE and click “Next” this is a little more involved and the next window to open is this,
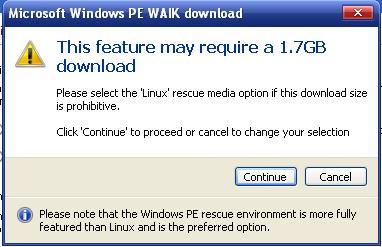
Click “Continue” and then this window opens,
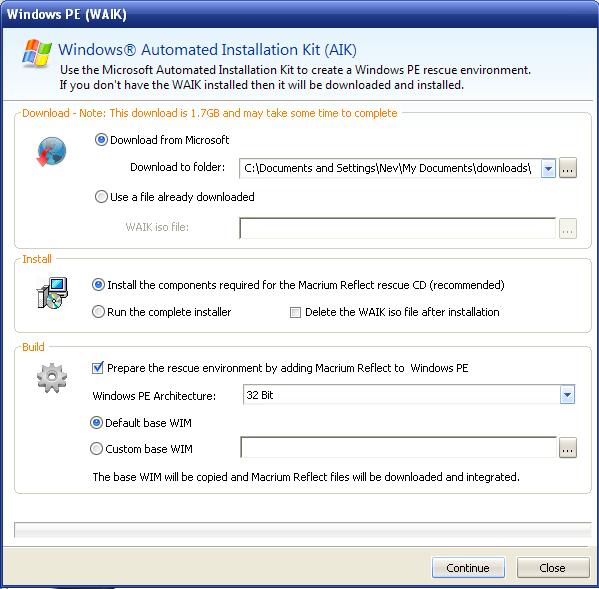
Click “Continue” The download from Microsoft will start with a progress bar showing at the bottom, as previously warned it will take some time, in my case due to a poor download speed at my end it took an hour and a half to download.
It then has to install the files, which again may take some time, there may be a few other messages come up that just need to be clicked to continue.
At the end you should then see this,
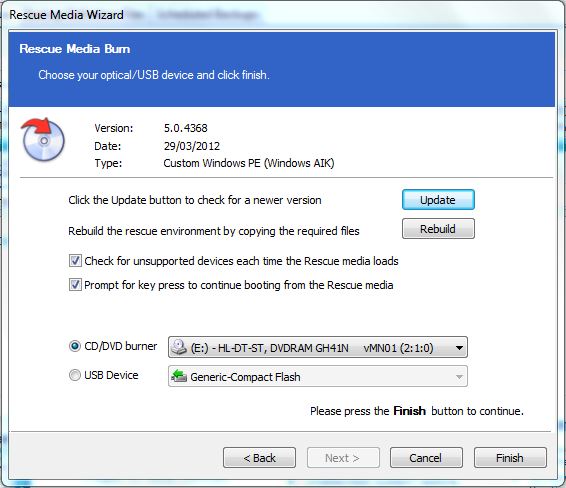
if you have a disk drive put the blank disk in if you haven't done so already, and click the “finish” Button.
If you only have USB ports as smaller notebooks do, then plug in a USB memory or flash drive and makes sure the dot is in the circle for that USB device.
Macrium have put out updates and do so on a regular basis it seems, so once you have created the rescue disk do not update the software without updating and creating a new disk. The reason is that the old disk will see any updates in created image files as a corruption and refuse to install it if the image was created by a newer form of the software.
Once you have created the disk or USB memory or flash drive, go back to the Macrium Reflect opening page as shown above, and make sure the tick is either not there or removed from the box pointed out by the red arrow.
Next is to click the "Back up" (Green arrow) and as below select "Image Local Drives"

The next window will be this one
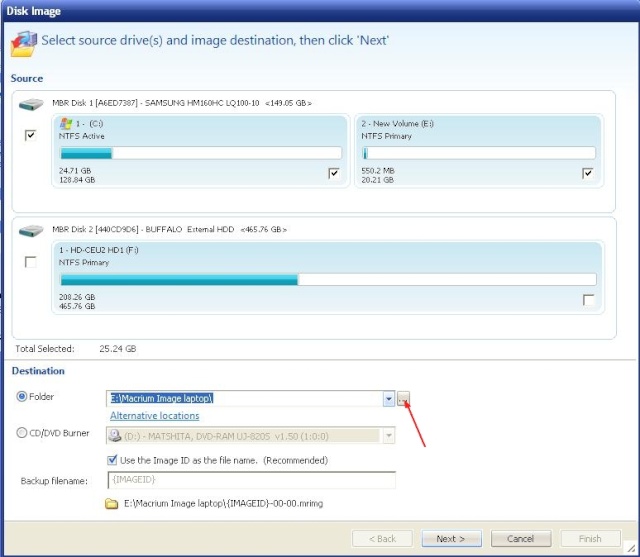
Click the small box (Red arrow) as this is the browse button to find your hard drive and the folder you earlier created, "My Backups" or similar. You should then see a similar thing to what is there in that picture.
Click the "Next" button at the bottom right.
You should then see this appear,
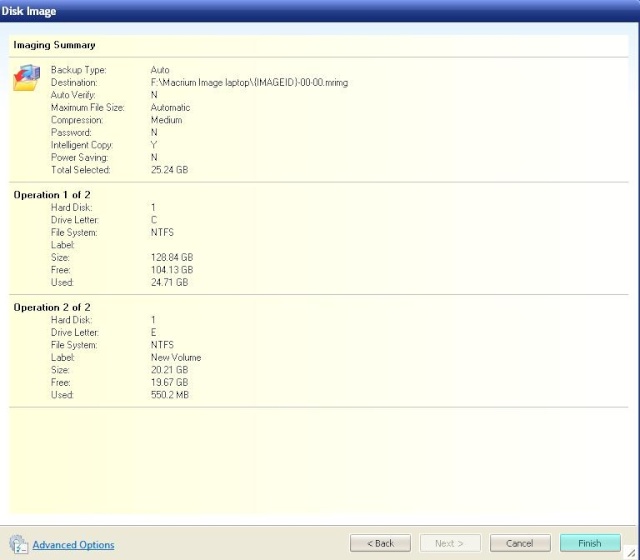
It is just a confirmation window to show what is so far done, down at the bottom click the blue outlined "Finish" button at the bottom right.
This will then appear,
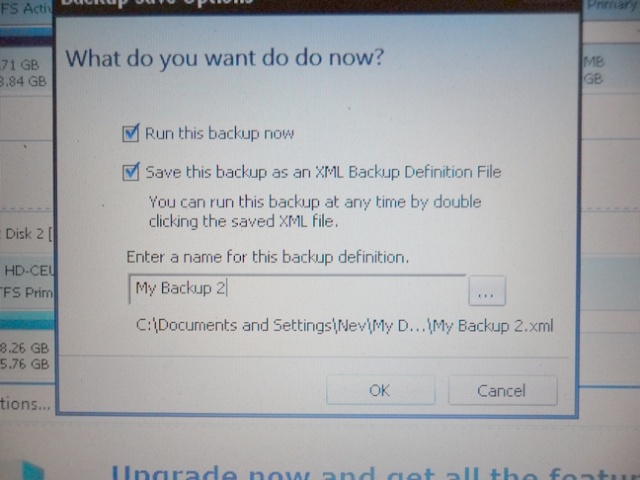
Make sure the two boxes are ticked as shown, then "Enter a name for this backup" and click the OK button.
This then opens to show you the progress of the backup being created.
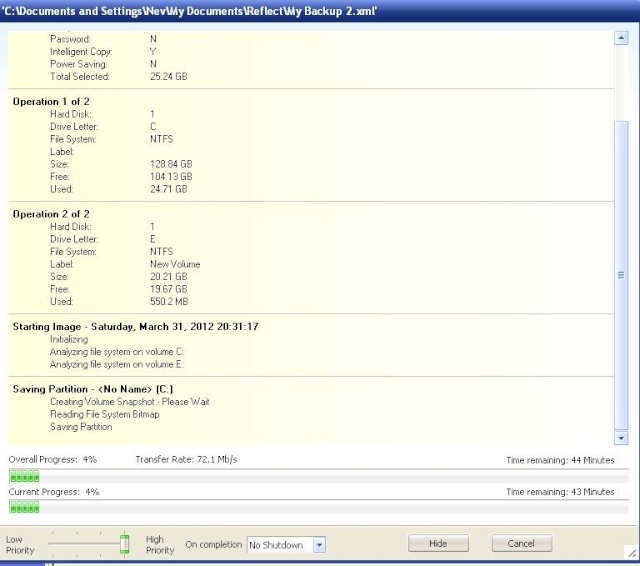
Make sure the slider at the bottom is slid over to high priority.
Once the backup is created it will tell you it has been successful and then everything can then be closed, you have created a full backup of your entire computer on the external hard drive.
------------------------------------------------------------------------------------------------------
OK, now we come to the time when the backup has to be used to get your computer back to where it was when you made the backup. Please remember it will be back to the time you made it. Any additions, new photo's, newly installed software, music or documents that were done after the backup was made, will be lost for good. So if the computer is still workable enough to retrieve and copy them to elsewhere then do so now.
----------------------------------------------------------------------------------------------------
Next section deals with a total collapse of the computer. This may be due to many things, but providing the computers internal hard drive is OK and the other hardware is operating correctly all will be fine.
This section also works if the original internal hard drive has packed up and therefore been replaced with a brand new but empty hard drive.
First of course connect the external hard drive that has your previously created image on it, and if mains powered make sure that is connected and also turned on.
So, the next and most important bit is to get the computer to boot up from the previously created boot disk.
This is done from the BIOS and actually starts before the computer tries to boot up into Windows, so how do we get to that point?
Yu cannot get into the BIOS pages once windows is up and running, so first the computer must be fully turned off, if the start is still working, click start, then turn off computer, (Shut Down in Windows 7 and Vista) then click the red button in the middle to "Turn Off" and wait for the computer to fully shut down.
Next is to press the power on button and straight away start tapping the correct key on the keyboard, usually F2, but some computers are different depending on the make.
Here is a comprehensive list of makes and which key will get you into the "Set up" or BIOS pages.
http://pcsupport.abo...osaccess_pc.htm
Although it tells you on that page, you might miss the fact that Toshiba and many other makes of laptops and desktops have a handy short cut to be able to do what we want to do.
the key to tap is F12 in this instance, (check with your computers documentation) this gives you the boot options we are looking for on the bottom of the screen, it is just a matter of using the side to side or up and down key to position the cursor or highlight the CD/DVD option, then insert the boot disk and click the enter key. Other makes present this page differently but they serve the same purpose.
As in this picture.

The symbols are left to right in this instance- to boot from the Hard drive, CD/DVD, Floppy disk, (not many computers have one now) and the last is to boot from the local area network. just as the picture, select the CD/DVD disk symbol, put in the boot disk and press the enter key.
Other computers I am afraid it may have to be the long way round.
As I said most computers will get to the main BIOS page from the F2 key though check that list on the link above to make sure your computer does so.
Once you have the BIOS main page up there will be instructions for how to navigate and select the function you want, in most cases there is a line of tabs on the top row, you want the one marked boot or boot order, use left, right, or up, down keys to place the highlight or cursor on that tab and click enter, you should then see a page similar to this.
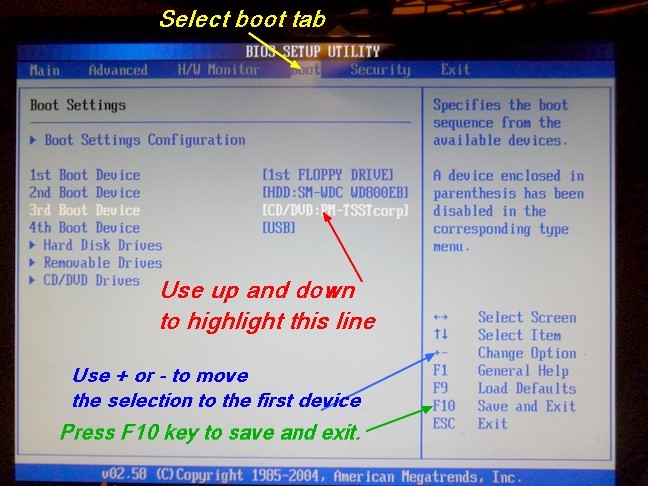
As mentioned, select the boot tab which gives a page similar to this.
Then use the up and down to select the CD/DVD, and in this case it is then the positive + or negative - key to move that to the top of the list to become the first boot device. Once done, insert the boot disk into the CD/DVD drawer, then as in this case press the F10 key.
Your BIOS pages may be slightly different but the object is to make the computer boot from the CD/DVD as the first on the list.
There is also a good explanation with a slightly different BIOS page photo's here=
http://pcsupport.abo...orderchange.htm
So, the next thing is the computer will now search for and then start to boot up from the boot disk, this will take a short while as there is quite a bit for it to do before it gets to the next stage.
If you created the Linux disk and are using that one, you will eventually be presented with the Macrium Reflect restore wizard. Read what it says, then click on "Next"
On the left of the next page is "Computer" and "Network", click the + in the box next to "Computer" from there you should be able to find your external hard drive listed. If not it may well be that the make is not supported by the Linux disk and you will then have to use the Windows PE disk.
that is why I mentioned that it is a much better disk to download and create.
It is the case that my external hard drive may not be supported and I am glad I took the time to make the Windows PE disk.
I can only explain further now as to what happens with the Windows PE disk.
With the Windows PE disk you may see a message saying "Press any key to boot from CD" do so as soon as you see the message as the time delay is short. If you miss it, it will then go back to the internal hard drive and try to boot from that if you are not quick enough.
it will tell you that it is then loading windows, this is normal and is the Windows PE environment it is loading.
You will see a grey screen and a message may appear titled "Unsupported Devices", with a list saying no driver loaded against each item in the list, this can be ignored as all drivers needed should still be in the image you are re-installing, just click the close button. You may then get a message to "continue loading rescue CD" click the yes button.
It is OK as all needed drivers are on the external hard drive image and will be installed with that image.
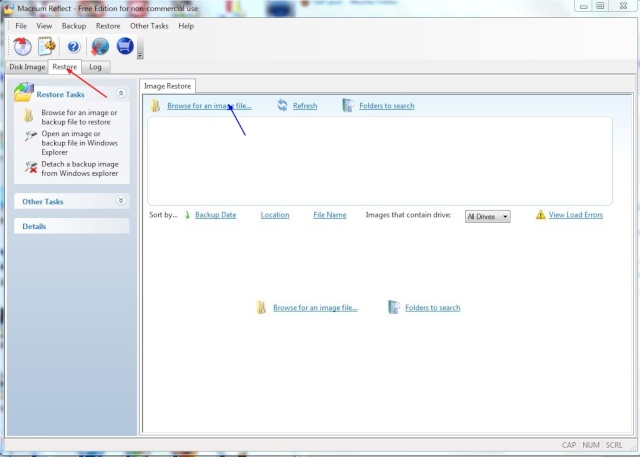
You will then see the Macrium Reflect main window opens up, click on the "Browse for an image file" on the upper left as shown here,
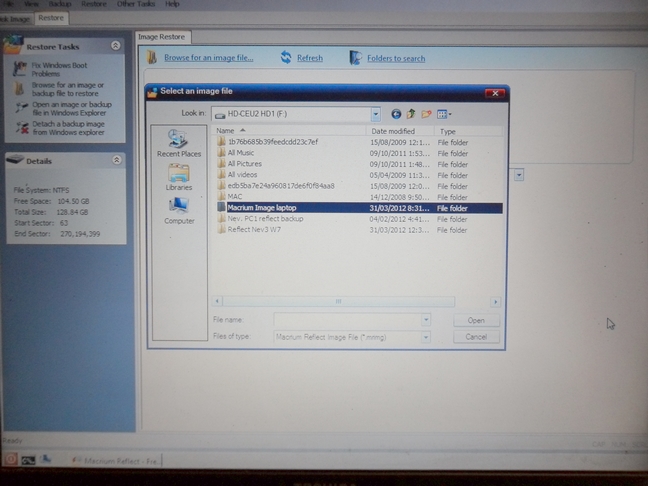
. You should finish up with something similar to what I showed there and as a reminder here is the box with in my case "Macrium Image Laptop" selected, click open from there, then select the image file you wish to use if more than one, and again click “Open”
You should then get this opens up
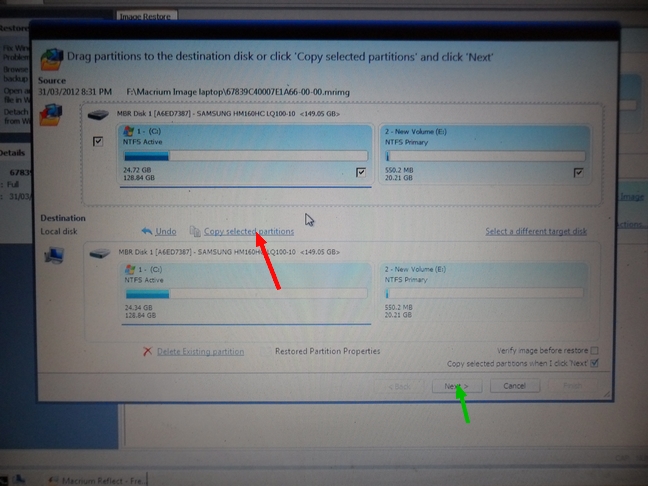
Make sure there is a tick in the three boxes as above, though in your case there may only be two if there are no extra partitions originally on the image created.
Then as the red arrow click on "Copy selected Partitions" then click Next.
You will see a page then titled "Restore Summary" with a finish button on the bottom right. Click on that finish button. A new window opens titled "Confirm Overwrite" click the continue, and the image will then start to being transferred onto your computer. You will see the similar progress bars as when you first created the image, and it will take a similar time to install.
Once fully installed, the system may reboot. And you are ready to go, remember to remove the boot or rescue disk from the CD/DVD drawer as it may try to boot from it.
Please note, this tutorial was first written in 2012, some minor changes have happened in the latest updates to the Macrium Reflect software, however most should still be the same or easy enough to work out what to do.
Nev.


 Sign In
 Create Account
