

Win7 BSOD problem
Started by
piax93
, Dec 07 2012 02:54 AM
#16

 Posted 11 January 2013 - 07:30 AM
rshaffer61
-

- Moderator
-

- 34,114 posts
Moderator

#17
Posted 13 January 2013 - 11:09 AM
piax93
- Topic Starter
-
- Member
-

- 12 posts
Member
==================================================
Dump File : 011113-10187-01.dmp
Crash Time : 11/01/2013 08:21:35
Bug Check String : KMODE_EXCEPTION_NOT_HANDLED
Bug Check Code : 0x0000001e
Parameter 1 : ffffffff`c0000005
Parameter 2 : fffff800`03087ec5
Parameter 3 : 00000000`00000000
Parameter 4 : ffffffff`ffffffff
Caused By Driver : usbohci.sys
Caused By Address : usbohci.sys+7508f01
File Description :
Product Name :
Company :
File Version :
Processor : x64
Crash Address : ntoskrnl.exe+7efc0
Stack Address 1 :
Stack Address 2 :
Stack Address 3 :
Computer Name :
Full Path : C:\Windows\Minidump\011113-10187-01.dmp
Processors Count : 4
Major Version : 15
Minor Version : 7601
Dump File Size : 301.426
==================================================
==================================================
Dump File : 011013-11265-01.dmp
Crash Time : 10/01/2013 22:15:32
Bug Check String : PAGE_FAULT_IN_NONPAGED_AREA
Bug Check Code : 0x00000050
Parameter 1 : fffffa90`07f43100
Parameter 2 : 00000000`00000000
Parameter 3 : fffff800`030d025a
Parameter 4 : 00000000`00000005
Caused By Driver : wmiacpi.sys
Caused By Address : wmiacpi.sys+72bc840
File Description :
Product Name :
Company :
File Version :
Processor : x64
Crash Address : ntoskrnl.exe+7efc0
Stack Address 1 :
Stack Address 2 :
Stack Address 3 :
Computer Name :
Full Path : C:\Windows\Minidump\011013-11265-01.dmp
Processors Count : 4
Major Version : 15
Minor Version : 7601
Dump File Size : 301.426
==================================================
==================================================
Dump File : 010913-11281-01.dmp
Crash Time : 09/01/2013 08:53:40
Bug Check String : PAGE_FAULT_IN_NONPAGED_AREA
Bug Check Code : 0x00000050
Parameter 1 : fffff8b0`01fdea30
Parameter 2 : 00000000`00000000
Parameter 3 : fffff880`0541d586
Parameter 4 : 00000000`00000005
Caused By Driver : hidusb.sys
Caused By Address : hidusb.sys+783a30
File Description :
Product Name :
Company :
File Version :
Processor : x64
Crash Address : ntoskrnl.exe+7efc0
Stack Address 1 :
Stack Address 2 :
Stack Address 3 :
Computer Name :
Full Path : C:\Windows\Minidump\010913-11281-01.dmp
Processors Count : 4
Major Version : 15
Minor Version : 7601
Dump File Size : 301.426
==================================================
#18
Posted 13 January 2013 - 11:45 AM
rshaffer61
-
- Moderator
-
- 34,114 posts
Moderator
OK two of your errors were caused by hidusb.sys which is the USB mini port driver.
The other wmiacpi.sys is part of the Windows.
The first could be caused by memory or a driver. I want to make sure this isn't a memory issue so please do the following for me and post the results.
A If you have more than one RAM module installed, try starting computer with one RAM stick at a time.
NOTE Keep in mind, the manual check listed above is always superior to the software check, listed below. DO NOT proceed with memtest, if you can go with option A
B. If you have only one RAM stick installed...
...run memtest...
1. Download - Pre-Compiled Bootable ISO (.zip). If you prefer to use the USB version then use this link USB KEY
2. Unzip downloaded /memtest86+-4.20.iso.zip file.
3. Inside, you'll find /memtest86+-4.20.iso file.
4. Download, and install ImgBurn: http://www.imgburn.com/
5. Insert blank CD into your CD drive.
6. Open ImgBurn, and click on Write image file to disc
7. Click on Browse for a file... icon:

8. Locate memtest86+-4.20.iso file, and click Open button.
9. Click on ImgBurn green arrow to start burning bootable memtest86 CD:

10. Once the CD is created, boot from it, and memtest will automatically start to run. You may have to change the boot sequence in your BIOS to make it work right.
To change Boot Sequence in your BIOS
Reboot the system and at the first post screen (where it is counting up memory) start tapping the DEL button
This will enter you into the Bios\Cmos area.
Find the Advanced area and click Enter
Look for Boot Sequence or Boot Options and highlight that click Enter
Now highlight the first drive and follow the directions on the bottom of the screen on how to modify it and change it to CDrom.
Change the second drive to the C or Main Drive
Once that is done then click F10 to Save and Exit
You will prompted to enter Y to verify Save and Exit. Click Y and the system will now reboot with the new settings.
The running program will look something like this depending on the size and number of ram modules installed:

It's recommended to run 5-6 passes. Each pass contains very same 8 tests.
This will show the progress of the test. It can take a while. Be patient, or leave it running overnight.

The following image is the test results area:

The most important item here is the errors line. If you see ANY errors, even one, most likely, you have bad RAM.
The other wmiacpi.sys is part of the Windows.
The first could be caused by memory or a driver. I want to make sure this isn't a memory issue so please do the following for me and post the results.
A If you have more than one RAM module installed, try starting computer with one RAM stick at a time.
NOTE Keep in mind, the manual check listed above is always superior to the software check, listed below. DO NOT proceed with memtest, if you can go with option A
B. If you have only one RAM stick installed...
...run memtest...
1. Download - Pre-Compiled Bootable ISO (.zip). If you prefer to use the USB version then use this link USB KEY
2. Unzip downloaded /memtest86+-4.20.iso.zip file.
3. Inside, you'll find /memtest86+-4.20.iso file.
4. Download, and install ImgBurn: http://www.imgburn.com/
5. Insert blank CD into your CD drive.
6. Open ImgBurn, and click on Write image file to disc
7. Click on Browse for a file... icon:
8. Locate memtest86+-4.20.iso file, and click Open button.
9. Click on ImgBurn green arrow to start burning bootable memtest86 CD:
10. Once the CD is created, boot from it, and memtest will automatically start to run. You may have to change the boot sequence in your BIOS to make it work right.
To change Boot Sequence in your BIOS
Reboot the system and at the first post screen (where it is counting up memory) start tapping the DEL button
This will enter you into the Bios\Cmos area.
Find the Advanced area and click Enter
Look for Boot Sequence or Boot Options and highlight that click Enter
Now highlight the first drive and follow the directions on the bottom of the screen on how to modify it and change it to CDrom.
Change the second drive to the C or Main Drive
Once that is done then click F10 to Save and Exit
You will prompted to enter Y to verify Save and Exit. Click Y and the system will now reboot with the new settings.
The running program will look something like this depending on the size and number of ram modules installed:
It's recommended to run 5-6 passes. Each pass contains very same 8 tests.
This will show the progress of the test. It can take a while. Be patient, or leave it running overnight.
The following image is the test results area:
The most important item here is the errors line. If you see ANY errors, even one, most likely, you have bad RAM.
#19
Posted 13 January 2013 - 01:44 PM
piax93
- Topic Starter
-
- Member
-
- 12 posts
Member
I have already run memtest86+, 12 iteration, dual channel and single channel, and my RAM is ok
#20
Posted 13 January 2013 - 01:58 PM
rshaffer61
-
- Moderator
-
- 34,114 posts
Moderator
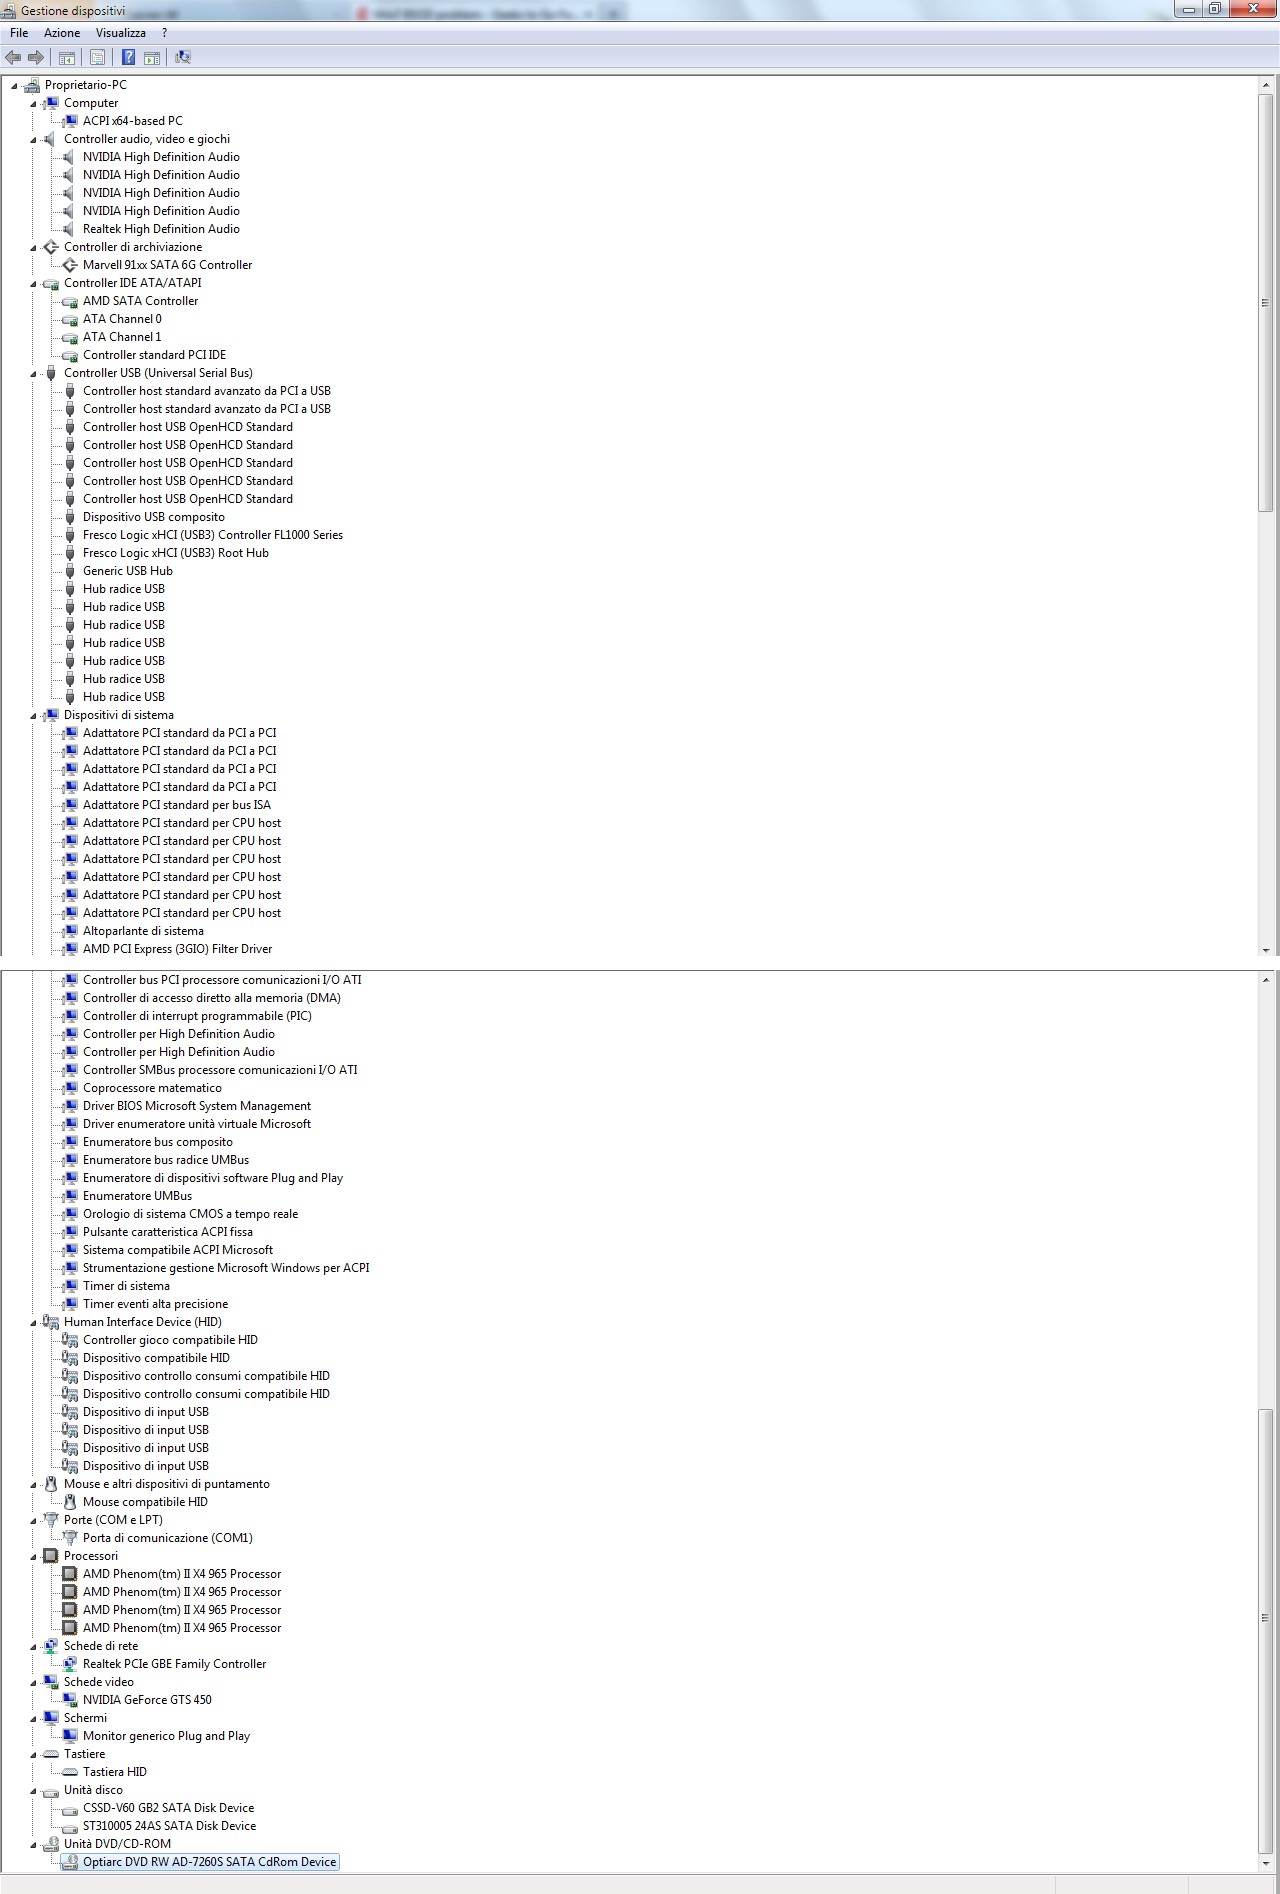
Then post a screenshot of your Device Manager please.
Please Go to
1: START and the click on RUN
2: Type in devmgmt.msc
3: Click Enter
To do a screenshot please have click on your Print Screen on your keyboard. It is normally the key above your number pad between the F12 key and the Scroll Lock key
Now go to Start and then to All Programs
Scroll to Accessories and then click on Paint
In the Empty White Area click and hold the CTRL key and then click the V
Go to the File option at the top and click on Save as
Save as file type JPEG and save it to your Desktop
Attach it to your next reply
#21
Posted 14 January 2013 - 02:43 AM
piax93
- Topic Starter
-
- Member
-
- 12 posts
Member
Done
Attached Thumbnails
#22
Posted 14 January 2013 - 07:52 AM
rshaffer61
-
- Moderator
-
- 34,114 posts
Moderator
With that everything looks good.
Is there a warranty on the system still?
Is there a warranty on the system still?
#23
Posted 14 January 2013 - 02:34 PM
piax93
- Topic Starter
-
- Member
-
- 12 posts
Member
I built it by myself, so I don't have warranty on the whole system, only on some components (in Italy warranty systems quite suck).
The strange thing is that everything worked fine for about 1,5 years since i built it, then i started getting those BSODs. Fortunately my system boots up in about 30 seconds, so when it crashes there is not a big loss in time. I think we can close this topic as unsolved, and blame microsoft for making an unstable OS XD. Thank you anyway for everything.
The strange thing is that everything worked fine for about 1,5 years since i built it, then i started getting those BSODs. Fortunately my system boots up in about 30 seconds, so when it crashes there is not a big loss in time. I think we can close this topic as unsolved, and blame microsoft for making an unstable OS XD. Thank you anyway for everything.
#24
Posted 14 January 2013 - 02:45 PM
rshaffer61
-
- Moderator
-
- 34,114 posts
Moderator
No the issue isn't Microsoft it is hardware someplace.
Do you have the OS installation disk? Is it OEM or retail?
Try the following.
Tutorial for running chkdsk in Vista\Win 7 located HERE.
SFC /Scannow Win7
Go HERE and read the tutorial that shows how to do SFC or System File Checker and running in a Elevated Command Prompt in Vista and Win7.
Do you have the OS installation disk? Is it OEM or retail?
Try the following.
Tutorial for running chkdsk in Vista\Win 7 located HERE.
SFC /Scannow Win7
Go HERE and read the tutorial that shows how to do SFC or System File Checker and running in a Elevated Command Prompt in Vista and Win7.


Similar Topics
0 user(s) are reading this topic
0 members, 0 guests, 0 anonymous users
As Featured On:


 Sign In
 Create Account
