


Text by Troy, Pictures by Artellos.
A guide brought to you by the Geeks to Go Tech Academy
To build your own computer – it's a dream many a geek has had. Many have also fulfilled this – and also many non-geeks too. If you have a technically-inclined mind, can follow instruction, are patient, and are in need (or want) of a computer, then why not follow our guide and build your own? If you don't know what parts are all compatible, or if you're wanting the best “bang for your buck” in the component choices, or even if you're stuck half-way through the build and need a guided response - feel free to post a thread right here in our System Building and Upgrading forum, and we'll help you! There are many different uses for a computer system, so make sure you let us know why you want to use it, and a budget, and you'll be bragging to your mates in no time about your self-built system.

A quick note – like there are many different uses for a computer system, there are also many different ways to build a computer system. Die-hard Geeks may wish to debate the order here, but the reality is that this way works. Other ways work also. And, of course, this tutorial was written up to go with some photos that one of our very own Tech Apprentices took when he built his own computer. So you may find that your system looks different from the pictures – for example, you may not have a discrete video card, and you may have two hard drives, and so on. If your system is markedly different from our example here, please feel free to post a thread and we can tell you any differences you need to incorporate into the build. For example, some aftermarket CPU heatsink/fans need a bracket on the underside of the motherboard, so this would need to be installed before the motherboard is fitted in the case.
Update to the Quick Note: Lately I have been installing the CPU, CPU heatsink, and RAM into the motherboard before putting the motherboard into the case. I find it much easier to work on by itself. As I've said above, either way works...
1. Gather all Components
First things first – we need to ensure we have all the pieces. Here is a list of things you'll need:
- Case (and any extra Case Fans)
- Power Supply
- Motherboard
- CPU (Processor) and Heatsink/Fan (and thermal paste, if not included)
- RAM (Memory)
- Hard Drive
- Optical Drive (e.g. DVD Burner)
- Video Card (may be integrated into Motherboard)
- Sound Card (may be integrated into Motherboard)
- Networking Card (may be integrated into Motherboard)
- Keyboard
- Mouse
- Speakers
- Monitor
- Any extra add-on cards you may have for the build (eg. TV Tuner Card)
- OS Installation Disc (eg. Windows, Linux)
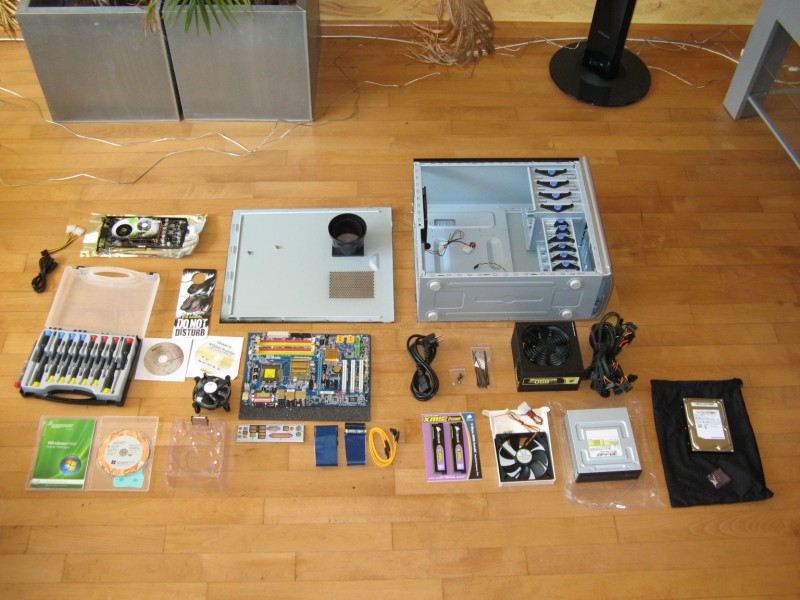
The idea is to get the bunch of parts into a working computer
2. Gathering Your Tools
Once you have gathered your components, you need to ensure you have the right tools:
- Proper screwdrivers. (flat and philips)
- A pair of pointy-nose pliers
- Zip ties
- Scissors or snips for cutting off loose zip tie ends
- Patience and common sense
These tools should be all you need when building a computer. It is important to take anti-static precautions. Some people may wish to use an anti-static wriststrap. Once you have all the components and tools, read on and we'll explain how to build your own computer!
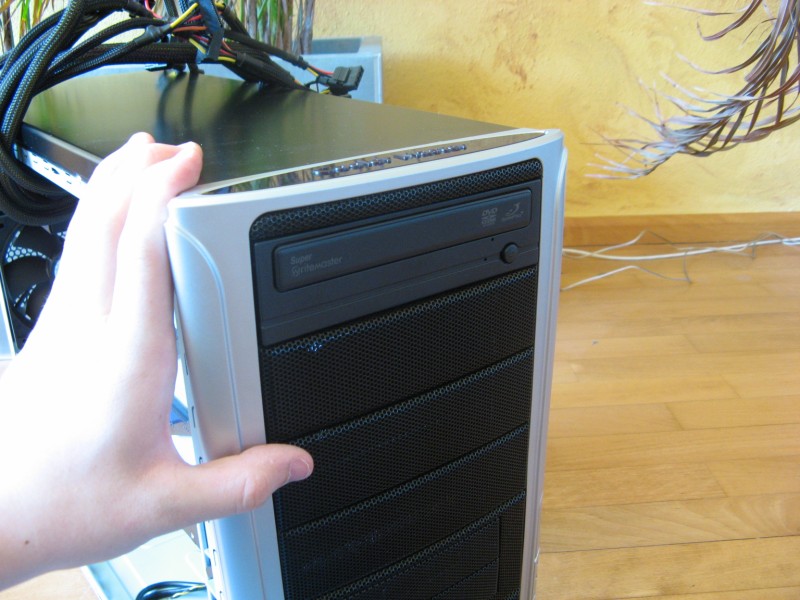
3. The Build
First, the case. Open both side panels, then install the standoffs that will keep the motherboard off the metal plate.
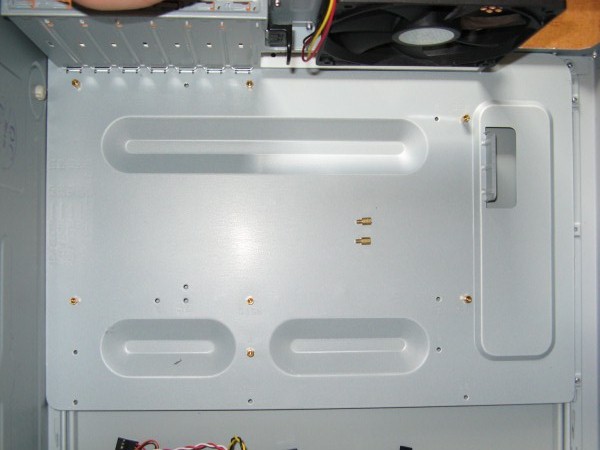
Ensure you only install to align with the holes on the motherboard
In the picture above you can see where the standoffs are installed. Use a set of pliers to make sure the standoffs are driven in firmly. Once you have installed the standoffs, next install the back panel I/O bracket that came with the motherboard. Usually, you'll find that the case's generic one is incorrect. Pop the old one out, and insert the one that came with the motherboard. Ensure that it is properly installed, as the motherboard will be hard up against it. Now it's time to install the motherboard. Simply position the motherboard in the correct position and slowly lower it down into the case. To ensure the motherboard is rotated the right way, the CPU socket should be toward the top-left of the case. Make sure you position it right on top of the standoffs so you can properly lock it in by driving screws in the holes on the motherboard where the standoffs are positioned. Put the screws in firm – not tight – so the motherboard is fastened securely.
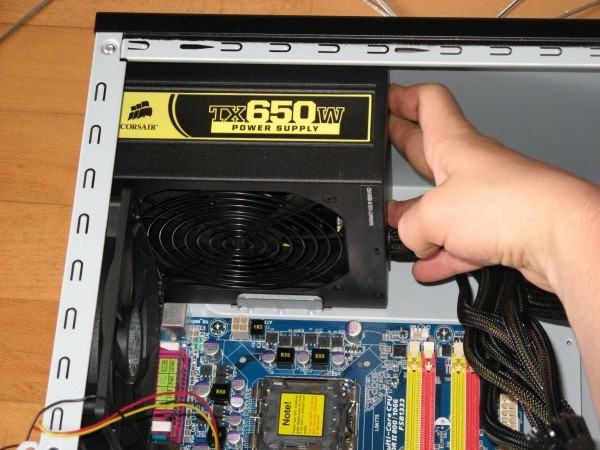
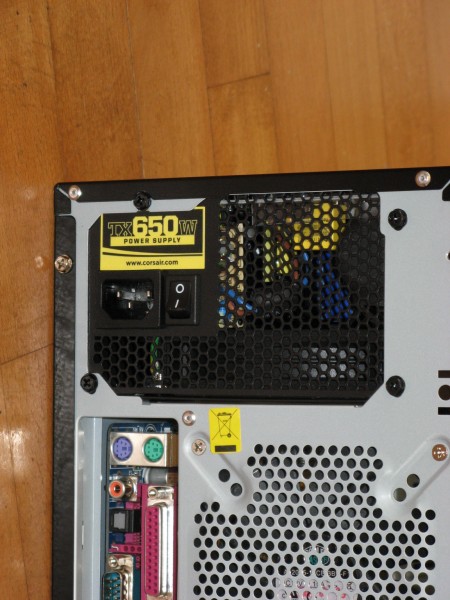
After the motherboard, install the PSU. Slide the unit from inside the case, and sit it up flush against the back of the case. You'll see where you need to install the 4 screws that hold it in tight. Once it's in firmly, put the cables out of the way so you have as much room as possible inside the case (I.e. hang them up and outside the case).
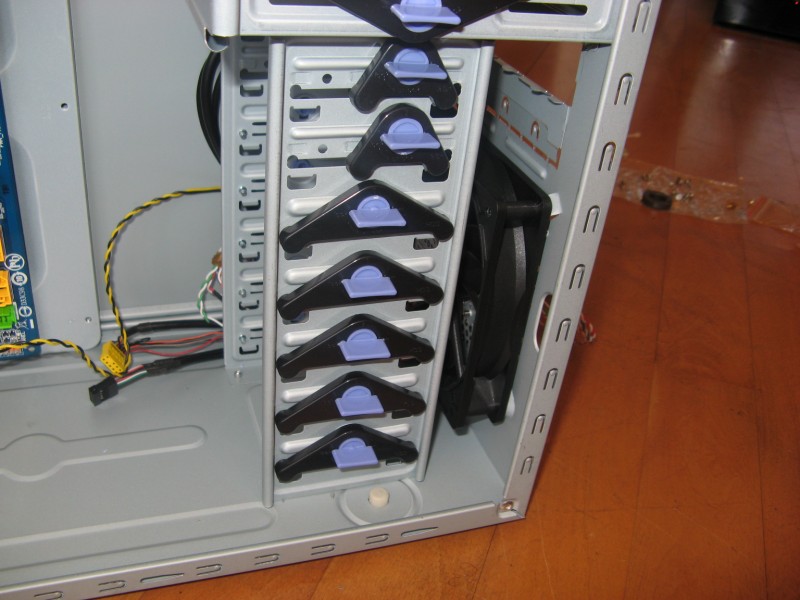
Next, finish preparing the case for the rest of the components. If you are installing any add-on cards (such as a discrete video card), you'll need to remove the metal backing plate aligning with the corresponding installation slot.
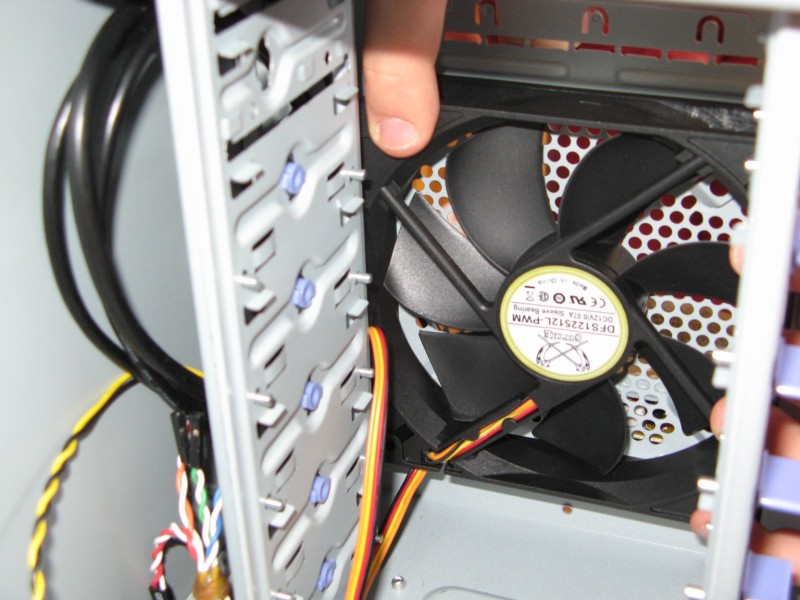
Now move onto any case fans that need to be installed. Most cases come with at least one fan pre-installed on the back, such as our example did. We've also added one in front of where the hard drive will be located. Once the hard drive is installed, it's almost impossible to fit a fan in or out of there, so it's important to do this first. Make sure the case fan is facing so that the air is blown into the case over where the hard drive will be installed – this is an intake fan, and the fan on the back is an exhaust fan.
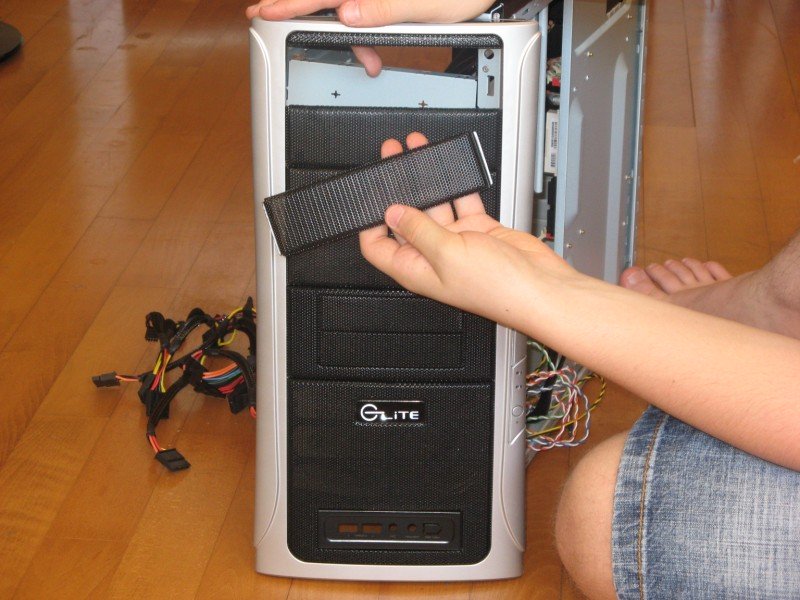
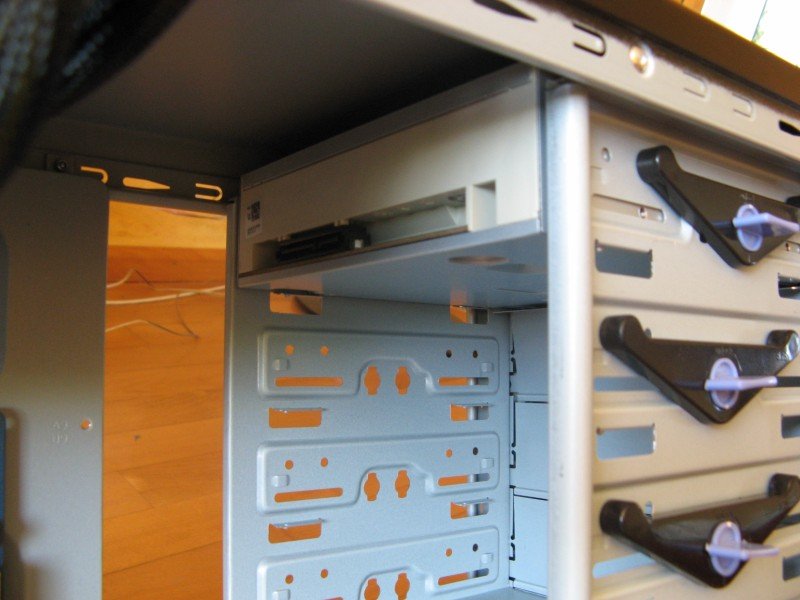
On the front of the case, you'll need to remove the bezel plates to make room for inserting any optical drives and floppy drives. In our example computer, you can see we have one DVD burner, but no floppy drives – so only one plate was removed.
Now there is room for the optical drive to fit, go ahead and install it. The unit should slide in from the front until it is sitting flush with the case. Some cases may have a “screw-less” or “tool-less” design, whereby a bracket needs to be removed to slide the unit in, and then returned into place and clipped into the lock position. This is how the Cooler Master case works in our example. Other cases will simply have holes ready, and you need to align them up and screw in firm.
After the optical drive, install the hard drive in the same manner. The only difference is that the hard drive should slide in to the lower cage from inside the case. Make sure the you insert it the correct way, so that the power and data connectors are facing the back of the case, ready to connect up at a later point. If you are installing a large graphics card (I.e. for a gaming computer), you may want to ensure you put the hard drive in the lower space to make as much room as possible for the graphics card and PSU cables. And – of course – if this build is using multiple graphics cards (SLI or Crossfire), then careful planning is needed prior to fitting the parts.
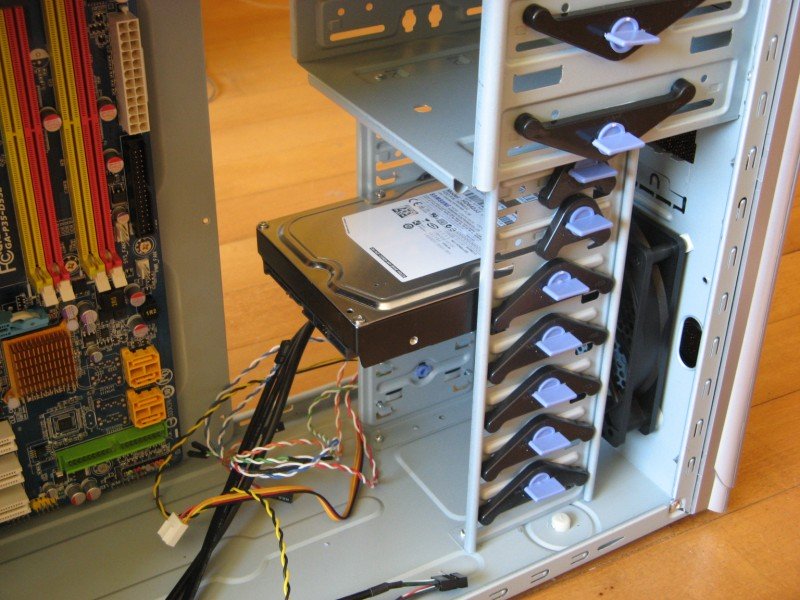
By now, the inside of the case should be starting to take shape. The motherboard, power supply, optical drive, and hard drive are all installed. Next we'll move on to the components that connect to the motherboard directly.
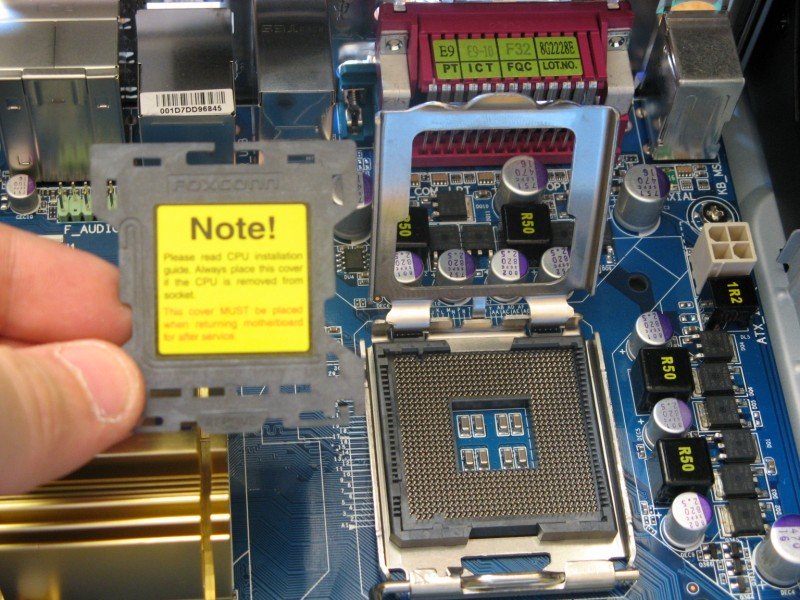
CPU – in our example, we have used a Socket 775 (Intel E8400) processor and motherboard combination. Other combinations may look different, such as having pins on the processor itself and not on the motherboard. Either way, take extreme caution, as even a slight bend to one of these pins can render the component useless.
Using the lever next to the CPU socket, unhinge it and then open the metal gate surrounding the socket. Most will have a protective cover that needs removing.
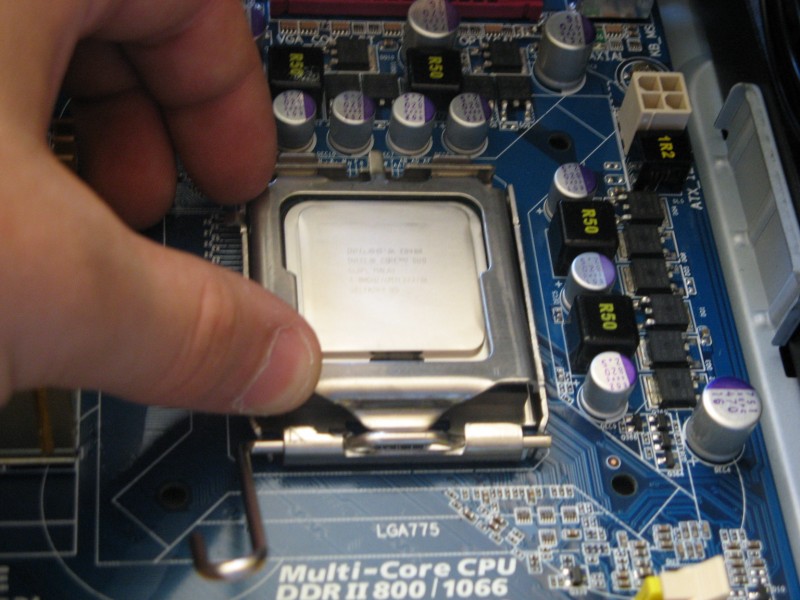
Handling the CPU gently by the edges, place the CPU into the socket, ensuring it is aligned the correct way.
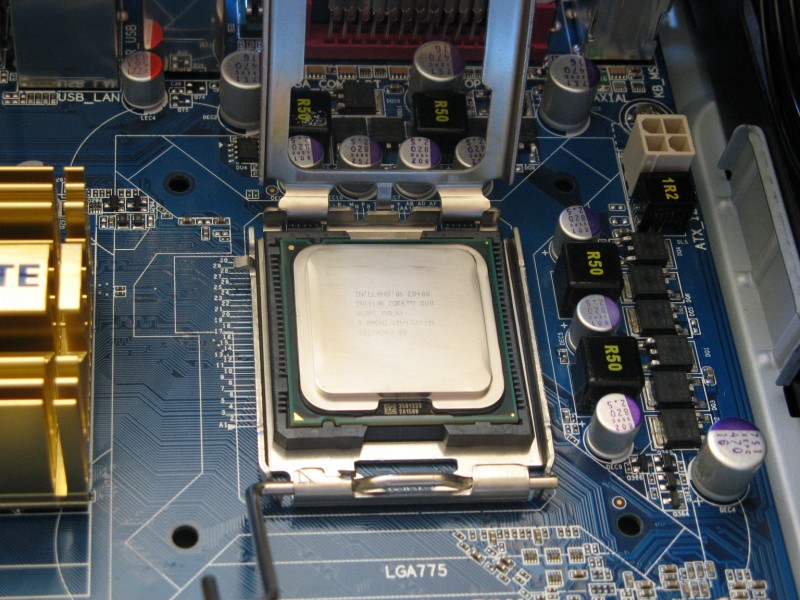
This is the CPU sitting in place with the gate open
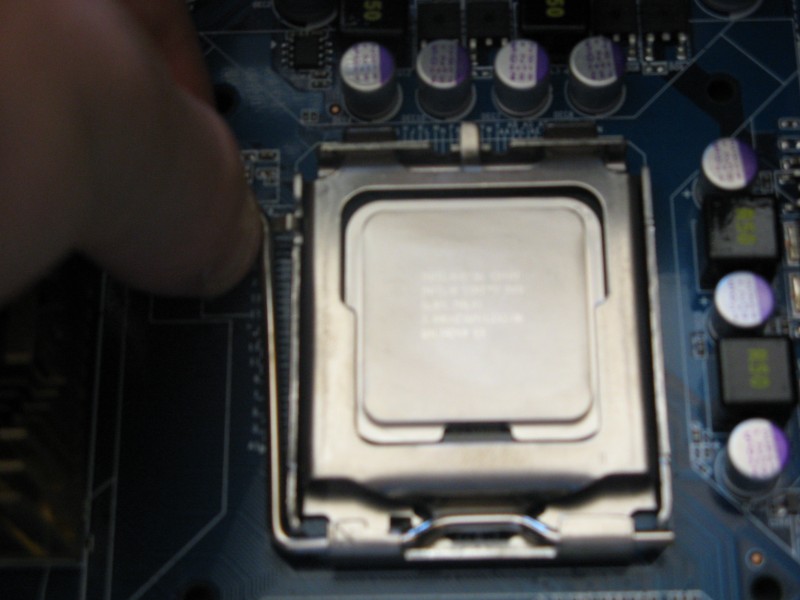
Gently close the metal gate surround.
Finally, use the lever to lock the metal gate surround into place – you may need to use firm pressure.
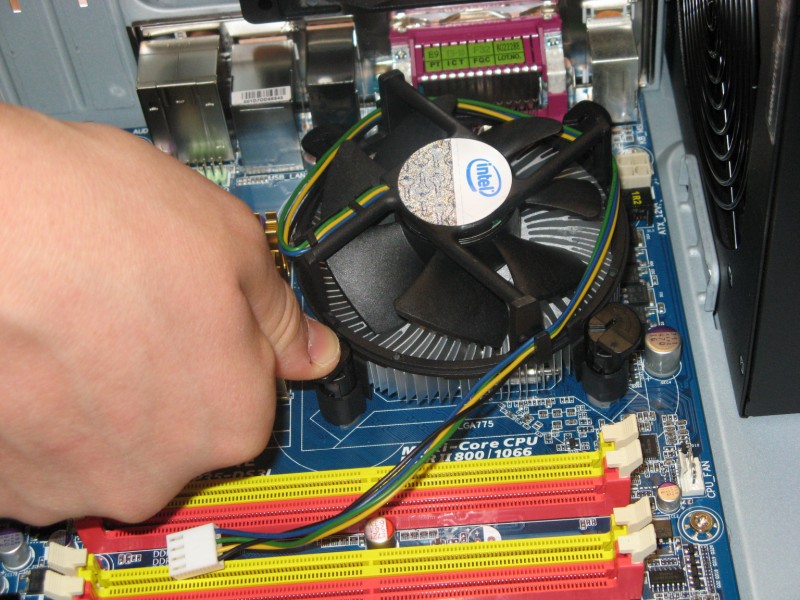
After the CPU is installed, fit the CPU heatsink/fan. If you have purchased a retail CPU, most come with thermal paste pre-applied to the heatsink. If this is the case, then you do not need to worry about putting your own paste on. If this is not the case, then you'll need to squeeze a small amount (about the size of a grain of rice) onto the CPU before mounting the heatsink on top.
Once the thermal paste is organised, and the CPU is ready to go, line up the heatsink and sit it in place. (If you are using a 3rd-party heatsink, you will need to follow the instructions provided with it). Press down firmly on the 4 corner clips to properly attach the heatsink to the motherboard, which puts the proper amount of pressure onto the CPU for maximum heat dissipation.
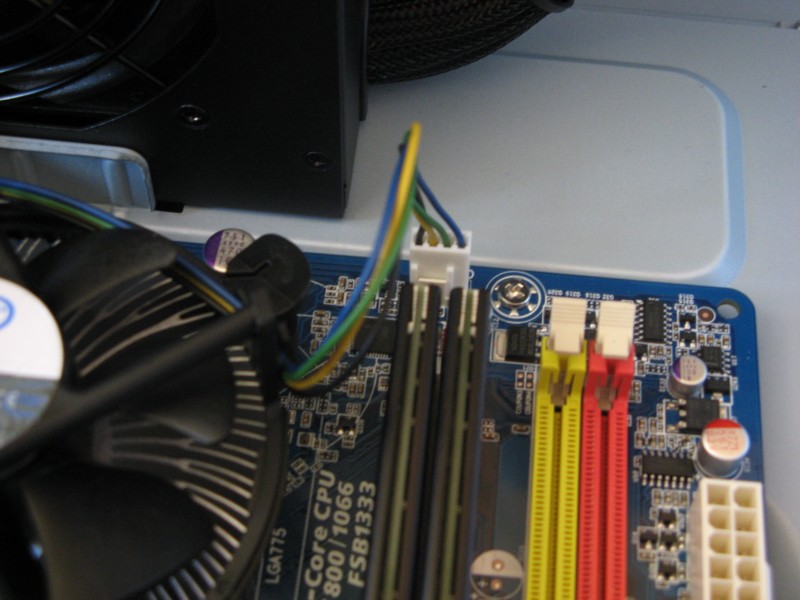
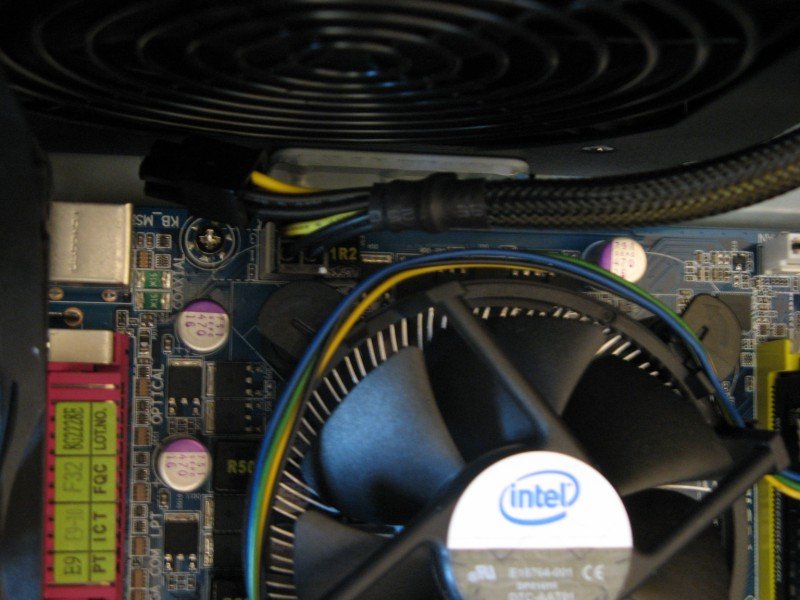
While we're on the CPU, we'll finish off the job by attaching the heatsink/fan power and sensor connector to the motherboard, and the 4-pin CPU power connector from the PSU to the motherboard close to the CPU. (Some newer variants may have an 8-pin power connector - this is for new high-powered CPU and motherboard combinations - consult your motherboard manual for which one you should use).
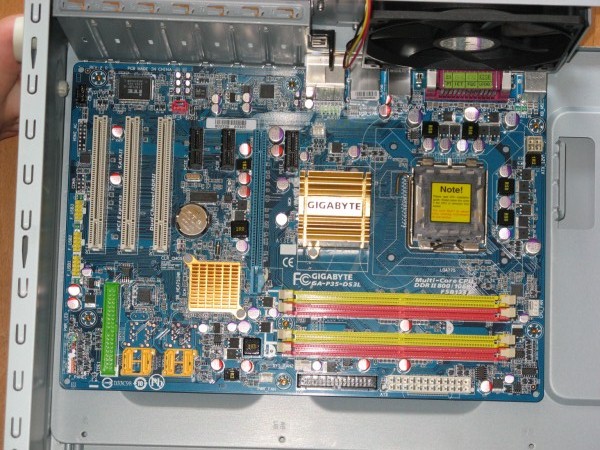
The RAM sticks are relatively easy to install. If your motherboard supports a dual-channel configuration, then it will most likely have the dual-channel slots already marked as such. In our example, we can see the slots are colour-coded - so install matching pairs of RAM sticks into matching slots. For our example, this means slots 1 and 3 will then be populated.
Once you've sorted out where the sticks are being installed, unlock the slots by moving the end levers outward.
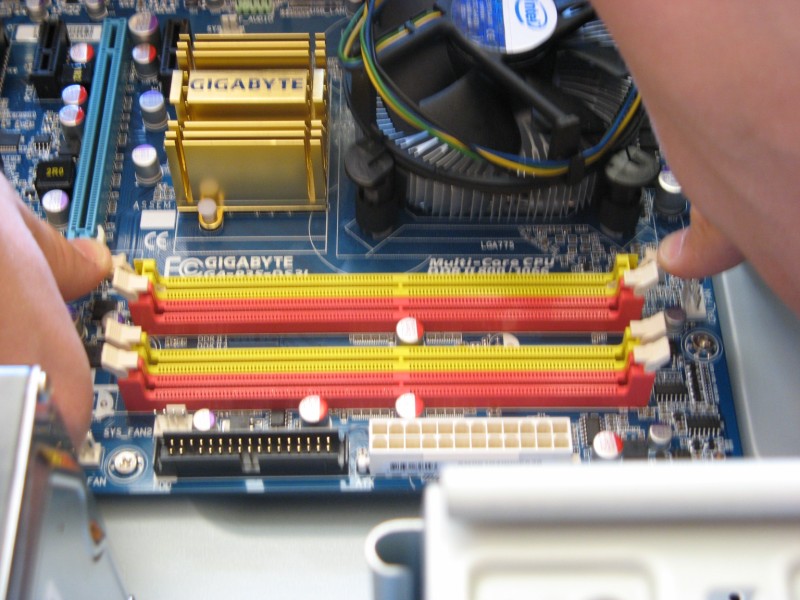
Open the side locks, ready to install the RAM
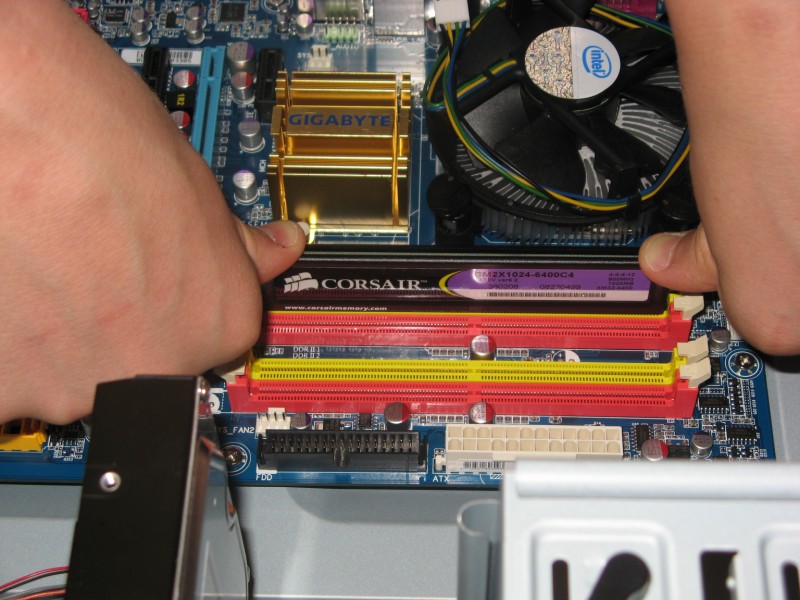
Line the module up (the off-centre notch will ensure it only fits one way) and use steady, firm pressure to push it in. When it is in place, the slots at the end will have "snapped" into each side of the stick, securing it.
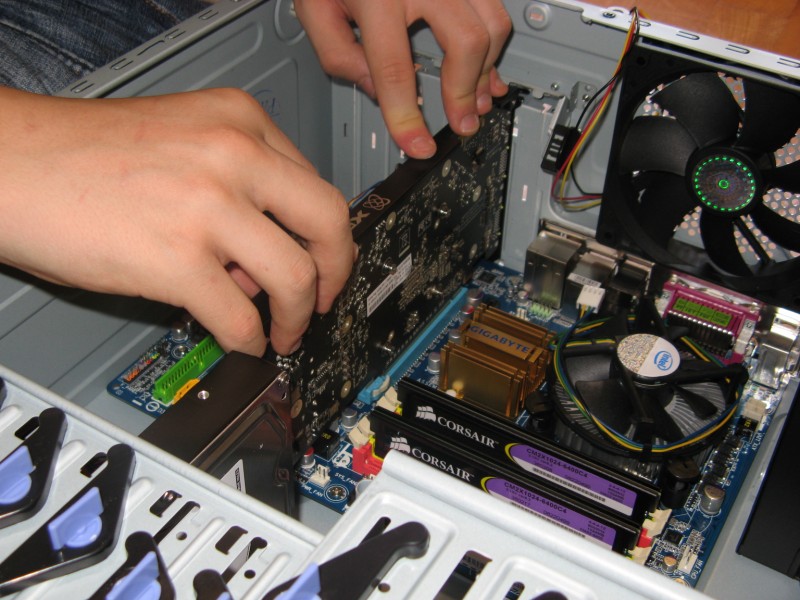
Now add any discrete cards for the build – in our example photo, we have one video card to be installed. Be sure to line up each card properly into the installation slot on the motherboard. Push cards in firm to ensure a proper fit.
Now all the physical components should be installed for your system. All that's left to do is connect everything up. SATA data cables (or IDE ribbon cables for components that connect in that way) need to run from the device to the motherboard. Power cables from the PSU need to connect up to each component as necessary.
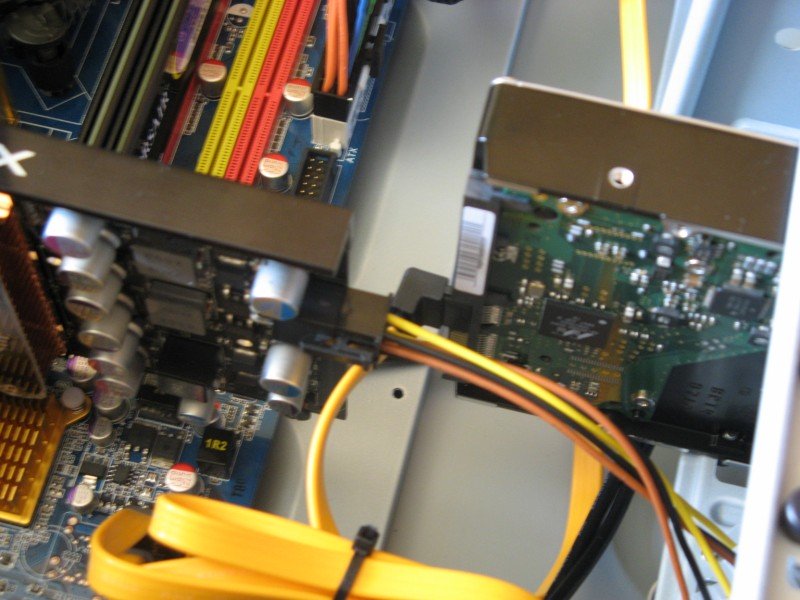
It is especially important to take care when running the cables from the PSU to each component – always try and get the “mess” minimised as much as possible, for a nicer look and better in-case airflow. Use zip ties to clean up loose ends, especially where the fans are located. It is in this regard that a modular PSU makes all the difference – only connect what is needed and the rest can be left in the box, instead of having to zip tie it all together and tuck the bundle out of the way as much as possible... Even so – with careful planning, a non-modular PSU can still be routed efficiently for good air-flow.
You should have already connected the CPU 4-pin (or 8-pin) connector, so next install the 24-pin ATX motherboard power connector, the DVD drive, the hard drive, the graphics card, and anything else in your specific system that needs a power cable.
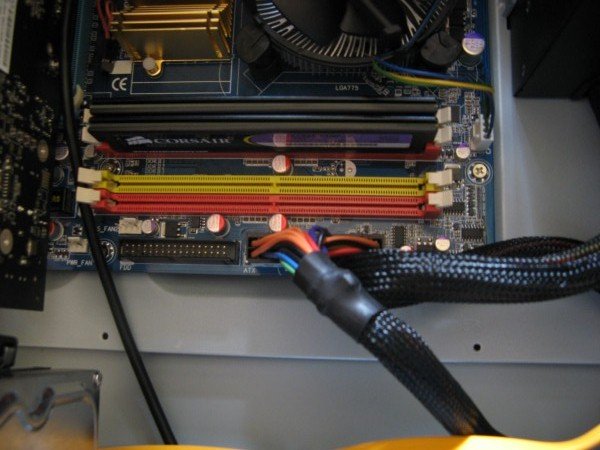
Note from Artellos (Olrik): As you might see, I made a little mistake here. I didn't install the second RAM module in the other Yellow slot. This way the RAM doesn't run in Dual-Channel configuration. I should have placed the second one in the other yellow slot.
The final connections to be made are the case connectors to the motherboard. These are for the power and reset button, power and HDD light, and USB and other data connectors for the ports on the front of the case. As every case and motherboard is different, you'll need to carefully follow the instructions in the motherboard manual. Every manual should have wiring diagrams in detail. You may find it under the heading “Front Panel Connectors” or F_PANEL.
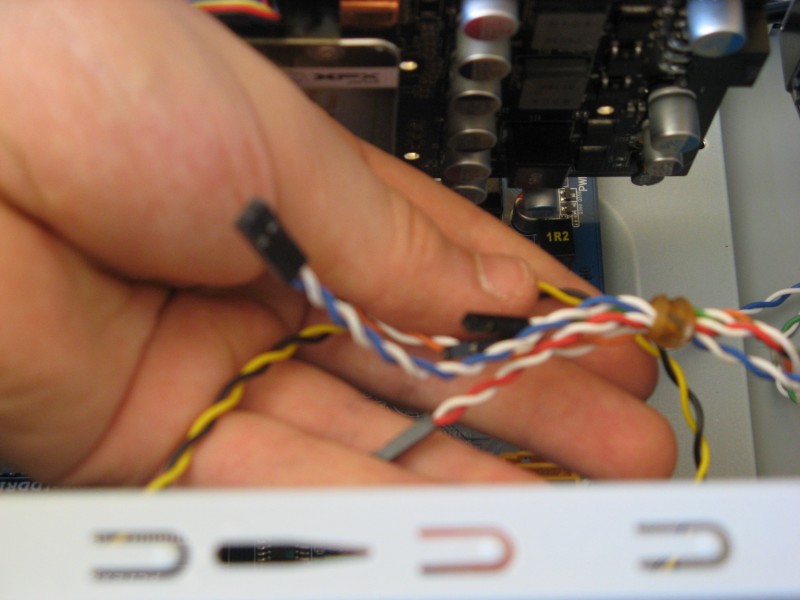
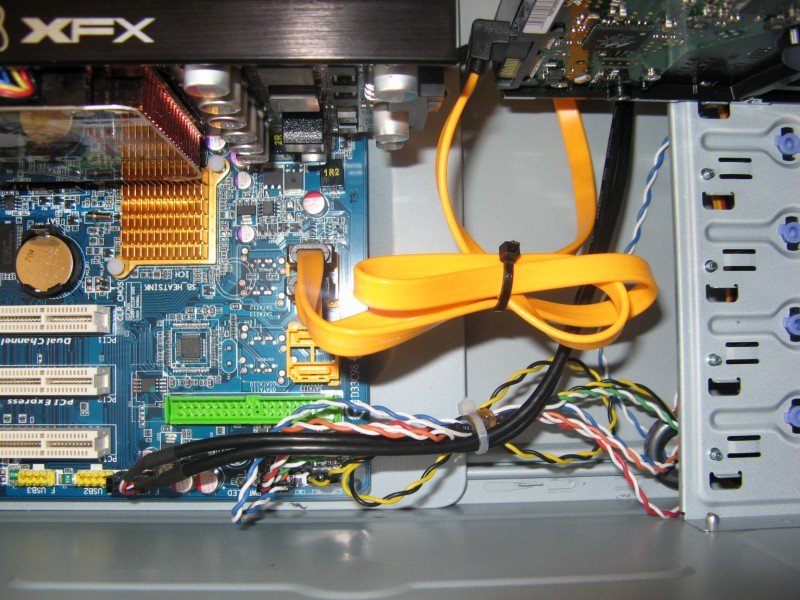
The Photo above is showing a very clean, simple look with the cables tied up nicely
4. The Result
And there you have it. Everything should now be complete, and ready for installation of the operating system. In the photo below, we can see the system in all its glory, although a few more zip-ties to minimise the bunch of black cables from the PSU into a smaller bundle would be nice. Nonetheless, for a first-time build, this Tech Apprentice received top marks! (Well, the system worked, so that's good!)
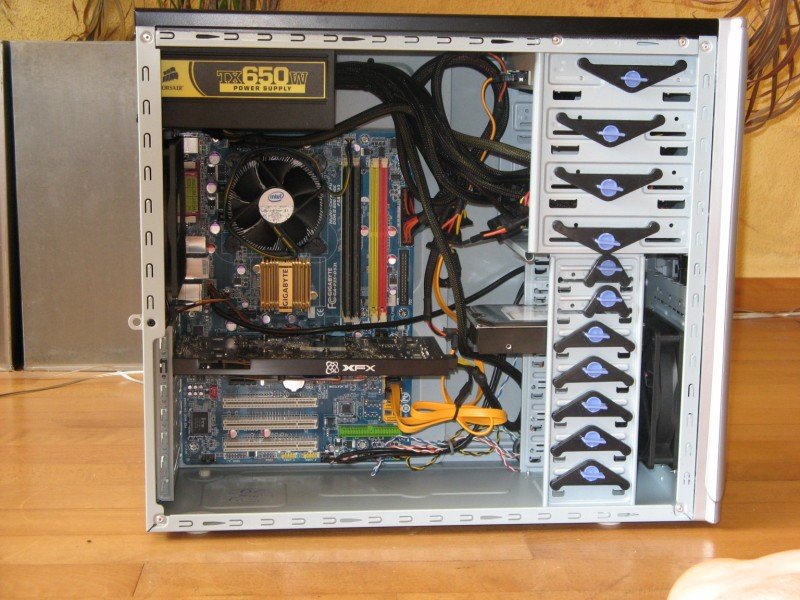
The job complete!
All thats left to do is close the case side panels, to protect the important components inside, and to create the proper environment for in-case airflow – to keep all the components nice and cool.
If you are installing an OEM version of Windows, you need to put the COA sticker on the case
That's all there is to it! Enjoy your new computer.
Unfortunately for some, it might not be over just yet - sometimes components can be DOA (dead on arrival). If you don't know why the computer isn't working, start a new thread right here in System Building and Upgrading, include as much information about what issue you have and what you have tried to fix it.
Best Regards,
The Geeks to Go! Tech Academy
Edited by Troy, 27 October 2010 - 05:28 AM.


 Sign In
 Create Account
