


Edited by dlmgg, 20 March 2006 - 02:15 PM.

Need help with your computer or device? Want to learn new tech skills? You're in the right place!
Geeks to Go is a friendly community of tech experts who can solve any problem you have. Just create a free account and post your question. Our volunteers will reply quickly and guide you through the steps. Don't let tech troubles stop you. Join Geeks to Go now and get the support you need!


Member

Edited by dlmgg, 20 March 2006 - 02:15 PM.

Fixer-upper guy

Member

Trusted Tech

Edited by Jack123, 23 March 2006 - 07:49 PM.
Trusted Tech
Edited by Jack123, 23 March 2006 - 08:49 AM.
Member

Trusted Tech
I was going to open the front to check the button itself but I can't find any charts on how to get in there
Edited by Jack123, 23 March 2006 - 08:55 AM.
Member


Trusted Tech
I don't have a Voltmeter and I'm not sure how to use one. I'm guessing with some instruction it probably wouldn't be too difficult to do.
Edited by Jack123, 23 March 2006 - 08:55 AM.
Member

Trusted Tech
Thanks for sticking with me
I checked those wires, they look crimped but they really aren't, I had to sort of tuck them under the corner there because they were getting hit by the fan when it turned on. They appear to be fine.
Edited by Jack123, 23 March 2006 - 08:56 AM.
Member


Trusted Tech
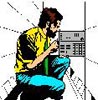
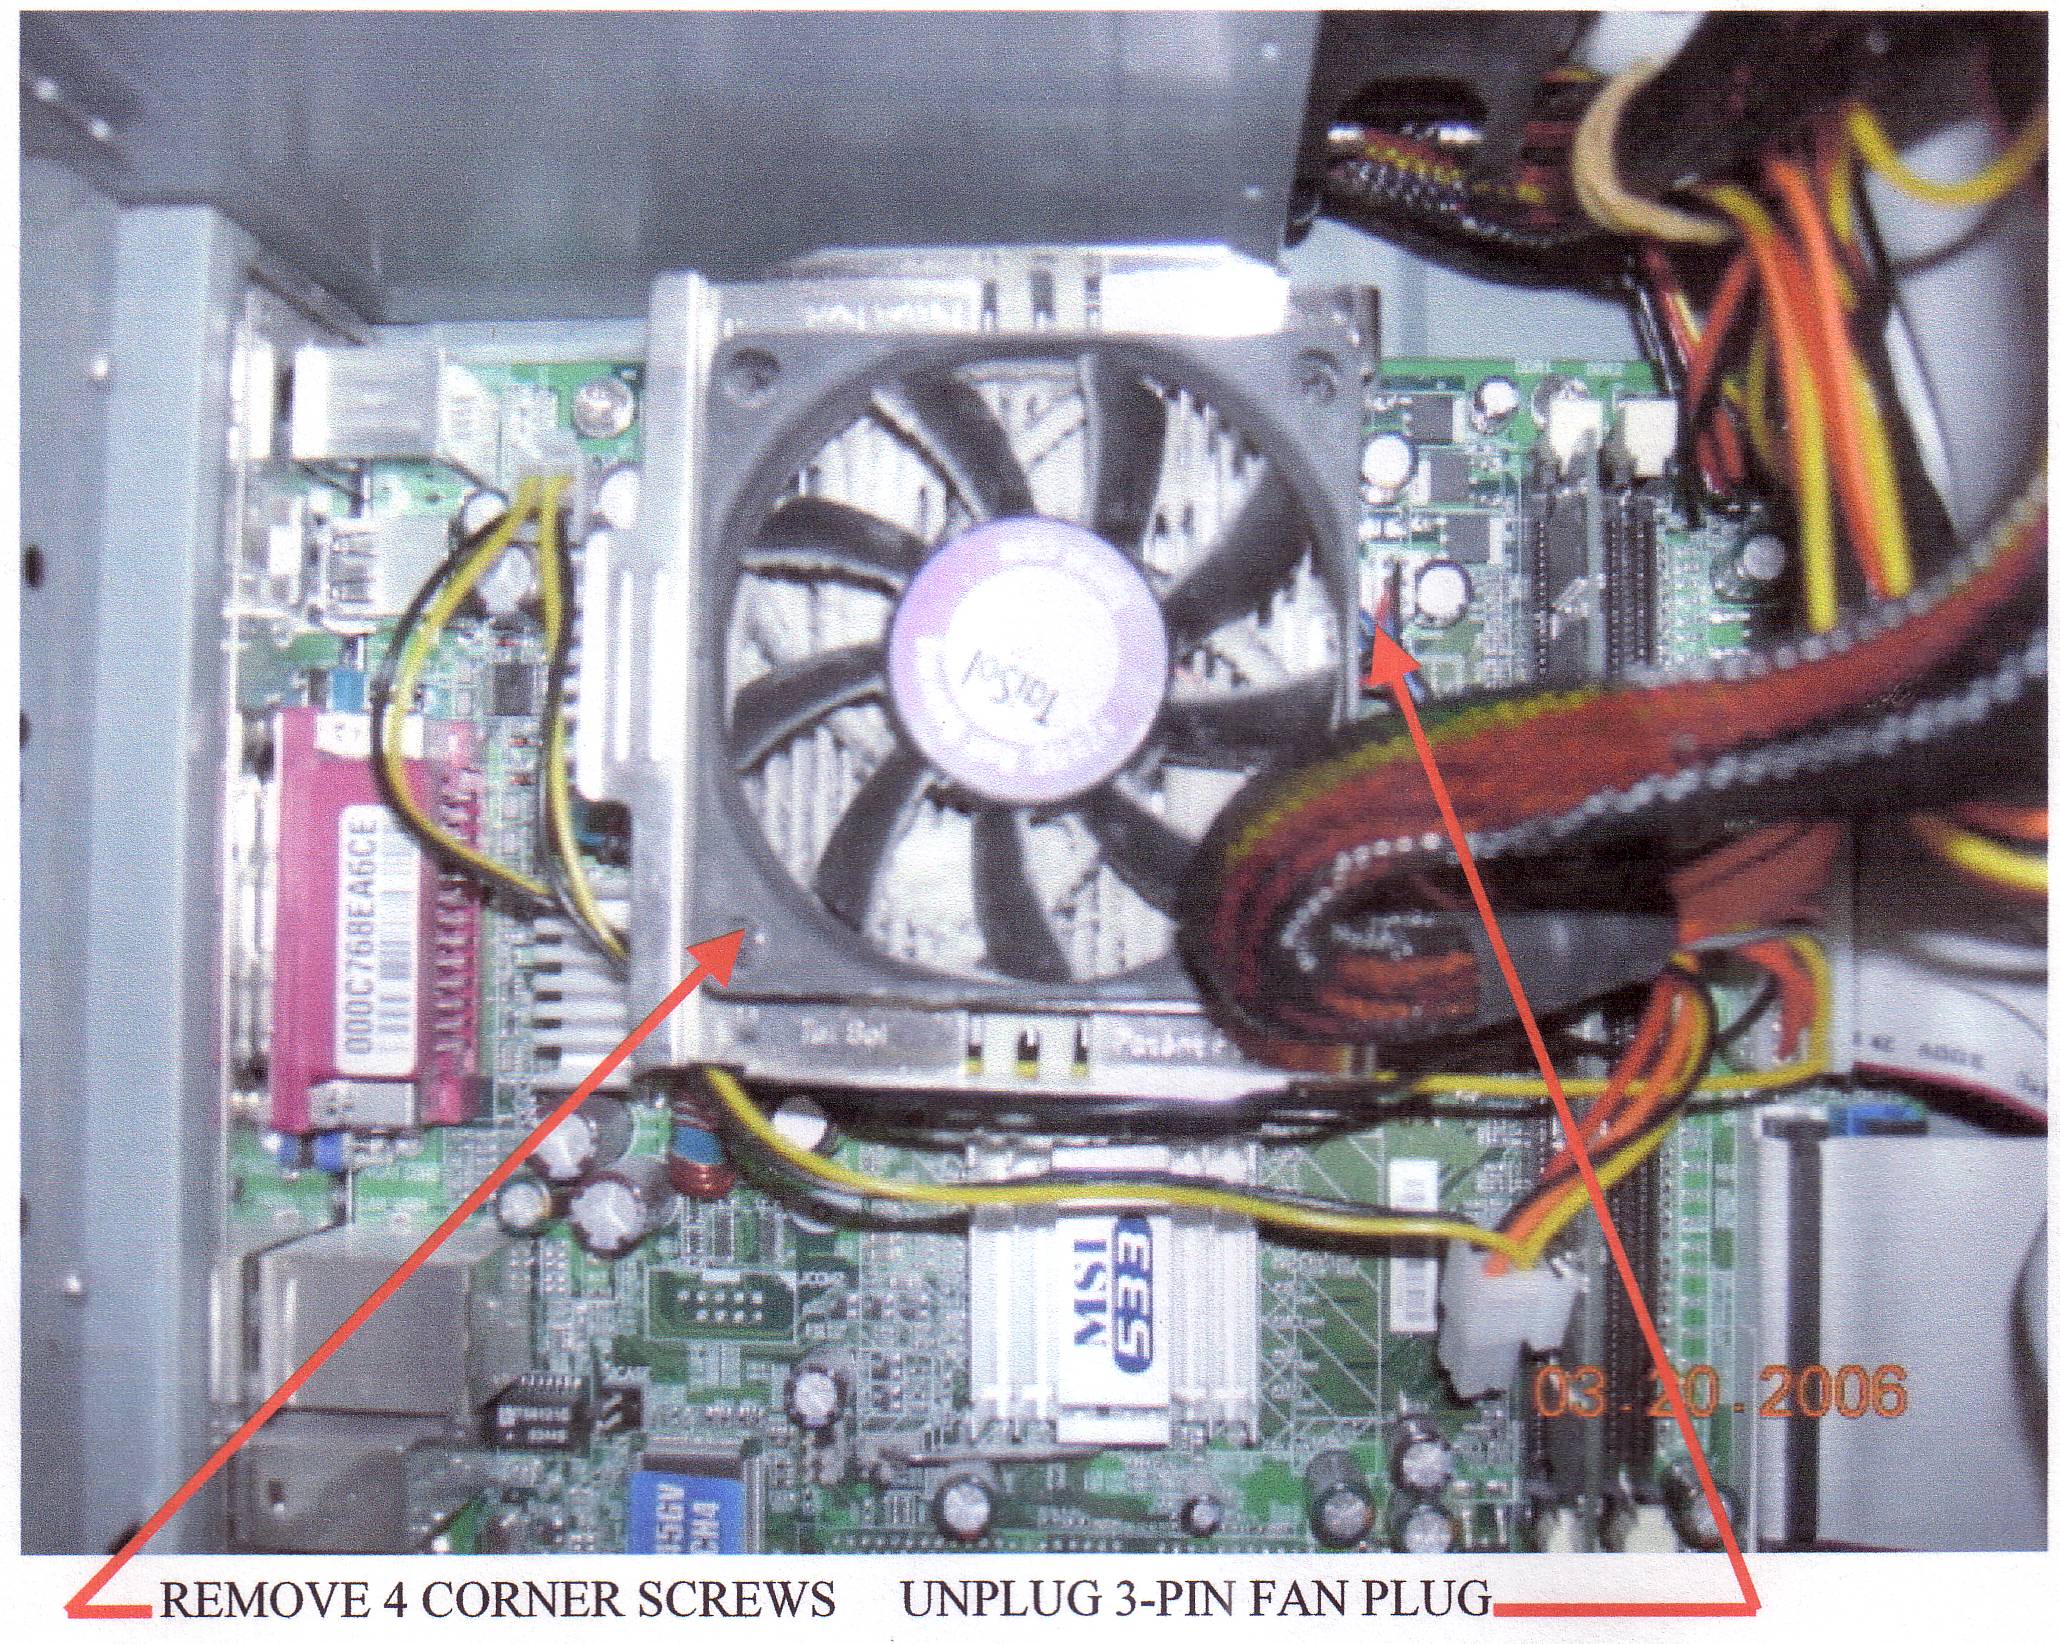
I checked, here is a picture for you:
Member
Trusted Tech
I did steps 1-4 with the same outcome. When you say remove the bottom, do you mean umplug something else? I'm in new territory here, not quite sure what you want me to unplug.
Edited by Jack123, 23 March 2006 - 11:40 AM.


0 members, 0 guests, 0 anonymous users


Community Forum Software by IP.Board
Licensed to: Geeks to Go, Inc.

 Sign In
 Create Account
