

xp wont boot
Started by
hsnyder95
, Apr 01 2012 11:46 PM
#1

 Posted 01 April 2012 - 11:46 PM
hsnyder95
-
- Member
-

- 36 posts
Member

#2
Posted 02 April 2012 - 05:51 AM
rshaffer61
-

- Moderator
-

- 34,114 posts
Moderator
Hello hsnyder95.... Welcome to
GeeksToGo,


I'm sorry to hear about your issue. We will try to help you resolve this as soon as possible.
Before we can help you need to provide the following so I can start you in the right direction.
Laptop or Desktop?
Getting your Data is not hard as long as the hard drive is functional.
Use Puppy Linux Live CD to Recover Your Data:
===================
***Required Hardware***
CD Burner (CDRW) Drive,
Blank CD,
Extra Storage Device (USB Flash Drive, External Hard Drive)
===================
1. Save these files to your Desktop/Burn Your Live CD:
2. Set your boot priority in the BIOS to CD-ROM first, Hard Drive Second
3. Recover Your Data
Remember to only click once! No double clicking! Once you drag and drop your first folder, you will notice a small menu will appear giving you the option to move or copy. Choose COPY each time you drag and drop.
YOU ARE DONE!!! Simply click Menu >> Mouse Over Shutdown >> Reboot/Turn Off Computer. Be sure to plug your USB Drive into another working windows machine to verify all data is there and transferred without corruption. Congratulations!
If you're doing this to recovery from a virus or malware infection, (or even if you're not), DO NOT copy executable files (.exe, .scr. etc...) if any of these files are infected you could be copying the corruption over to any new device/computer. just copy documents, pictures, music, or videos.
GeeksToGo,
I'm sorry to hear about your issue. We will try to help you resolve this as soon as possible.
- Please understand we are all volunteers and we are not here all the time.
- Sometimes it may be a extended amount of time to get back to you. If it has been
more then 3 days please shoot me a PM and I will try to get back to you quickly
then. - Please do the following and supply the requested information as needed. If you
don't understand my instructions please ask and I will try to explain them
clearer for you. - Do not attempt any steps unless instructed or ask before to
make sure they will not cause any further issues. - If you are receiving assistance in any other forum site please let us know as there may be conflicting advice given.
Before we can help you need to provide the following so I can start you in the right direction.
Laptop or Desktop?
- If a name brand system then what brand, make and model is the system?
- If custom built then what brand, make and model is the motherboard
- Total memory installed
- Total hard drive capacity and free space
- What steps have you taken so far to resolve the issue
Getting your Data is not hard as long as the hard drive is functional.
Use Puppy Linux Live CD to Recover Your Data:
===================
***Required Hardware***
CD Burner (CDRW) Drive,
Blank CD,
Extra Storage Device (USB Flash Drive, External Hard Drive)
===================
1. Save these files to your Desktop/Burn Your Live CD:
- Download Latest Puppy Linux ISO (i.e.: lupu-520.iso)
Download BurnCDCC ISO Burning Software
- Open BurnCDCC with Windows Explorer
- Extract All files to a location you can remember
- Double Click
 BurnCDCC
 - Click Browse
 and navigate to the Puppy Linux ISO file you just downloaded
 - Open/Double Click that file
IMPORTANT: Adjust the speed bar to CD: 4x DVD: 1x - Click Start

- Your CD Burner Tray will open automatically
- Insert a blank CD and close the tray
- Click OK
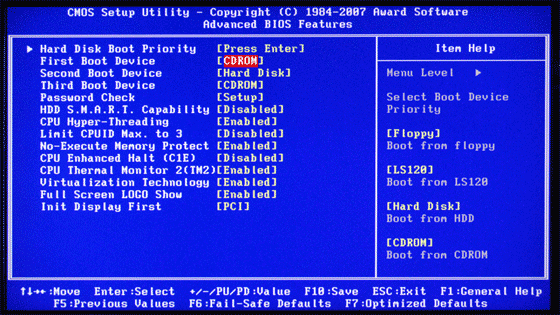
2. Set your boot priority in the BIOS to CD-ROM first, Hard Drive Second
- Start the computer/press the power button
- Immediately start tapping the appropriate key to enter the BIOS, aka "Setup"
(Usually shown during the "Dell" screen, or "Gateway" Screen) - Once in the BIOS, under Advanced BIOS Options change boot priority to:
CD-ROM 1st, Hard Drive 2nd - Open your ROM drive and insert the disk
- Press F10 to save and exit
- Agree with "Y" to continue
- Your computer will restart and boot from the Puppy Linux Live CD
3. Recover Your Data
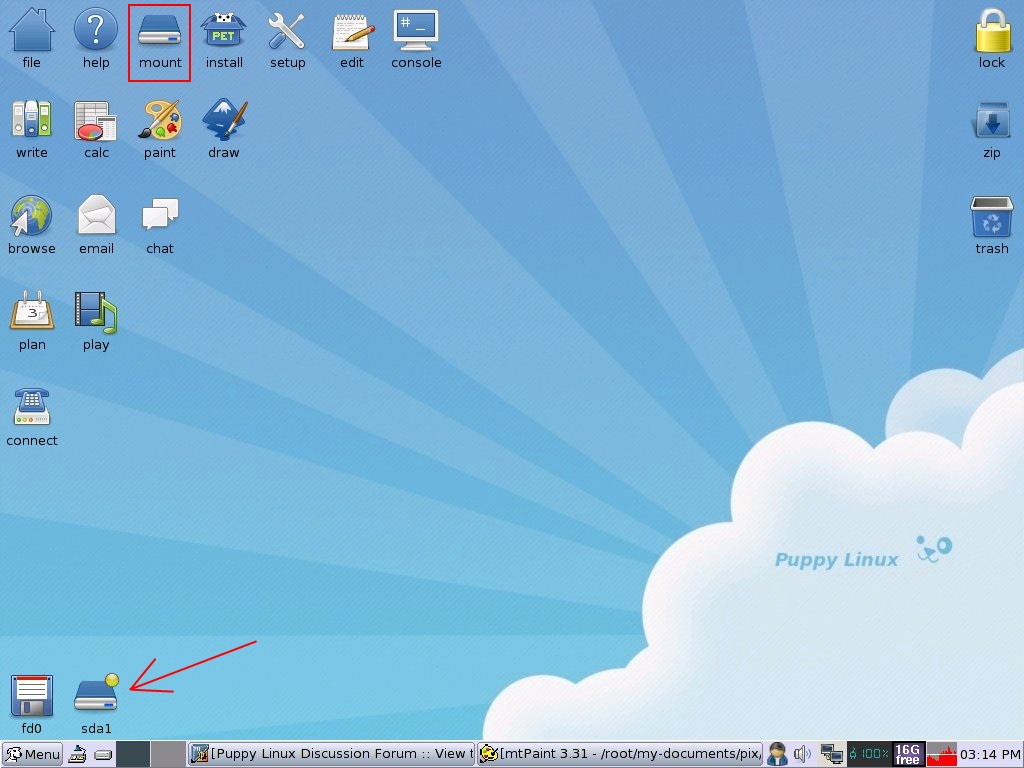
- Once Puppy Linux has loaded, it is actually running in your computer's Memory (RAM). You will see a fully functioning Graphical User Interface similar to what you normally call "your computer". Internet access may or may not be available depending on your machine, so it is recommended you print these instructions before beginning. Also, double clicking is not needed in Puppy. To expand, or open folders/icons, just click once. Puppy is very light on resources, so you will quickly notice it is much speedier than you are used to. This is normal. Ready? Let's get started.
3a. Mount Drives - Click the Mount Icon located at the top left of your desktop.

- A Window will open. By default, the "drive" tab will be forward/highlighted. Click on Mount for your hard drive.
- Assuming you only have one hard drive and/or partition, there may be only one selection to mount.
- USB Flash Drives usually automatically mount upon boot, but click the "usbdrv" tab and make sure it is mounted.
- If using an external hard drive for the data recovery, do this under the "drive" tab. Mount it now.
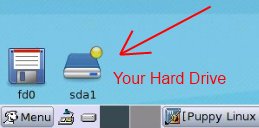
- At the bottom left of your desktop a list of all hard drives/partitions, USB Drives, and Optical Drives are listed with a familiar looking hard drive icon.
- Open your old hard drive i.e. sda1
- Next, open your USB Flash Drive or External Drive. i.e. sdc or sdb1
- If you open the wrong drive, simply X out at the top right corner of the window that opens. (Just like in Windows)
- From your old hard drive, drag and drop whatever files/folders you wish to transfer to your USB Drive's Window.
Remember to only click once! No double clicking! Once you drag and drop your first folder, you will notice a small menu will appear giving you the option to move or copy. Choose COPY each time you drag and drop.
YOU ARE DONE!!! Simply click Menu >> Mouse Over Shutdown >> Reboot/Turn Off Computer. Be sure to plug your USB Drive into another working windows machine to verify all data is there and transferred without corruption. Congratulations!
If you're doing this to recovery from a virus or malware infection, (or even if you're not), DO NOT copy executable files (.exe, .scr. etc...) if any of these files are infected you could be copying the corruption over to any new device/computer. just copy documents, pictures, music, or videos.
#3
Posted 02 April 2012 - 09:49 PM
hsnyder95
- Topic Starter
-
- Member
-
- 36 posts
Member
ok its a sony vioa pvc-rz22g desktop. i have no clue the total memory, but its has 512 ram. the only thing i have tryed is to system restore and thats it
#4
Posted 03 April 2012 - 05:58 AM
rshaffer61
-
- Moderator
-
- 34,114 posts
Moderator
You just answered your question. Memory is ram.i have no clue the total memory, but its has 512 ram
RAM = Random Access Memory
Since it is a Sony you can try the chance there is a Recovery Partition already on your hard drive to erase and reinstall your OS.
Sony:
The key to use is F10 at Sony logo on startup to access the Recovery Partition. This should wipe the drive clean and restore it back to factory new settings.
#5
Posted 05 April 2012 - 03:24 PM
hsnyder95
- Topic Starter
-
- Member
-
- 36 posts
Member
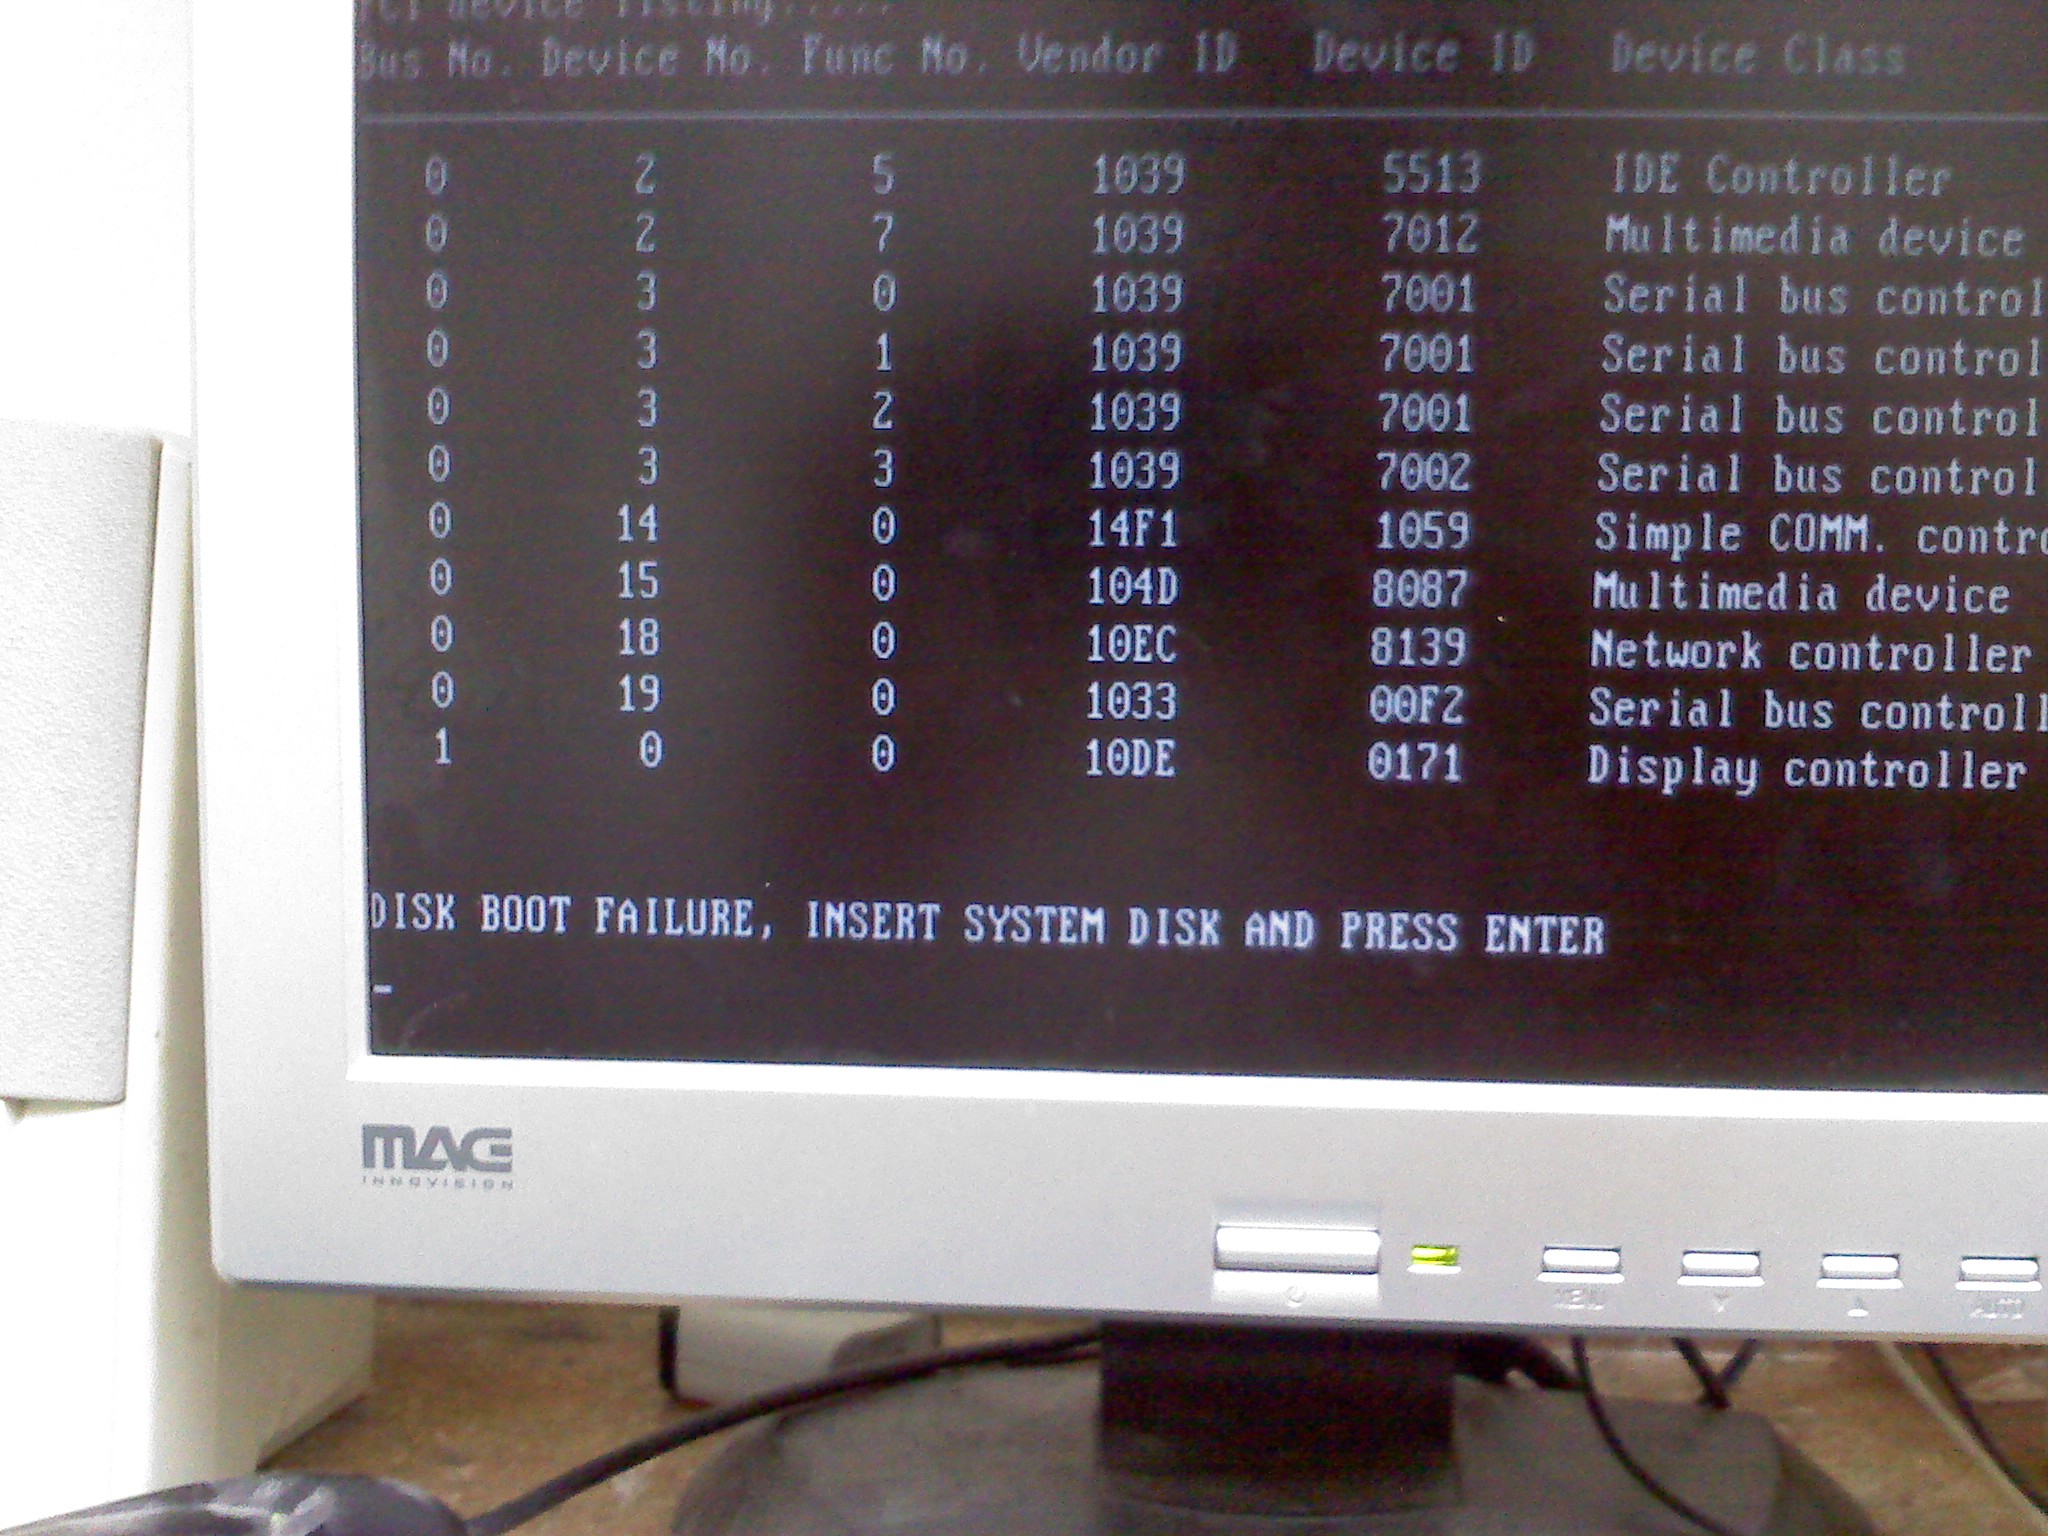
Ok so the first pproblem with that is that i get this when i turn the computer on
Attached Thumbnails
#6
Posted 05 April 2012 - 03:36 PM
rshaffer61
-
- Moderator
-
- 34,114 posts
Moderator
OK that means it cannot find your hard drive to boot to or your windows XP is not present.
Lets test the hard drive first to see if there is a problem there.
Run hard drive diagnostics: http://www.tacktech....ay.cfm?ttid=287
Make sure, you select tool, which is appropriate for the brand of your hard drive.
Depending on the program, it'll create bootable floppy, or bootable CD.
If downloaded file is of .iso type, use ImgBurn: http://www.imgburn.com/ to burn .iso file to a CD (select "Write image file to disc" option), and make the CD bootable.
NOTE. If your hard drive is made by Toshiba, try the Hitachi DFT CD Image version of the software
Thanks to Broni for the instructions
#7
Posted 05 April 2012 - 04:12 PM
hsnyder95
- Topic Starter
-
- Member
-
- 36 posts
Member
ok can u please explain a bit more how to hard rive diagnostics it confuesed me a bit. and i look at my computer and i think i have a seagate harddrive
#8
Posted 05 April 2012 - 04:14 PM
rshaffer61
-
- Moderator
-
- 34,114 posts
Moderator
Then you need to get the SeaTools DOS cd ISO.
Then start with my previous post with the line that starts with:
[b]If downloaded file is of .iso type
Then start with my previous post with the line that starts with:
[b]If downloaded file is of .iso type
#9
Posted 06 April 2012 - 10:30 AM
hsnyder95
- Topic Starter
-
- Member
-
- 36 posts
Member
Ok so i was running the Linux before you told me to do the hard drive thing. I managed to get it to work, but the there isnt a hard drive to mount. cant i just directly use the program from the Linux so i don't have to waste a disk.
#10
Posted 06 April 2012 - 10:52 AM
rshaffer61
-
- Moderator
-
- 34,114 posts
Moderator
Yep you can use Linux but what is it you are using Linux for?
Unless you are using a Linux disk that includes a hard drive diagnostics tool I'm not sure what you are using then to test the hard drive.
Unless you are using a Linux disk that includes a hard drive diagnostics tool I'm not sure what you are using then to test the hard drive.
#11
Posted 06 April 2012 - 11:40 AM
hsnyder95
- Topic Starter
-
- Member
-
- 36 posts
Member
you said to use it to recover my files
#12
Posted 06 April 2012 - 11:43 AM
hsnyder95
- Topic Starter
-
- Member
-
- 36 posts
Member
never mind ill just continue on with what you said
#13
Posted 06 April 2012 - 11:43 AM
rshaffer61
-
- Moderator
-
- 34,114 posts
Moderator
Yes for recovery but your hard drive still needs to be tested to see if it is failing. Once you have recovered all data then you should follow the diagnostics instructions.you said to use it to recover my files
#14
Posted 12 April 2012 - 03:24 PM
hsnyder95
- Topic Starter
-
- Member
-
- 36 posts
Member
ok so i have all the programs but i dont know how to run imgburn at all
#15
Posted 12 April 2012 - 03:25 PM
hsnyder95
- Topic Starter
-
- Member
-
- 36 posts
Member
ok so i have all the programs but i dont know how to run imgburn at all


Similar Topics
0 user(s) are reading this topic
0 members, 0 guests, 0 anonymous users
As Featured On:


 Sign In
 Create Account
