

Blue Screen Restart/Different Farbar Results [Solved]
Started by
Don54
, Oct 23 2013 08:26 AM
-
 This topic is locked
#31

 Posted 25 October 2013 - 02:30 PM
Don54
- Topic Starter
-
- Member
-

- 57 posts
Member

#32
Posted 26 October 2013 - 08:09 PM
emeraldnzl
-
- GeekU Moderator
-

- 20,051 posts
GeekU Instructor
Sorry for the delay, Had to visit Auckland overnight.
Not good. Looks like your hard drive is "packing it in".
Might be too late now but I have been consulting about another user I am helping who has hard drive problems and one of our technical people who I regard highly has put together the following.
It might be a way for you to access the hard drive. This would be a way to back up your data.
A couple of things that may help:
===================
***Required Hardware***
CD Burner (CDRW) Drive,
Blank CD,
Extra Storage Device (USB Flash Drive, External Hard Drive)
===================
1. Save these files to your Desktop/Burn Your Live CD:
2. Set your boot priority in the BIOS to CD-ROM first, Hard Drive Second
3. Recover Your Data
Remember to only click once! No double clicking! Once you drag and drop your first folder, you will notice a small menu will appear giving you the option to move or copy. Choose COPY each time you drag and drop.
YOU ARE DONE!!! Simply click Menu >> Mouse Over Shutdown >> Reboot/Turn Off Computer. Be sure to plug your USB Drive into another working windows machine to verify all data is there and transferred without corruption. Congratulations!
Free and user friendly back up software that phillpower2, the technical consultant, often suggests and that has proved positive with members is Macrium Reflect
Tell me how you get on.
Got to the Reatogo desktop... it loaded up Win Xp not Win 7 which is my OS. Anyway clicked on OTLPE logo, when I selected the local disk it said "target is not windows 2000 or later."
Not good. Looks like your hard drive is "packing it in".
Might be too late now but I have been consulting about another user I am helping who has hard drive problems and one of our technical people who I regard highly has put together the following.
It might be a way for you to access the hard drive. This would be a way to back up your data.
A couple of things that may help:
===================
***Required Hardware***
CD Burner (CDRW) Drive,
Blank CD,
Extra Storage Device (USB Flash Drive, External Hard Drive)
===================
1. Save these files to your Desktop/Burn Your Live CD:
- Download Latest Puppy Linux ISO (i.e.: lupu-528.iso)
Download BurnCDCC ISO Burning Software
There are instructions on how to boot from flash drive with puppy here; http://www.pendrivel...e-from-windows/
- Open BurnCDCC with Windows Explorer
- Extract All files to a location you can remember
- Double Click
 BurnCDCC
 - Click Browse
 and navigate to the Puppy Linux ISO file you just downloaded
 - Open/Double Click that file
IMPORTANT: Adjust the speed bar to CD: 4x DVD: 1x - Click Start

- Your CD Burner Tray will open automatically
- Insert a blank CD and close the tray
- Click OK
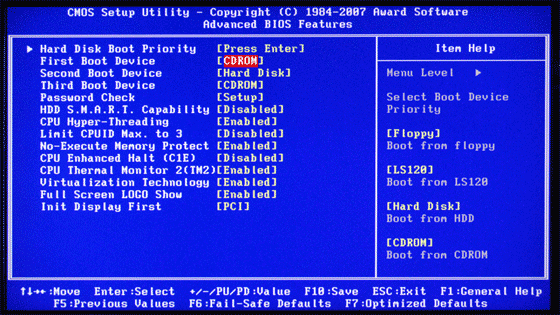
2. Set your boot priority in the BIOS to CD-ROM first, Hard Drive Second
- Start the computer/press the power button
- Immediately start tapping the appropriate key to enter the BIOS, aka "Setup"
(Usually shown during the "Dell" screen, or "Gateway" Screen) - Once in the BIOS, under Advanced BIOS Options change boot priority to:
CD-ROM 1st, Hard Drive 2nd - Open your ROM drive and insert the disk
- Press F10 to save and exit
- Agree with "Y" to continue
- Your computer will restart and boot from the Puppy Linux Live CD
3. Recover Your Data
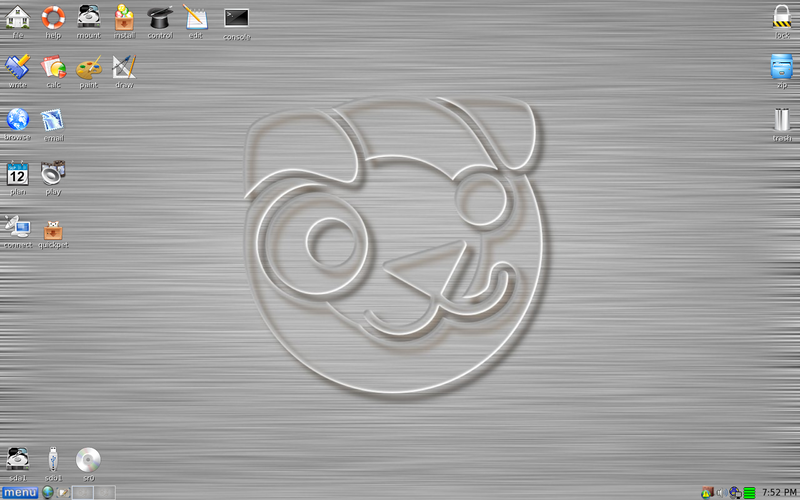
- Once Puppy Linux has loaded, it is actually running in your computer's Memory (RAM). You will see a fully functioning Graphical User Interface similar to what you normally call "your computer". Internet access may or may not be available depending on your machine, so it is recommended you print these instructions before beginning. Also, double clicking is not needed in Puppy. To expand, or open folders/icons, just click once. Puppy is very light on resources, so you will quickly notice it is much speedier than you are used to. This is normal. Ready? Let's get started.
3a. Mount Drives - Click the Mount Icon located at the top left of your desktop.

- A Window will open. By default, the "drive" tab will be forward/highlighted. Click on Mount for your hard drive.
- Assuming you only have one hard drive and/or partition, there may be only one selection to mount.
- USB Flash Drives usually automatically mount upon boot, but click the "usbdrv" tab and make sure it is mounted.
- If using an external hard drive for the data recovery, do this under the "drive" tab. Mount it now.
- At the bottom left of your desktop a list of all hard drives/partitions, USB Drives, and Optical Drives are listed with a familiar looking hard drive icon.
- Open your old hard drive i.e. sda1
- Next, open your USB Flash Drive or External Drive. i.e. sdc or sdb1
- If you open the wrong drive, simply X out at the top right corner of the window that opens. (Just like in Windows)
- From your old hard drive, drag and drop whatever files/folders you wish to transfer to your USB Drive's Window.
Remember to only click once! No double clicking! Once you drag and drop your first folder, you will notice a small menu will appear giving you the option to move or copy. Choose COPY each time you drag and drop.
YOU ARE DONE!!! Simply click Menu >> Mouse Over Shutdown >> Reboot/Turn Off Computer. Be sure to plug your USB Drive into another working windows machine to verify all data is there and transferred without corruption. Congratulations!
Free and user friendly back up software that phillpower2, the technical consultant, often suggests and that has proved positive with members is Macrium Reflect
Tell me how you get on.
#33
Posted 27 October 2013 - 08:51 AM
Don54
- Topic Starter
-
- Member
-
- 57 posts
Member
Thanks, yes I think the hard drive is bricked. It had also started making clicking noises in the last couple of weeks. Luckily when I was in safe mode early on I was able to copy most of my recent documents over to an external HD that I use for backup. I will try the procedure you describe above and let you know how it goes.
Thanks again for your advice and support, very much appreciated!
Don
Thanks again for your advice and support, very much appreciated!
Don

#35
Posted 29 October 2013 - 09:04 PM
Don54
- Topic Starter
-
- Member
-
- 57 posts
Member
Made the Puppy disk and booted up the PC. Found partitions but Puppy couldn't open the hard disk. Anything else I can do to access the disk?.
#36
Posted 29 October 2013 - 09:46 PM
emeraldnzl
-
- GeekU Moderator
-
- 20,051 posts
GeekU Instructor
Hello Don54,
I can't see a quick answer for you. I will ask our tech guys if they can think of anything but if the hard drive is toast it might be a big ask.
I can't see a quick answer for you. I will ask our tech guys if they can think of anything but if the hard drive is toast it might be a big ask.
#37
Posted 30 October 2013 - 12:56 PM
emeraldnzl
-
- GeekU Moderator
-
- 20,051 posts
GeekU Instructor
Hello Don54,
It seems its likely the drivers are not there to read the drive.
Options are narrowing. We can endeavour to have a look at the partitions on the disk to see if that tells us anything. Outside chance...
Download ListParts64 to a USB flash drive.
Plug the USB drive into the infected machine.
Boot your computer into Recovery Environment
- Restart the computer and press F8 repeatedly until the Advanced Options Menu appears.
- Select Repair your computer.
- Select Language and click Next
- Enter password (if necessary) and click OK, you should now see the screen below ...
- Select the Command Prompt option.
- A command window will open.
- Type notepad then hit Enter.
- Notepad will open.
- Click File > Open then select Computer.
- Note down the drive letter for your USB Drive.
- Close Notepad.
- Back in the command window ....
- Type e:/listparts64.exe and hit Enter (where e: is replaced by the drive letter for your USB drive)
- ListParts will start to run.
- Press the Scan button.
- When finished scanning it will make a log Result.txt on the flash drive.
- Close the command window.
- Boot back into normal mode and post me the Result.txt log please.
#38
Posted 31 October 2013 - 09:50 AM
Don54
- Topic Starter
-
- Member
-
- 57 posts
Member
Hi Emeraldnzl,
Thanks for sticking with me on this...don't like giving up but I guess the HD is fully toasted...tried to apply the above procedure and couldn't even get into the recovery console. Replaced the HD and moving on. Thank you so much for all of your kind assistance throughout this ordeal.
Best regards,
Don
#39
Posted 31 October 2013 - 01:55 PM
emeraldnzl
-
- GeekU Moderator
-
- 20,051 posts
GeekU Instructor
Your very welcome Don. 
I hope things go better for you with your next hard drive.
I hope things go better for you with your next hard drive.
#40
Posted 31 October 2013 - 03:57 PM
emeraldnzl
-
- GeekU Moderator
-
- 20,051 posts
GeekU Instructor
Since this issue appears to be resolved ... this Topic has been closed. Glad we could help.
If you're the topic starter, and need this topic reopened, please contact a staff member with the address of the thread.
Everyone else please begin a New Topic.
If you're the topic starter, and need this topic reopened, please contact a staff member with the address of the thread.
Everyone else please begin a New Topic.


Similar Topics
0 user(s) are reading this topic
0 members, 0 guests, 0 anonymous users
As Featured On:


 Sign In
 Create Account
