 Shunsui21,
Sorry that you have waited this long before receiving a reply, see if Puppy Linux is able to access the thumb drive;
===================
***Required Hardware***
CD Burner (CDRW) Drive,
Blank CD,
Extra Storage Device (USB Flash Drive, External Hard Drive)
===================
1. Save these files to your Desktop/Burn Your Live CD:
Download BurnCDCC ISO Burning Software
There are instructions on how to boot from flash drive with puppy here; http://www.pendrivel...e-from-windows/
Open BurnCDCC with Windows Explorer
Extract All files to a location you can remember
Double Click  BurnCDCC
Click Browse  and navigate to the Puppy Linux ISO file you just downloaded
Open/Double Click that file
IMPORTANT: Adjust the speed bar to CD: 4x DVD: 1x
Click Start 
Your CD Burner Tray will open automatically
Insert a blank CD and close the tray
Click OK
Puppy Linux Live CD will now be created
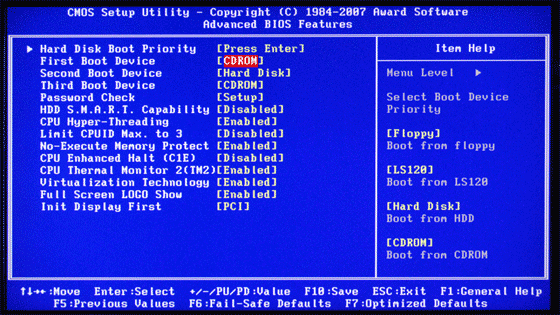
2. Set your boot priority in the BIOS to CD-ROM first, Hard Drive Second
Start the computer/press the power button
Immediately start tapping the appropriate key to enter the BIOS, aka "Setup"
(Usually shown during the "Dell" screen, or "Gateway" Screen)
Once in the BIOS, under Advanced BIOS Options change boot priority to:
CD-ROM 1st, Hard Drive 2nd
Open your ROM drive and insert the disk
Press F10 to save and exit
Agree with "Y" to continue
Your computer will restart and boot from the Puppy Linux Live CD
3. Recover Your Data
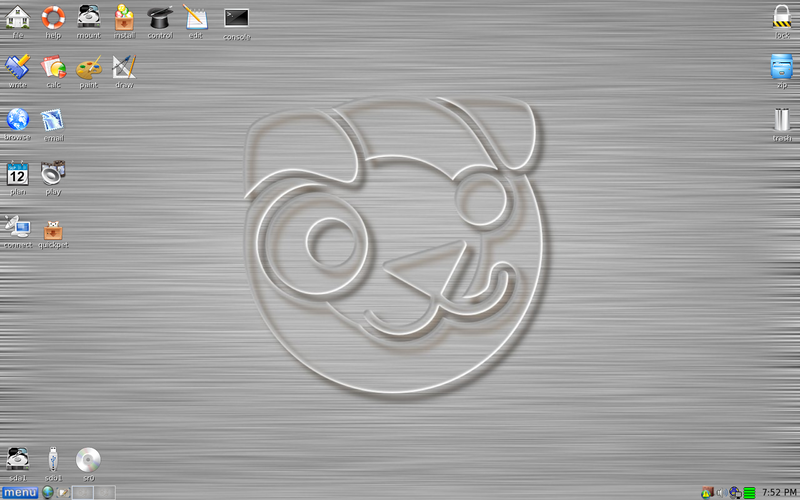
- Once Puppy Linux has loaded, it is actually running in your computer's Memory (RAM). You will see a fully functioning Graphical User Interface similar to what you normally call "your computer". Internet access may or may not be available depending on your machine, so it is recommended you print these instructions before beginning. Also, double clicking is not needed in Puppy. To expand, or open folders/icons, just click once. Puppy is very light on resources, so you will quickly notice it is much speedier than you are used to. This is normal. Ready? Let's get started.
3a. Mount Drives
Click the Mount Icon located at the top left of your desktop. 
A Window will open. By default, the "drive" tab will be forward/highlighted. Click on Mount for your hard drive.
Assuming you only have one hard drive and/or partition, there may be only one selection to mount.
USB Flash Drives usually automatically mount upon boot, but click the "usbdrv" tab and make sure it is mounted.
If using an external hard drive for the data recovery, do this under the "drive" tab. Mount it now.
3b. Transfer Files.
At the bottom left of your desktop a list of all hard drives/partitions, USB Drives, and Optical Drives are listed with a familiar looking hard drive icon.
Open your old hard drive i.e. sda1
Next, open your USB Flash Drive or External Drive. i.e. sdc or sdb1
If you open the wrong drive, simply X out at the top right corner of the window that opens. (Just like in Windows)
From your old hard drive, drag and drop whatever files/folders you wish to transfer to your USB Drive's Window.
For The Novice: The common path to your pictures, music, video, and documents folders is: Documents and Settings >> All Users (or each idividual name of each user. CHECK All Names!) >> Documents >> You will now see My Music, My Pictures, and My Videos.
Remember to only click once! No double clicking! Once you drag and drop your first folder, you will notice a small menu will appear giving you the option to move or copy. Choose COPY each time you drag and drop.
YOU ARE DONE!!! Simply click Menu >> Mouse Over Shutdown >> Reboot/Turn Off Computer. Be sure to plug your USB Drive into another working windows machine to verify all data is there and transferred without corruption. Congratulations!
NB: So that I can confirm that you have received notification of my reply to your topic please click on the Follow this topic tab at the upper right corner of the page.


 Sign In
 Create Account
