Jump to content

Welcome to Geeks to Go - Register now for FREE

Need help with your computer or device? Want to learn new tech skills? You're in the right place!
Geeks to Go is a friendly community of tech experts who can solve any problem you have. Just create a free account and post your question. Our volunteers will reply quickly and guide you through the steps. Don't let tech troubles stop you. Join Geeks to Go now and get the support you need!

How it Works Create Account
Photo

Flash Tutorials


  • Please log in to reply

#1
Magosis

Magosis

    Retired Staff

  • Retired Staff
  • 190 posts
Hi, my name is Patrick, I have worked with Macromedia Flash for 3 years now, initially as a hobby but later professionally in web design. I originally began making these tutorials for perfected pastime dot com but the site went bankrupt. After that I worked several smaller design jobs. Currently I’m a phone Internet tech support agent. But if I give much more detail on that this will just turn into a rant about how I want a real I.T. job.

In the tutorials that follow you can expect to see a few things; the tutorials are starting off very basic so if you have had prior experience then you may wish to wait for some of the advanced tutorials to be written. The other thing you may not is I have abhorrent spelling and grammar, so if you see a typo let me know and I’ll fix it.

Index
Intro
Post 1 – The Intro and Index (Done)
Part One - Animation
Post 2 – Lesson I: The Tool (Done)
Post 3 – Lesson II: Tweening Animation (Done)
Post 4 – Lesson III: Frame by Frame Animation (Done)
Post 5 – Lesson IV: Using Movie Clips (Done)
Post 6 – Lesson V: Basic Scripting for Animation Effects (Done)
Post 7 – Lesson VI: Your First Project (Done)
Part Two – User Interface Programming
Post 8 – Lesson VII: Buttons
Post 9 – Lesson VIII: Player Commands and Frame Use
Post 10 – Lesson IX: Text Input and Variables
Post 11 – Lesson X: Object and Level Referencing
Post 12 – Lesson XI: Movie Clip Behavior and Properties
Post 13 – Lesson XII: Math Functions
Post 14 – Lesson XIII: Logical Statements (if, else)
Post 15 – Lesson XIV: Logical Statements (for, while)
Post 16 – Lesson XV: Key Input
Post 17 – Lesson XVI: Your First Interface
Part Three – Advanced Programming
Post 18 – Lesson XVII: Using JavaScript in Flash
Post 19 – Lesson XVIII: Exporting Variables to a Server Side Script
Post 20 – Lesson XIX: Importing Data from PHP
Post 21 – Lesson XX: Your First Game
Closing
Post 22 – After Thoughts

Thanks to the admin team for pinning this topic


Edited by Magosis, 15 November 2006 - 06:34 PM.

  • 0

Advertisements


#2
Magosis

Magosis

    Retired Staff

  • Topic Starter
  • Retired Staff
  • 190 posts
Lesson I: The Tool

The macromedia flash application is a tool for development of applets for the Macromedia flash activeX plug-in. The tool as of this documents last up date is currently on version 8.

A free 30 day all features included trial of this software can be found at: http://www.macromedi...o/?promoid=BINT

This tool is quite large however so the download may take a while, While your waiting why not read on. :)

There are 3 primary uses for macromedia flash although there are many more the key ones are:
(*) Animation
(*) Game Development
(*) Web user interfacing

The easiest of these to learn the basics of is the Animation end of the program and a grasp of this is essential for all other uses of the application.

Once the tool has been downloaded and installed, upon first opening the tool you will notice an interface much similar to that of a image editing application. Although there will be several notable differences the most important of these for your first experience will be the Timeline.

The time line is the basis of all animation. This is were you can add sequential frames to allow for an almost flip book effect or sure other animation tools (or scripting tool later) to generate the wanted effects.

Now the best way to learn is to jump right in so lets get started by making your first image. Many of you will wish to skip this step as you have used other image editors, this is not recommended as Flash reacts differently in some cases.

First we will need to click on the paint brush tool this is the primary drawing tool in Flash.

Posted Image

Now to learn how the tool renders a line lets try to draw a straight line with the pint brush tool. This is normal a difficult feat in a paint program but with macromedia’s smooth paint feature it becomes much easier.

Posted Image

Moving on, let’s erase that using the eraser tool which works the same way as in other applications.

Posted Image

Now to further illustrate this lets try to draw a circle.

Posted Image

Once you have gotten the hang of using the paint tool to draw basic shapes we will try to draw a face. Start with a circle

Posted Image

Next add lines as shown

Posted Image

We will now remove the line that is separating the head portions using the eraser tool.

Posted Image

We will now ad a nose to the head this proportions the face and allows us to judge were other features should be placed.

Posted Image

Next we need to add the eye brows to finish the proportions.

Posted Image

Now that the skeletal structure of the face is in place can add the hair. The simplest hair style to draw is the medium unkempt hair but there are many others that you could try. Once you have added the hair to the image be sure to erase any excess lines.

Posted ImagePosted ImagePosted Image

Now that you have the basic face, we can add color., using the fill tool,

Posted Image

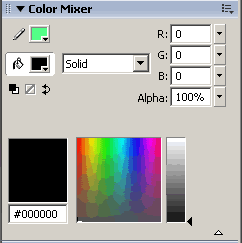
Fill each area with an appropriate color. You can change the fill color in the Color Mixer sub menu

Posted Image

or by using the quick color selector.

Posted Image

So it should look something like this.

Posted Image

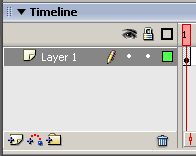
Now that you have the basics down lets try something a touch more advanced and add some shading. To add shading we will need to add a second layer to the image, for this we will need to use the time line menu.

Posted Image

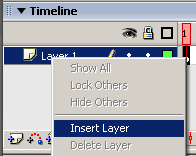
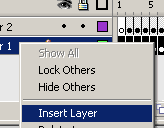
Now right-click were it says layer 1. And click on “Insert Layer”

Posted Image

You will now have two layers listed in the timeline. This time left click on layer 1 and press CTRL and C. once you have done this you will need to select the pointer tool this is the black cursor button

Posted Image

Now click on layer two and right-click anywhere in the white area on the editable document. And then click on paste in place.

Posted Image

Now change the color in the color mixer to black and lower the alpha value to 30% and click the right hand dot underneath the lock on the layer 1 line to change make the layer un-editable.

Posted Image ---- Posted Image

Now use the eraser tool, to erase the black in the area’s you do not wish to be shaded

Posted Image

And there you have it your well on your way to being an animator as the first step is always making a good picture. :tazz:

Edited by Magosis, 07 December 2005 - 02:24 PM.

  • 0

#3
Magosis

Magosis

    Retired Staff

  • Topic Starter
  • Retired Staff
  • 190 posts
Lesson 2: Tweening Animation

In Macromedia flash there is a animation rendering system called Tweening. This system attempts to automatically fill all frames along the timeline of a simple animation. This can be useful for only simple animation however because the effects generated when Tweening a complex picture or multiple objects at the same time can produce undesired effects.

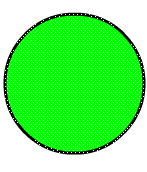
The first type of Tweening we will try is called a Shape tween this is the simpler of the two, as it does not requite grouping the images. We will start the process by drawing a circle. With the Oval auto-shape tool

Posted Image

So it should look something like this.

Posted Image

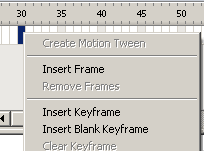
Now right click on frame 30 in the timeline. And click on Insert Keyframe.

Posted Image

At this point we need to make some changes to the image so it has something to change into through the animation. Lets change the fill color. As well as reposition the circle using the arrow keys.

Posted Image

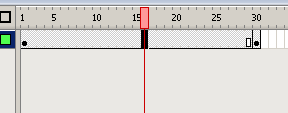
Now we can add the tween. If you look at the timeline there are two frames one large and one small. We will need to click anywhere inside the large frame.

Posted Image

Now at the bottom of the screen there is a window called the property inspector.

Posted Image

In this box we will need to set the tween type to shape.

Posted Image

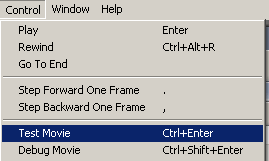
If you have done everything correctly, you have a very basic animation completed. To view the animation, you will need to click on Control and the Test Movie.

Posted Image

It should look something like this.

Posted Image

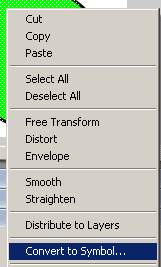
Now we will look at motion tweens although further information on these can be found in Post 5 – Lesson IV: Using Movie Clips. To begin lets left click on frame 30 in the time line and then right click on the circle on the main stage. And click on “Convert to Symbol…”

Posted Image
Posted Image

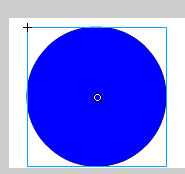
A popup window will appear be sure that the movie clip radio button is selected and press ok.

Posted Image

Now repeat this process for the first frame in the timeline.

Posted Image

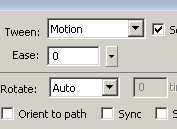
Finally click anywhere in the first larger frame of the timeline and then in the property selector change the tween to motion.

Posted Image

If you have done everything correctly, you have another very basic animation completed. To view the animation, you will need to click on Control and the Test Movie.

Posted Image

And it should look something like this.

Posted Image

Not that you have seen the difference in behaviors of tweens I recommend taking some time and playing with them. The important thing to remember is that a shape tween can have anything on its layer except symbols. While a motion tween is a tween that can only have a single symbol on the layer.

Edited by Magosis, 07 December 2005 - 04:04 PM.

  • 0

#4
Magosis

Magosis

    Retired Staff

  • Topic Starter
  • Retired Staff
  • 190 posts
Lesson 3: Frame by Frame Animation

While the tween feature is very useful there are just some things that cannot be done properly by it, this why it is important to know how to animate, by individual frames. The concept here is very easy but to make the animation look decent takes a lot of work when using this method.

If you ever attempted to make a flip-book cartoon as a child then you are familiar with the general concept of frame by frame animation. We will need some kind of starting point for our animation here so lets draw a basic stick man using the paint tool

Posted Image

He should look something like this

Posted Image

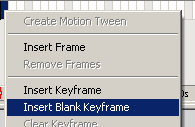
Once you have the first frame drawn right-click on frame 2 in the timeline and click Insert blank Keyframe.

Posted Image

We will now use a feature called onion-skins to allow us to have a reference for drawing the next frame. Click on the onion-skins Icon to activate it

Posted Image

This will cause a faded version of the original sick man to show on the stage. This is not going to show in the final animation but can be used as a reference.

Posted Image

We will now draw the next frame, be sure to not add to drastic of a change to the image or it will not look realistic.

Posted Image

Repeat this process as necessary adding additional Keyframe to the timeline

Posted Image

Once you have completed your animation test it be clicking on Control then test movie.

Posted Image

Play around with this a bit and see how realistic of motion you can achieve.

Posted Image

This is quite possibly the hardest part of the application to become good at so practice makes perfect and when you are comfortable with your skill move onto the next section.

Edited by Magosis, 07 December 2005 - 04:40 PM.

  • 0

#5
Magosis

Magosis

    Retired Staff

  • Topic Starter
  • Retired Staff
  • 190 posts
Lesson 4: Using Movie Clips

Macromedia Flash has a useful feature called movie clips these act as independent movies from the rest of the timeline. These Movie Clips are mainly used in applications such as games and user interface tools but they do serve a valuable purpose in the animation end of the program as well.

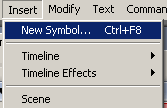
In this lesson we will make a bouncing ball. First we will need to click Insert, and then New Symbol.

Posted Image

Next the new symbol box will appear, be sure that the Movie Clip radio button is checked and press ok.

Posted Image

This will open the instance of the movie clip for editing. Since we are just making a bouncing ball lets first draw a circle with the oval tool.

Posted Image

So it will look something like this.

Posted Image

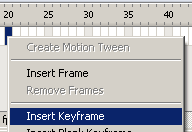
Now we will use a shape tween to make the ball move up and down. Right-click on frame 20 and click Insert Keyframe

Posted Image

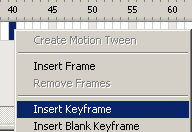
Next we will right-click on frame 40 and insert a Keyframe.

Posted Image

We will now left-click on frame 20 and press the up arrow key approximately 40 times. This will move the ball up substantially.

Posted Image

Next we add the shape tween by clicking on the time line in the first large frame

Posted Image

And setting the tween type to shape

Posted Image

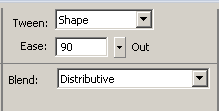
Finally to help simulate Gravity we will set the ease of the tween in the property inspector to 90

Posted Image

Now we will ad the animation for the ball falling. We will start by clicking on the timeline in the second large frame.

Posted Image

And setting the tween type to shape

Posted Image

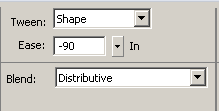
Finally to help simulate Gravity we will set the ease of the tween in the property inspector to -90

Posted Image

Now lets see how that looks by clicking on Control and then Test Scene.

Posted Image

It should look something like this:

Posted Image

We now need to go back to the main stage this can be accomplished by clicking on the blue arrow in the upper left hand side of the screen.

Posted Image

At this point we will need to add the symbol we just made to the main stage. You will need to drag it from the library menu onto the stage

Posted Image

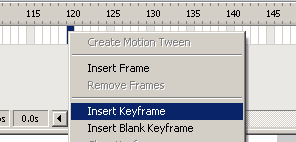
Next using the scroll bar under the timeline, scroll over to fame 120 and right-click and click on insert Keyframe.

Posted Image -- Posted Image

Now move the ball horizontally to the opposite side of the stage. After which click on the first large frame in the timeline and add a motion tween

Posted Image

Now we will view the final product by clicking on Control and Test Movie.

Posted Image

It should look something like this:

Posted Image

As with the other Lessons I recommend you spend some time and play with these features we have covered, this will allow you to get a better feel for the tool before moving onto the next lesson.

Edited by Magosis, 08 December 2005 - 01:35 AM.

  • 0

#6
Magosis

Magosis

    Retired Staff

  • Topic Starter
  • Retired Staff
  • 190 posts
Lesson 6: Basic Scripting for animation Effects

In some cases we have a movie clip that is tweened but we need it to behave differently than simply looping. To achieve this we will need to use the first elements of scripting.

When most animators hear scripting they shudder but in flash it is quite simple to use basic commands to bypass the use of difficult Frame by Frame animation.

In this we will be using the following codes

gotoAndPlay(#);

This code sends the player head to a certain frame on the current timeline and plays from there

gotoAndStop(#);

This code sends the player head to a certain frame on the current timeline and stops it there

this. gotoAndPlay(#);

This code sends the play head of the selected movieclip to a certain frame and plays it from there

this.gotoAndStop(#);

This code sends the play head of the selected movieclip to a certain frame and stops it there

The most important thing to understand when using any scripting in Flash is that scripts can be attached in two places. The first place you can attach a script is to a frame in the timeline. This can be a frame in either the main timeline or a movie clip timeline. If a frame has script in it, it will appear like this.

The codes you would attach to a timeline are

gotoAndPlay(#);
gotoAndStop(#);

The other place you can attach a script is into a movieclip object it's self. The codes you would attach to a movieclip are, these work similarly and we will look at them further in later lessons.

this. gotoAndPlay(#);
this.gotoAndStop(#);

Now the usage of this might seem a bit obscure but I can assure you that these will be very useful when animating movieclips as you can use these to have a movie clip internally loop.

As this can be a somewhat difficult concept to simply explain, lets get down to it.

First we are going to create another movie clip

Posted Image

We are going to use the oval tool once more to create a circle

Posted Image

It should look something like this

Posted Image

Now in this movie clip we are going to add a second layer as we did in the first tutorial
Posted Image

This second layer for the time being will have nothing on it

Posted Image

Selecting the first layer again by clicking on the frame that we drew the circle in

Posted Image

We are going to modify the circle with the black cursor tool

Posted Image

Use this tool to stretch the circle by clicking anywhere on the white space of the stage and then clicking and dragging on the border of it

Posted Image

The goal here is to make it look something like this.

Posted Image

We are now using F6 going to add a second frame to each layer of the timeline. This can be done by clicking the second frame of either layer and dragging to highlight the second frame of the other.

Posted Image

We then press f6 to add the new frames.

Posted Image

Here is were you finally get a bit of creative license. On the second layer of the timeline we are going to animate eyes for our little friend here these will slowly open and be animated frame by frame. Be sure for each frame you add to the second layer you also add one to the first so the body remains constant

Posted Image

We are now going to add one more frame to the animation of both layers this frame should not have any changes from the once prior

Posted Image --- Posted Image

Next on the bottom timeline, We will add a key fame using F6, six frames over from the one we just added

Posted Image

From this frame we will count another six frames over and add another key frame six more over.

Posted Image

highlighting the second of the larger frame sets on the first layer

Posted Image

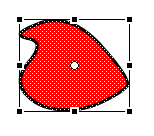
we will use the transform tool

Posted Image

to vertically stretch the body of our creation
Posted Image

Next we will once again highlight the second large frame set

Posted Image

and set the frames to a shape tween.

Posted Image

We will then do this for the second large frame set

Posted Image

again changing them to a shape tween.

Posted Image

Next we will click on the timeline, on the second layer above the last frame of the animation and press F5.

Posted Image---Posted Image

We will now click controls and then test scene it should look something like this

Posted Image

Not exactly the picture of smooth animation, this is were the scripting comes in. We are now going to add another layer to this animation. This layer will be solely used for the script associated with the MovieClip time line.
Posted Image

We will then click and drag the layer we just created to be the bottom layer

Posted Image---Posted Image---Posted Image

we will now on Layer 3 highlight the frame directly below the first large frame set

Posted Image

also at this point be sure to note the frame number, in the case of our example the frame number is 10

Posted Image

now on layer three, click on the final frame of the animation.

Posted Image

Here we will create a key frame by pressing F6.

Posted Image

Now we will add the script to this first we will need to expand the actions interface. This can be done by clicking on the arrow next to where it says actions above the property inspector.

Posted Image

now that the actions tool is open we will click inside the white space of the actions tool, and a text cursor will apear.

Posted Image

in this box we will type in "gotoAndStop( " the frame number we took note of from the earlier step, in the case of our example this was 10 and then ");" looking something like this

Posted Image

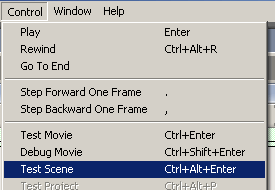
now if we go to controls and click on test scene
Posted Image

it should look like this.

Posted Image

***Refresh the page to see this animation***

Alternatively if you click on the final frame of Layer 3 and change "gotoAndStop" to "gotoAndPlay"

Posted Image

You will achieve an effect that looks like this.

Posted Image

***Keep in mind I am limited to displaying GIF's here so there is a end point as I cannot employ swf ActionScript in a GIF***

Well this is yet another lesson under your belt. Congrats, But as always I encourage you to play with what you have learned here. The next lesson will finaly be your first real flash project. So make sure you are comfortable with all of the tools we have seen here before moving on.

Edited by Magosis, 01 August 2006 - 01:18 PM.

  • 0

#7
Magosis

Magosis

    Retired Staff

  • Topic Starter
  • Retired Staff
  • 190 posts
Lesson VII: Your first project

In this lesson we are going to look at animation process as well you will begin your first project. We will also be looking at how to use scenes in an animation to organize our project and how to use folders in the library to do the same.

When one starts a project a bit o forward planning is often required. In this case I recommend drawing a storyboard and possibly writing a scrip, if the course of the animation is textual or verbal.

Click here, to download a story board template I have made. This is a useful too for many people in the planning stage. Alternatively you may use flash or another image editing program to emulate this in a digital environment. Remember at no time is this pre-planning written in stone, however as you are creating the piece you may find some things not working while others working exceptionally well, allow for this and adapt to it.

Whenever working on a project of any scale don't rush. All too often when w are proud of our work we want to rush and show it off. When you rush you get sloppy. This is no to say there are not short cuts and we have already explored a few o these, but when in dought do it frame by frame.

Now onto organization, this is likely my biggest failing as an animator but I still will show you the proper way to organize animation.

Firstly scenes are used much as they are in movies to separate changes in location or dramatic camera shifts these will allow you to keep smaller more manageable timelines and layers if you break up large changes in scene or perspective into multiple scenes.

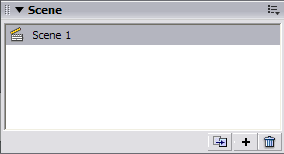
To bring up the scene menu hold shift and press F2. A menu will appear much like this.

Posted Image

By default your first scene in named "Scene 1" you can double click on he scene name to change it.

Below the scene list there are a number of options they are

Duplicate Scene

Posted Image

Add Scene

Posted Image

And Delete Scene

Posted Image

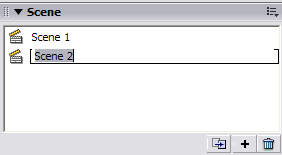
To add a sene obviously click Add Scene, and the new scene will appear in the scene list with a name like "Scene x" were x is a number based on how many scenes have been made. This scene will appear as a blank timeline and stage much like if you had started a new document.

Posted Image

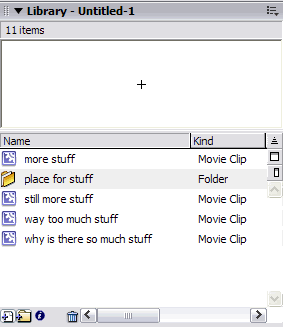
Some times when multiple symbols are being used the library can get quite cluttered. This can be frustrating if you are looking for a certain object. A method to avoid this and manage your work better over multiple sittings is to sort the library object by using folders

Press F11 to bring up the library and notice in the bottom left of the library window, there are some icons.

Posted Image

The icon we are concerned with here is the, Add Folder icon.

Posted Image

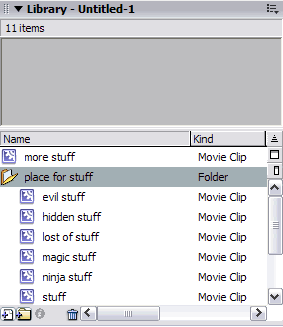
Click on add folder will add a new folder and prompt you to name it, to the library you can drag symbols from the library into this folder

Posted Image

To expand or collapse this folder just click on the folder icon next to it's name in the library.

Posted Image Posted Image

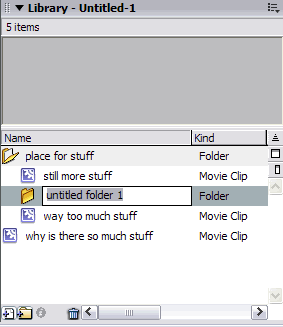
You can add folders inside of others by clicking on the folder you wish to be the parent

Posted Image

And then pressing the add folder button.

Posted Image

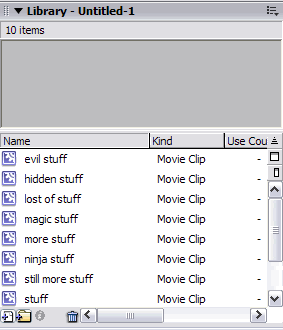
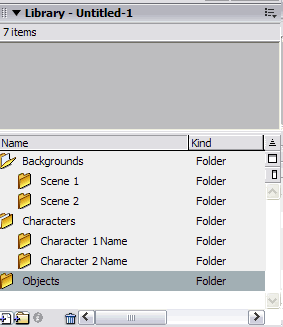
Generally when animating is I good to sort movie clip objects by the following system, or something similar

Posted Image

Now that we have looked at the basics of organization these is on more aspect we need to look into before we can get to work. We are now going to be looking at stage size and background color.

Firstly you will need to click on the black cursor tool

Posted Image

Now click anywhere on the stage with no content

The properties inspector should change to look like this

Posted Image

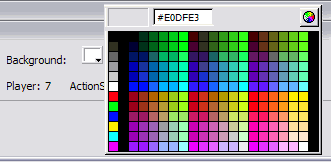
Clicking on the color selector box next to background

Posted Image

Will bring up the standard color selector menu to change the background color just select a new one

Posted Image

To change stage size click on the size/document settings button

Posted Image

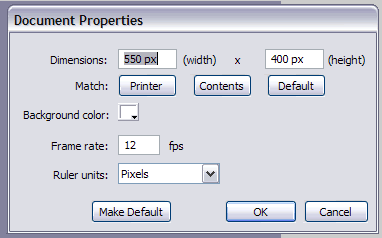
A new window will appear

Posted Image

From this window you can change the numeric values of the document size as well as the frame rate.

When you have the settings you like press o.k.

We are now ready to start your first project. As I mentioned earlier an story board and script of some kind will help you flech out your initial ideas. Your first project will be to create a scene with the following specifications:

600 pixels by 600 pixels in size
24 frames per second
At least 2 distinct original characters
At least one object they interact with
At least one scene change
Should have © Your name – today's date
Should be posted some were for others to see (not required but I can't give you advice if it's not)

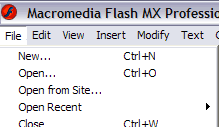
When you are done your animation you will want to export it to a .SwF file these files are the web viewable flash format. To do this, click on file in the upper left of the screen.

Posted Image

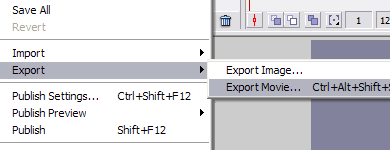
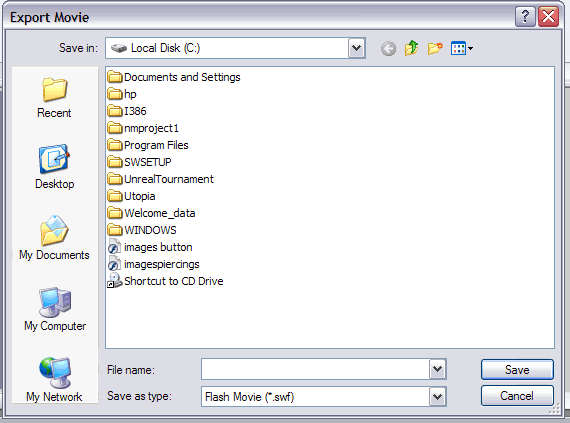
Then click on export, and then export movie.\

Posted Image

It will ask you to save it under a file name so name it appropriately

Posted Image

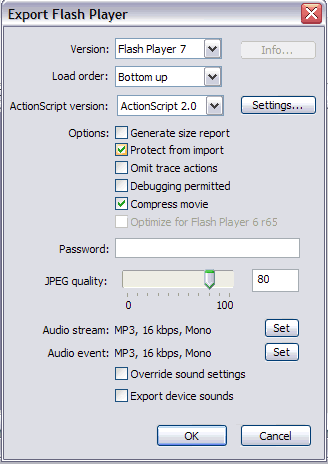
Finally it will ask you to select your export settings,

Posted Image

For the most part we want to leave these at their defaults for now, except make sure there is a check mark next to "Protect from Import" this will help stop people from stealing your work, if you put it on the web.

Posted Image

Finally click ok to save the .SwF file

Keep in mind an SwF is not an editable file you will also want to be saving your work periodically by holding control and pressing the s key. This will save it as a .Fla file that is editable.

This concludes the basic animation part of my tutorial. Before moving on o the next section it may be good to review what we have gone over so far as practice is a much better teacher than I could be.

Edited by Magosis, 15 November 2006 - 06:31 PM.

  • 0

#8
Magosis

Magosis

    Retired Staff

  • Topic Starter
  • Retired Staff
  • 190 posts
Post 8 – Lesson VII: Buttons

Edited by Magosis, 07 December 2005 - 02:03 PM.

  • 0

#9
Magosis

Magosis

    Retired Staff

  • Topic Starter
  • Retired Staff
  • 190 posts
Post 9 – Lesson VIII: Player Commands and Frame Use

Edited by Magosis, 07 December 2005 - 02:04 PM.

  • 0

#10
Magosis

Magosis

    Retired Staff

  • Topic Starter
  • Retired Staff
  • 190 posts
Post 10 – Lesson IX: Text Input and Variables

Edited by Magosis, 07 December 2005 - 02:05 PM.

  • 0

Advertisements


#11
Magosis

Magosis

    Retired Staff

  • Topic Starter
  • Retired Staff
  • 190 posts
Post 11 – Lesson X: Object and Level Referencing

Edited by Magosis, 07 December 2005 - 02:07 PM.

  • 0

#12
Magosis

Magosis

    Retired Staff

  • Topic Starter
  • Retired Staff
  • 190 posts
Post 12 – Lesson XI: Movie Clip Behavior and Properties

Edited by Magosis, 07 December 2005 - 02:08 PM.
  • 0

#13
Magosis

Magosis

    Retired Staff

  • Topic Starter
  • Retired Staff
  • 190 posts
Post 13 – Lesson XII: Math Functions

Edited by Magosis, 07 December 2005 - 02:09 PM.

  • 0

#14
Magosis

Magosis

    Retired Staff

  • Topic Starter
  • Retired Staff
  • 190 posts
Post 14 – Lesson XIII: Logical Statements (if, else)

Edited by Magosis, 07 December 2005 - 02:09 PM.
  • 0

#15
Magosis

Magosis

    Retired Staff

  • Topic Starter
  • Retired Staff
  • 190 posts
Post 15 – Lesson XIV: Logical Statements (for, while)

Edited by Magosis, 07 December 2005 - 02:09 PM.
  • 0


Similar Topics

0 user(s) are reading this topic

0 members, 0 guests, 0 anonymous users

As Featured On:

Microsoft Yahoo BBC MSN PC Magazine Washington Post HP