OK we will go through this step by step.
Step 1.The bootable USB flash drive that you made earlier is the one we are using.
Insert it in the good computer.
Click on
My Computer then click on the
USB drive.(removable drive)
You should see:
Folders:
boot
optFiles:
syslinux.cfg
vesamenu.c32If you do not see these files let me know. If you do see them keep the USB drive in the good computer and go on to
step.2Step 2.Right click the following download link and select "save link/target as":
xPUD_MBRfix Save the file to your USB drive.
Click on
My Computer and then click on the
USB drive (removable)
You should see:
Folders:
boot
optFiles:
syslinux.cfg
vesamenu.c32
xPUD_MBRfixIf you
do not see all of these let me know.
If you do then right click on the
Safely remove hardware icon in your system tray select your USB mass storage device to
Stop When it says it is safe to remove, remove it. Go on to
step 3.Step 3.- Insert the USB drive in the ailing computer. Turn on the ailing computer and push F12 to select boot up on USB device.
- Boot the ailing computer to xPUD
- Click on the folder that represents your USB drive (sdb1 ?)
- Double click on xPUD_MBRfix to execute the script
- When asked "what boot code do you want to write?" type m for XP boot code and press enter.
- When asked "to which one do you want to write a new mbr?" type sda and press enter.
- Type y and press enter to confirm your choices.
- Press enter to close the window.
- Upon finishing, its actions will produce a report (mlog.txt)
- Post that report in your next reply by using FireFox on the xPUD desktop
- Make sure you are connected to the internet via ethernet cable or setup the wireless to go online.
- Click Menu, click Web Browser firefox
- Type www.geekstogo.com in the address bar and hit ENTER
- Click on Forums, sign in, click on your topic and go to add reply.
- Click on use Full Editor
- Type a message in and then below the input box click the button Click to Attach Files
- Search to the flash drive for the file, mlog.txt, click it to upload it.
- Then click Add to post.
- Finally click Add reply.
- Click on Home
- Click on Power Off
- Click on Turn Off
- When the ailing PC is shutdown remove the USB flash drive.
Step 4.Once done, restart and test the ailing computer to see if it can boot up into normal mode.
If not give me a status on this run. When it boots upDownload and Install CombofixDownload
ComboFix from one of the following locations:
Link 1Link 2VERY IMPORTANT !!! Save ComboFix.exe to your
Desktop *
IMPORTANT -
Disable your AntiVirus and AntiSpyware applications, usually via a right click on the System Tray icon. They may otherwise interfere with our tools. If you have difficulty properly disabling your protective programs, refer to this link
here - Double click on ComboFix.exe & follow the prompts.
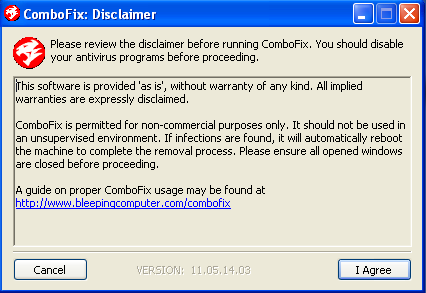
- Accept the disclaimer and allow to update if it asks

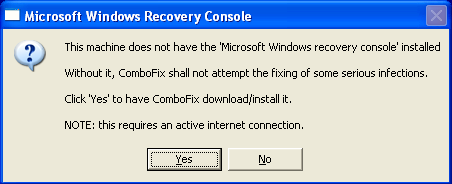
- As part of it's process, ComboFix will check to see if the Microsoft Windows Recovery Console is installed. With malware infections being as they are today, it's strongly recommended to have this pre-installed on your machine before doing any malware removal. It will allow you to boot up into a special recovery/repair mode that will allow us to more easily help you should your computer have a problem after an attempted removal of malware.
- Follow the prompts to allow ComboFix to download and install the Microsoft Windows Recovery Console, and when prompted, agree to the End-User License Agreement to install the Microsoft Windows Recovery Console.
**Please note: If the Microsoft Windows Recovery Console is already installed, ComboFix will continue it's malware removal procedures.

- Once the Microsoft Windows Recovery Console is installed using ComboFix, you should see the following message:

- Click on Yes, to continue scanning for malware.
- When finished, it will produce a report for you.
- Please post the "C:\ComboFix.txt" for further review.
Notes:
1. Do not mouse-click Combofix's window while it is running. That may cause it to stall.
2. Do not "re-run" Combofix. If you have a problem, reply back for further instructions


Can it be fixed .


