Jump to content

Welcome to Geeks to Go - Register now for FREE

Need help with your computer or device? Want to learn new tech skills? You're in the right place!
Geeks to Go is a friendly community of tech experts who can solve any problem you have. Just create a free account and post your question. Our volunteers will reply quickly and guide you through the steps. Don't let tech troubles stop you. Join Geeks to Go now and get the support you need!

How it Works Create Account

Highest Reputation Content


#12367 Attention! Read Malware and Spyware Cleaning Guide before posting.

Posted by admin on 10 August 2004 - 02:44 PM

Welcome to Geeks to Go's Virus, Spyware, and Malware Removal forum

With our help, over 100,000 people have successfully removed malware from their computer! View our feedback forum to see what others are saying. Don't worry, you don't have to be a geek to remove malware. Our geeks do the technical work, and provide easy step-by-step instructions that require only basic computer skills. Our help is always free. The experts who help you are all volunteers. Some have been at this a long time, others are just reaching the end of their training (we teach malware removal too). Regardless of who helps, we're confident you'll receive some of the highest quality malware removal help available anywhere, at any price.

Step 1. Create a free Geeks to Go account


Click here to join GeekstoGo and create a free account. Before you can create a new malware removal topic, you must join. It's an easy process that involves creating a unique username, password, and submitting your email address. Your email address is only used to notify you when your topic receives replies, or if you forget your password. Alternatively, you can join by using your existing Facebook or Twitter account.


registration.png


Step 2. Check the System Architecture


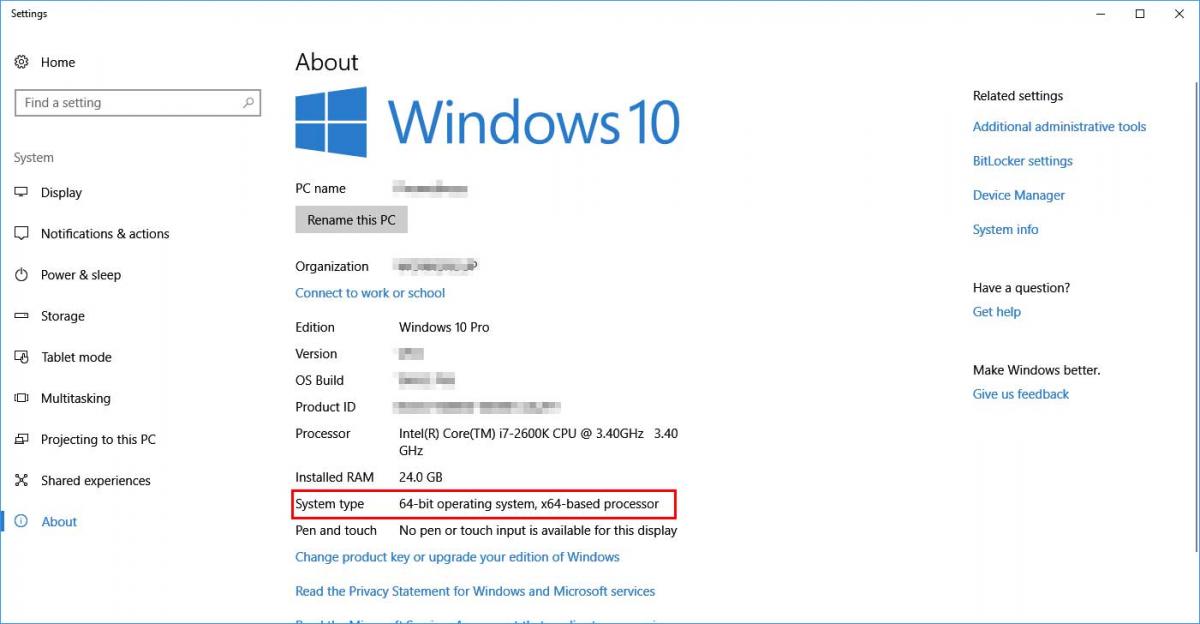
The tool we need to run has been developed in two versions, matching two different architectures. Before we ask you to run it, we need to check which one is yours: 32-bit or 64-bit. You will find detailed instructions how to do that below. Depending on that you'll have to choose the correct version of the tool!
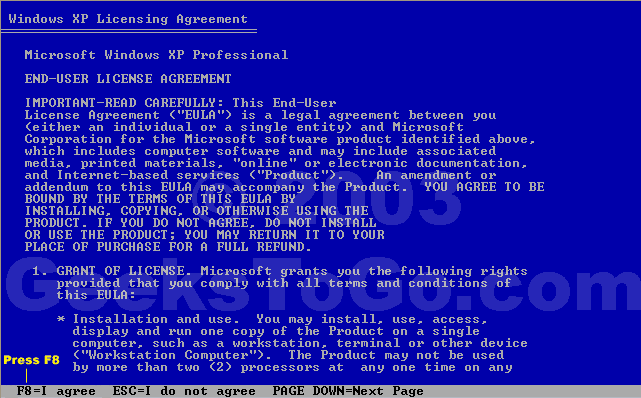
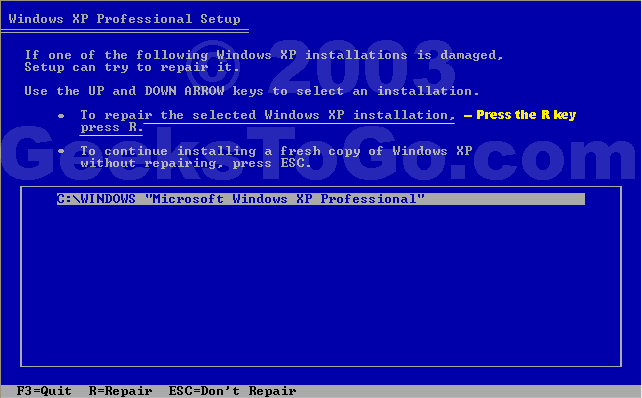

For Windows XP

Spoiler


For Windows Vista & 7

Spoiler


For Windows 8 & 8.1

Spoiler


For Windows 10

Spoiler


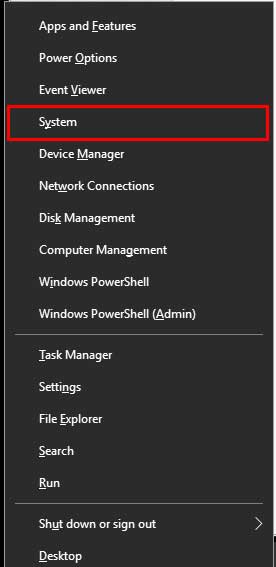
Step 3. Download and Run FRST


Farbar Recovery Scan Tool has been developed by Farbar and is updated to work with all the current Windows versions (unlike tools like HiJackThis).

Depending on your system architecture (Identified above) download the matching version from the link below:Please note that the 32-bit version will be named FRST.exe, while the 64-bit will be named FRST64.exe.

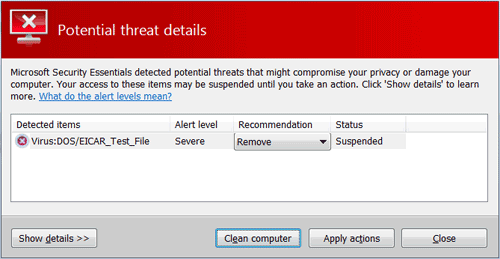
The Anti-Virus products may give false detections stating that the tool is harmful - please ignore them and in those cases allow the download to complete.

Save the tool to your Desktop (this is very important!)
If you don't know how to do it, please consult the Spoiler below.

Spoiler


Run the tool by right-clicking on its icon and select Run as administrator as presented below.
 

frst-run.png


If you're running Windows XP - ignore that and instead just double-click on its icon.

Windows 8 & 8.1 users may face another warning from the Windows SmartScreen Protection - please click More information and Run.

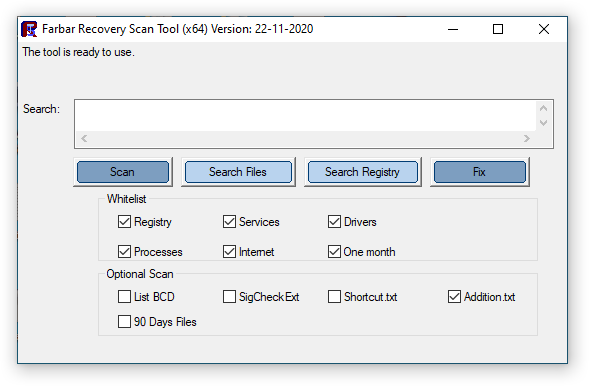
You will be presented with a window like below:
 

frst-console.png


First make sure that the Addition box is checked. If it's not, check it.

Then please press Scan button. You will see that the progress bar is moving.


Upon completion a window will pop-up:
 

frst-scanfrst.png


Please press OK, right after that a second window will appear:
 

frst-scanaddition.png


Again please press OK.


After that two notepad windows will be opened (one under another). Leave these open for now, you will need them both shortly.

Step 4. Create a new topic, describe your issue(s)

Click here to start a new topic in the Virus Spyware, and Malware removal forum.
  • Be descriptive.
  • Ask clearly.
  • Be precise and informative about your problem.
  • Describe any symptoms fully.
Often with modern malware, diagnostic logs do not tell the whole story. Including infection names, file names, or error messages will aid the person helping. Also, include any removal tools or steps you've that you've used to try and remove the infection (if any). If known, it would be helpful to know how the infection was acquired. Offer a thorough, detailed description, and you'll get a fast, accurate reply.
 

startnewtopic.png


Step 5. Copy and paste the FRST logs from step 3

Please only copy and paste your logs as described below, unless asked to attach it.

How to copy and paste:
  • Go to the notepad window containing FRST.txt.
  • Right-click with your mouse or touchpad.
  • Choose Select All from the shortcut menu.
  • Right-click again, then choose Copy from the shortcut menu.
  • Go the window where you are typing your new topic. Select an area after the text.
  • Right-click and select Paste from the shortcut menu.
  • The FRST.txt log will be pasted after your text.
Please repeat this procedure for Addition.txt.


workcopy.png


Step 6. Review and submit your topic

If you're satisfied with your new topic, click the Post New Topic button. Or, to preview what your topic will look like before posting it, click the Preview Post button. You will still have an opportunity to edit your topic after posting it.

After submitting your topic please make sure that you're following it. This will keep you notified to your e-mail whenever your thread will be replied by an approved helper.

In the upper-right corner you will see a button marked red (as below):


follow2.png


If you see there unfollow.png that means you are already following this topic and there's nothing more you should do, except awaiting the reply :)
 
Otherwise, press the follow.png button and in the shown window select your notification options (Receive Instantly is recommended).


Tips for a better experience

1. Please remember, everyone here volunteers their time. Be patient, kind, and don't forget to say thanks. We understand it's stressful to have an infected computer and wish we could help everyone immediately. However, depending on the complexity of your infection, when it was posted, and other factors, it may take a couple of days for your topic to receive an initial reply.
2. Please follow your thread to a conclusion. When finished, we will post instructions and advice on preventing future infections. If you fail to follow your topic to conclusion, your system may not be completely clean, and it will be more vulnerable to future infections.
3. If known, the "Topic Title" should contain the name of the infection. Your first, and best opportunity to attract a qualified expert is a quality title.
4. Please stay with your original topic when posting follow ups. Only post your topic once.
5. Do not create topics at multiple forums. It will confuse you, and create extra work for us. If you do this your topic will be closed.
6. If you enjoyed your experience, and would like to learn more about removing malware and spyware, join GeekU our malware removal training program (free).


Last Updated: March 7, 2015
  • 61


#1834531 OTL Tutorial - How to use OldTimer ListIt

Posted by admin on 20 May 2010 - 04:24 PM

OTL.jpg

OTL is a flexible, multipurpose, diagnostic, and malware removal tool. It also has some curative ability.


*************************


Introduction

 
Donation Information

OTL is FREE. However, it is the result of significant investments of time and effort by OldTimer. The program contains many thousands of lines of code. OldTimer also spends countless hours offering support to forum helpers and their malware victims. If you find his OTL tool helpful, and would like to support his efforts, buy him a cup of coffee. Or, simply click the Paypal button below:


x-click-but04.gif

 
Tutorial Information

This tutorial has been created by and is the property of emeraldnzl. Please contact emeraldnzl prior to quoting from this tutorial, to obtain permission for using it at other sites, and for information on any pending updates. Also note this tutorial was originally authored to offer guidance to helpers offering malware removal assistance at various forums.

Note: This is the master copy of the OTL Tutorial. If hosting this tutorial by permission at another site check the date at the bottom to verify that you have the latest version.


Important note!: While OTL is primarily a diagnostic tool, it has advanced removal abilities. If you don't understand the instructions in this guide, please seek assistance from an expert listed in one of the forums below. Use special caution when creating any scripts. Improper use can result in data loss, or an unbootable system.

Translations

This OTL tutorial is offered in mutiple languages (links may leave this site).
English:

French:

Table of contents

  • Introduction
  • Download Links
  • Output
  • Standard Scan Areas
  • Example Output
  • Processes
  • Modules
  • Services
  • Drivers
  • Standard Registry
  • Internet Explorer
  • Firefox
  • Chrome
  • O1 Hosts File
  • O2 Browser Helper Objects
  • O3 Internet Explorer Toolbars
  • O4 Automatic Start up Entries
  • O6 Local Machine Policies
  • O7 User Policies
  • O8 Internet Explorer Context Menu
  • O9 Internet Explorer buttons/Tools menu
  • O10 Layered Service Providers
  • O12 Internet Explorer Plugins
  • O13 Internet Explorer Default prefix
  • O15 Internet Explorer Trusted Zones
  • O16 ActiveX objects
  • O17 Transmission Control Protocol
  • O18 Extra Protocols
  • O19 User Style Sheet
  • O20 AppInit_Dills/Winlogon Notify
  • O21 ShellServicObjectDelayLoad
  • O22 SharedTaskScheduler
  • O24 Windows Active Desktop Components
  • O27 Image File Execution Options
  • O28 Shell Execute Hooks
  • O29 Security Providers
  • O30 Lsa
  • O31 SafeBoot
  • O32 Autorun files on drives
  • O33 MountPoints2
  • O34 BootExecute
  • O35 shell spawning values
  • O36 appcert dlls
  • O37 file associations
  • O38 session manager\subsystems
  • Pre-defined Custom Scan Command Example
  • Custom Scans - Standalone Commands
  • Quick Reference of available Directives & Commands
  • :processes
  • :OTL
  • :Services
  • :Reg
  • :Files
  • :Commands
  • Switches
  • Commands/Switches
  • CleanUp

What it will work with

OTL has 32bit and 64bit functionality. It will work with all Windows OS NT and later, that is, Operating Systems from 2000 through to Windows 7.

It does not work with Windows 9x machines.

Note: The public version of the OTL tool is no longer being updated or maintained. While OTL will scan and work with Windows 8 it has not been designed to take into account any changes made since Windows 7. Care should be exercised in interpretation and fixing when working with Windows 8 or above.


Diagnosis

Generally OTL is used as an initial diagnosis tool at the start of a problem analysis. It is helpful not only in the identification of malware but also in telling you some useful information about the user's computer. However, especially when another tool has been used as a starter, OTL can be used as a follow up tool to add to the understanding of a machine's infection and allow for fixes that might otherwise be risky or onerous in their preparation and application. One of OTL's greatest strengths is its ability to perform custom scans for any files or registry data. As malware continues to find new ways to infect systems, OTL is not required to be updated to identify it. Simply implementing a new custom scan for the specific information needed is all that is required. You can see where this is currently being utilized in the G2G Malware and Spyware Cleaning Guide. As the malware runs its course, if it becomes obsolete and is no longer a threat, the custom scans can be removed and new ones implemented if necessary. Many user's develop their own lists of custom scans to deliver the exact information that they wish to see regarding a system.

Fixes

OTL has a wide range of directives that can be used both to manipulate the computer's processes and to fix problems you have identified.

In addition there are a number of switches that can be used both for diagnostic purposes and for malware removal.

Cleanup

OTL has a CleanUp feature that will automatically remove many of the tools that are commonly used in malware removal from the user's machine. This function can be used in conjunction with your prevention speech.

Preparation for use

Nowadays malware will often interfere with the tools we use. Like many other tools OTL.exe can be renamed to say OTL.com if malware has blocked the exe name.

OTL does not create a registry backup so unless ERUNT or another backup program is in use you are relying on System Restore if a problem develops. With the types of infections prevalent nowadays it is wise to have a fall back position. Installation of the Recovery Console is recommended.

You do not need to tell the user to turn wordwrap off in Notepad. OTL will do that for them. If wordwrap is on, it will be reset to its original setting when you do the cleanup but you need to use OTL's cleanup function.

As for hidden files, OTL reads the current status when it starts up and makes everything visible so it can scan. When a cleanup is done it will look to see if it had to make any changes to the settings and if necessary revert them back to what they were. This happens no matter how many times OTL was run in between the first run and the cleanup run.

Running OTL

A user will be instructed to download OTL to the desktop. From there it is a simple matter to double click the OTL icon to run it. The OTL icon looks like this


OTLicon-1.jpg

 
Once OTL is opened the user is presented with a console looking like this:
 

OTLv3.1.5.0.gif

 
Looking at an example canned below you will see how the user can configure OTL to carry out the scans that a forum helper wants:
 

[list]
[*]Download [url=http://oldtimer.geekstogo.com/OTL.exe][b][color=#FF0000]OTL[/color][/b][/url] to your desktop.
[*]Double click on the icon to run it (for Vista and above, right click and select "Run as administrator"). Make sure all other windows are closed and to let it run uninterrupted.
[*]When the window appears, underneath [u][b]Output[/b][/u] at the top change it to [b]Minimal Output[/b].
[*]Under the [b]Standard Registry[/b] box change it to [b]All[/b].
[*]Check the boxes beside [b]LOP Check[/b] and [b]Purity Check[/b].
[*]Click the [u]Run Scan[/u] button. Do not change any settings unless otherwise told to do so. The scan wont take long.
[list]
[*]When the scan completes, it will open two notepad windows. [b]OTL.Txt[/b] and [b]Extras.Txt[/b]. These are saved in the same location as OTL.
[*]Please copy [b](Edit->Select All, Edit->Copy)[/b] the contents of these files, one at a time, and post it with your next reply.
[/list]
[/list]

Once OTL has completed its scans it will save notepad copies of the scans in the folder that OTL was started from. In the first scan both an OTL.txt log and an Extras.txt log will be produced. In subsequent scans, unless instructed to produce an Extras log, OTL will only produce an OTL log.

A copy of an OTL fix log is saved in a text file at <systemdrive:\_OTL\MovedFiles. In most cases this will be C:\_OTL\MovedFiles
Direct Download Links

Download links. The latest version of OTL can be downloaded from http://oldtimer.geekstogo.com/OTL.exe or www.itxassociates.com/OT-Tools/OTL.exe

In addition, for users that cannot run executables. You can now download OTL either as a .com, or a .scr file.

Links:
http://oldtimer.geekstogo.com/OTL.com
http://oldtimer.geekstogo.com/OTL.scr

or:
www.itxassociates.com/OT-Tools/OTL.com
www.itxassociates.com/OT-Tools/OTL.scr

Note: When using these links, use Internet Explorer to download. If using Firefox, you should right-click and use "Save link As". Otherwise, on some systems, FF attempts to open the file as a script and just a bunch of gibberish is displayed.


Header

Here is an example of a header:


OTL logfile created on: 16/09/2009 12:11:33 PM - Run 1
OTL by OldTimer - Version 3.0.14.0 Folder = C:\Documents and Settings\John Doe\Desktop\Geekstogo
Windows XP Home Edition Service Pack 3 (Version = 5.1.2600) - Type = NTWorkstation
Internet Explorer (Version = 8.0.6001.18702)
Locale: 00000C09 | Country: Australia | Language: ENA | Date Format: dd/MM/yyyy

494.80 Mb Total Physical Memory | 154.25 Mb Available Physical Memory | 31.17% Memory free
1.13 Gb Paging File | 0.74 Gb Available in Paging File | 65.64% Paging File free
Paging file location(s): C:\pagefile.sys 744 1488 [binary data]

%SystemDrive% = C: | %SystemRoot% = C:\WINDOWS | %ProgramFiles% = C:\Program Files
Drive C: | 37.26 Gb Total Space | 19.84 Gb Free Space | 53.25% Space Free | Partition Type: NTFS
Drive D: | 7.58 Gb Total Space | 0.00 Gb Free Space | 0.00% Space Free | Partition Type: UDF
Drive E: | 22.20 Mb Total Space | 0.00 Mb Free Space | 0.00% Space Free | Partition Type: CDFS
F: Drive not present or media not loaded
G: Drive not present or media not loaded
H: Drive not present or media not loaded
I: Drive not present or media not loaded

Computer Name: YOUR-4DACD0EA75
Current User Name: HP_Administrator
Logged in as Administrator.

Current Boot Mode: Normal
Scan Mode: Current user
Include 64bit Scans
Company Name Whitelist: On
Skip Microsoft Files: On
File Age = 14 Days
Output = Standard
Quick Scan

A proper perusal of this information can save you time in the long run.

Description by line


First line: tells you what date the log was created on, what time of day and what run it was.

Note: the date will be shown in the format set by the user in Control Panel.

Sometimes a user will mistakenly post an old log. The information in this line will alert you to that and you should ask for a new log with current information.

Second line: shows you the version number and where OTL has been saved to. The version number is particularly important. An old version may not have the most up to date functionality and may lead you to the wrong conclusion when assessing a log. Equally the location may be relevant, particularly if it is saved somewhere other than the desktop.

Third line: shows you the version of Windows that is on the machine, also the type of file system. Very helpful when determining whether other tools you might use are compatible with the user's computer.

Fourth line: gives you the version of Internet Explorer. IE8 can cause problems on some machines.

Fifth line: tells you the country, language and date format the OS is using. Can be useful in preparing replies. The TLA (three letter acronym) ENZ in the example represents English New Zealand.

Sixth line: tells you the amount of RAM installed on the machine together with the available physical memory and percentage of free memory. Often this can help explain a machines symptoms.

Note: The number shown may not reflect the hardware position the user believes is present. RAM reported may appear lower than what is actually on the machine. This can happen when the machine cannot actually access all the RAM it has. Possibilities include faulty RAM or Motherboard slot problem or something preventing the BIOS recognising it (e.g. BIOS may need to be upgraded). Also, for 32 bit systems with more than 4GB of ram installed, the maximum amount reported will only be 4GB. This is a limitation on 32-bit applications.

Seventh & eighth lines: Paging file size and paging file space available then Paging file location(s) and how much data is in pagefile.sys. These two lines may alert you to problems with memory allocation.

Note: One thing you might see is the figure reported in the log as larger than what it is on disk. This is because the amount shown in the log is the maximum amount that Windows will/can increase it to if needed.

Ninth line : tells you where the systems drive is operating from, where system root is located and where the program files folder is located.

The next few lines: tell you what drives are on the machine, their size, and how much free space there is. The partition type is also shown (NTFS, FAT, etc). This can be important. You might find a situation where very little free space remains on a hard drive (under 15% free for the system drive is less than optimum). This can impact the ability of tools to run. If free space is very low, say under 5%, then there is a chance that the computer will become unbootable when you run a tool. OTL will only report drive information for drives that are present and loaded with media.

The next line tells you the name of the computer, the current user and what level they are logged in as. This can alert you to whether the user has the appropriate permission rights.

Following that there is another group of lines that tell you the boot mode of the computer, whether only the current user settings or all the settings for all users have been included, whether 64-bit scans were included (on 64-bit OSs only), whether or not the Company Name Whitelist was used, whether or not all MS Files have been filtered out of the output and the file age (how many days back have been picked up in the file scans) shown in the log.

OTL adds notations to certain log entries:

[2008/01/20 21:52:15 | 01,216,000 | ---- | M - the last character inside the brackets will either be M or C standing for Created or Modified.

All of the scans except the Files Created scan and the Files Created No Company Name scans will show the last modified date of the files. The two Created scans will show the file or folder's created date. A lot of malware will adjust the modified date to try and hide or blend in with other files or folders so seeing the created date helps in determining potential malware. If the file or folders shows a modified date in 2003 but was created in 2010 then it is an indication that it should be looked at a bit more closely. Look at the created scans very closely because they tend to quickly point out malware.

[2010/03/15 18:25:02 | 1609,916,416 | -HS- | M] () -- C:\hiberfil.sys - the four designators after the file size can be RHSD and stand for:

R - Readonly
H - Hidden
S - System
D - Directory

SRV - (NMSAccessU) -- C:\Program Files (x86)\CDBurnerXP\NMSAccessU.exe () - denotes that there is not a company name. The company name will appear inside the trailing parenthesis. Most malware will not have a company name (but some put one in there in an attempt to hide) but not all files without a company name are bad as this example shows.

[2009/03/10 15:54:00 | 00,000,000 | ---D | M - this shows a Directory (D) that was Modified (M) on 2009/03/10.
In this case the example is a Directory and the date shown is the Modified date.

Directories will always have a file size of zero as this example shows. If it was a file then there would not be a D in that portion and the size of the file would normally be greater than zero although you may find files with a zero size as well, but in that case there still would not be a D value there. In this case the example is a Directory and the date shown is the modified date.

PRC - Processes
MOD - Modules
SRV - Services
DRV - Drivers
Standard Registry
IE - Internet Explorer Settings
FF - FireFox Settings
CHR - Chrome Settings
O1 Hosts File
O2 Browser Helper Objects
O3 Internet Explorer Toolbars
O4 Automatic Start up Entries
O6 Local Machine Policies
O7 User Policies
O8 Internet Explorer Context Menu
O9 Internet Explorer buttons/Tools menu
O10 Layered Service Providers
O12 Internet Explorer Plugins
O13 Internet Explorer Default prefix
O15 Internet Explorer Trusted Zones
O16 ActiveX objects
O17 Transmission Control Protocol
O18 Extra Protocols
O19 User Style Sheet
O20 AppInit_Dills/Winlogon Notify
O21 ShellServicObjectDelayLoad
O22 SharedTaskScheduler
O24 Windows Active Desktop Components
O27 Image File Execution Options
O28 Shell Execute Hooks
O29 Security Providers
O30 Lsa
O31 SafeBoot
O32 Autorun files on drives
O33 MountPoints2
O34 BootExecute
O35 - .com and .exe shell spawning values
O36 appcert dlls
O37 file associations (for .com and .exe shell spawning values)
O38 session manager\subsystemsFiles/Folder scans

Extra Registry - separate log automatically run on first OTL scan. Carries out the following scans and places the output in the Extras.txt log. This will only be automatically run the first time an OTL.exe scan is performed. After that, if you want to see this output you will need to instruct the user to select either the Use SafeList or All option in the Extra Registry group before performing the next scan:
File Associations
Shell Spawning
Security Center
Authorized Applications (if running on a non-Vista OS)
Vista Firewall Rules (if running on a Vista or above OS)
Uninstall List
Event Viewer (last 10 error messages in each Event Viewer log)There are two ways that you can ask the topic starter for the Standard Scans to be presented, Standard Output or Minimal Output (selected on the toolbar). Further you can use the SafeList (default option) or All option for all of the Standard Scans (selected within the particular scan group).

Note: With the Standard output the file date\times are included at the beginning of the line while with the Minimal output only the file name/path and company name are included. For the Processes, Modules, Services, Drivers, and File scans the output will be sorted by file date, but with any custom scans the output will be sorted by location and file name. On 64-bit OSs, the 64-bit items will be listed first in the output with the 32-bit items afterward within the grouping.

The Safe List is a list of 600+ (currently) Microsoft files that are deemed safe which will be filtered out of all scans if the scan includes a Safe List option and that option is chosen for the scan. Choosing the All option for any of these scans will turn the filter off and the output will include all items for that scan.

Note 2: You can customize the scanning options however you want to meet your specific needs. For example, you might want to set the Processes and Modules scans to None and the File Age setting to 180 days. If you do change any of the settings from the default settings then make sure that the Run Scan button is used. When the Quick Scan button is pressed a set of pre-defined settings will be applied, overriding any currently set settings. The Quick Scan settings cannot be overridden. Any custom items in the Custom Scans/Fixes area will not be affected by either the Run Scan or Quick Scan selection. These items will always be run if present.


There are also some additional pre-defined custom commands that can be used in Custom Scans:

Note: Except for the HijackThisBackups command, any of the output from these scans can be copy/pasted directly into the :OTL section of a fix for removal.

hijackthisbackups - lists all the HJT backups
netsvcs - lists entries under HKEY_LOCAL_MACHINE\Software\Microsoft\Windows NT\CurrentVersion\Svchost - netsvcs
msconfig - lists entries under HKEY_LOCAL_MACHINE\software\microsoft\shared tools\msconfig
safebootminimal - lists entries under HKEY_LOCAL_MACHINE\system\currentcontrolset\control\safeboot\Minimal
safebootnetwork - lists entries under HKEY_LOCAL_MACHINE\system\currentcontrolset\control\safeboot\Network
activex - lists entries under HKEY_LOCAL_MACHINE\software\microsoft\active setup\installed components
drivers32 - lists entries under HKEY_LOCAL_MACHINE\software\Microsoft\Windows NT\CurrentVersion\Drivers32

Note: by default, each of the above pre-defined scans will use the SafeList to filter out known good files. To override this action and include all files in any of these scans include a /ALL switch at the end of the command (Example: netsvcs /all).

Processes

Shows processes running on the machine.

========== Processes (SafeList) ==========

Standard:
PRC - [2009/11/11 00:03:54 | 00,529,408 | ---- | M] (OldTimer Tools) -- C:\OldTimer Tools\OTL.exe

Minimal:
PRC - C:\OldTimer Tools\OTL.exe (OldTimer Tools)

Modules

Shows kernal modules running on the machine.

========== Modules (SafeList) ==========

Standard:
MOD - [2009/04/28 10:05:56 | 00,715,264 | ---- | M] (Agnitum Ltd.) -- c:\Program Files\Agnitum\Outpost Firewall\wl_hook.dll

Minimal:
MOD - c:\Program Files\Agnitum\Outpost Firewall\wl_hook.dll (Agnitum Ltd.)

Services

Shows services running on the machine.

========== Win32 Services (SafeList) ==========

Standard:
SRV:64bit: - [2008/01/20 21:52:15 | 01,216,000 | ---- | M] (Microsoft Corporation) -- C:\Program Files\Windows Media Player\wmpnetwk.exe -- (WMPNetworkSvc)
SRV - [2009/09/06 12:38:06 | 00,071,096 | ---- | M] () -- C:\Program Files (x86)\CDBurnerXP\NMSAccessU.exe -- (NMSAccessU)

Minimal:
SRV:64bit: - (WMPNetworkSvc) -- C:\Program Files\Windows Media Player\wmpnetwk.exe (Microsoft Corporation)
SRV - (NMSAccessU) -- C:\Program Files (x86)\CDBurnerXP\NMSAccessU.exe ()

Drivers

Shows drivers running on the machine.

========== Driver Services (SafeList) ==========

Standard:
DRV:64bit: - [2009/02/10 16:14:00 | 00,399,384 | ---- | M] (Agnitum Ltd.) -- C:\Windows\SysNative\drivers\afwcore.sys -- (afwcore)
DRV - [2009/09/28 20:57:28 | 00,007,168 | ---- | M] () -- C:\Windows\SysWOW64\drivers\StarOpen.sys -- (StarOpen)

Minimal:
DRV:64bit: - (afwcore) -- C:\Windows\SysNative\drivers\afwcore.sys (Agnitum Ltd.)
DRV - (StarOpen) -- C:\Windows\SysWOW64\drivers\StarOpen.sys ()

Standard Registry

========== Standard Registry (SafeList) ==========

Internet Explorer

========== Internet Explorer ==========

This section shows a selection of browser internet settings from a number of versions of IE.

 
Looking at some items from the above example we see:

  • IE:64bit: - HKLM\..\SearchScopes,DefaultScope = {0633EE93-D776-472f-A0FF-E1416B8B2E3A}
  • IE default main search engine Bing

    An example list of good, questionable and bad (with search providers) shows the following GUID's:
    > {0633EE93-D776-472f-A0FF-E1416B8B2E3A} - Live Search or nowadays Bing
    > {84CBB9A2-6089-4BC9-91DB-B948E1907E8B} - Google
    > {DEA6C301-90B8-4B12-9C32-2A9935D739EE} - Yahoo
    > {6A1806CD-94D4-4689-BA73-E35EA1EA9990} - Ask (questionable... may be foistware)
    > {56256A51-B582-467e-B8D4-7786EDA79AE0} - MyWebSearch - Adware MyWebSearch
  • IE - HKLM\SOFTWARE\Microsoft\Internet Explorer\Main,Default_Search_URL = http://go.microsoft....k/?LinkId=54896
    • IE default main search engine Bing
  • IE - HKLM\SOFTWARE\Microsoft\Internet Explorer\Main,Default_Page_URL = http://go.microsoft....k/?LinkId=69157
    • IE main default page MSN
  • IE - HKLM\SOFTWARE\Microsoft\Internet Explorer\Main,Default_Search_URL = http://go.microsoft....k/?LinkId=54896
    • IE default main search engine Bing
  • IE - HKLM\SOFTWARE\Microsoft\Internet Explorer\Main,Extensions Off Page = about:NoAdd-ons
    • One of the lesser known features of Internet Explorer 7 is the "No Add Ons" mode. This page is used when No Add Ons mode is in operation.
  • IE - HKLM\SOFTWARE\Microsoft\Internet Explorer\Main,Local Page =
    • local page is blank. Another setting looks like this =C:\WINDOWS\System32\blank.htm
  • IE - HKLM\SOFTWARE\Microsoft\Internet Explorer\Main,Security Risk Page = about:SecurityRisk
    • Informs the user not to browse with the current security settings because they may be harmful to the computer. See here for a list of common about: addresses
  • IE - HKLM\SOFTWARE\Microsoft\Internet Explorer\Search,CustomSearch = http://uk.red.client...fo/bt_side.html
    • Yahoo web page
      • related to Yahoo BHO
  • IE - HKCU\SOFTWARE\Microsoft\Internet Explorer\Main,Start Page = http://www.aol.co.uk/talktalk
    • indicates the default home page
  • IE - HKCU\SOFTWARE\Microsoft\Internet Explorer\Main,Search Page = http://www.google.com
    • Google is set as a main search page
  • IE - HKCU\SOFTWARE\Microsoft\Internet Explorer\Search,Default_Search_URL = http://www.google.com/ie
    • indicates Google.com/ie set as a default search engine
  • Proxy settings.
  • IE - HKCU\Software\Microsoft\Windows\CurrentVersion\Internet Settings: "ProxyEnable" = 0
    • = 0 indicates the proxy server is disabled (set value of 'ProxyEnable' equal to '1' for proxy enabled or '0' for disabled)
  • IE - HKCU\Software\Microsoft\Windows\CurrentVersion\Internet Settings: "ProxyOverride" = *.local
    • indicates that Internet Explorer will not use the proxy for all internal network addresses
  • IE - HKCU\Software\Microsoft\Windows\CurrentVersion\Internet Settings: "ProxyServer" = 0.0.0.0:80
    • Is not a regular IP but 0.0.0.0 means "every IP that the computer provides". It listens on the loopback (127.0.0.1) as well as the internal network address. Many AV applications create a proxy server to filter outgoing mail through.

Note See instruction about to how to remove items from IE in the :OTL section under Quick Reference of available Directives & Commands for fixes below.


Firefox

========== FireFox ==========

This area shows the Firefox browser internet settings.


FF - prefs.js..extensions.enabledItems: {CAFEEFAC-0016-0000-0007-ABCDEFFEDCBA}:6.0.07
FF - prefs.js..extensions.enabledItems: {CAFEEFAC-0016-0000-0012-ABCDEFFEDCBA}:6.0.12
FF - prefs.js..extensions.enabledItems: {CAFEEFAC-0016-0000-0013-ABCDEFFEDCBA}:6.0.13
FF - prefs.js..extensions.enabledItems: {CAFEEFAC-0016-0000-0014-ABCDEFFEDCBA}:6.0.14
FF - prefs.js..extensions.enabledItems: {CAFEEFAC-0016-0000-0015-ABCDEFFEDCBA}:6.0.15
FF - prefs.js..extensions.enabledItems: [email protected]:1.0
FF - prefs.js..extensions.enabledItems: {20a82645-c095-46ed-80e3-08825760534b}:1.1
FF - prefs.js..extensions.enabledItems: {ABDE892B-13A8-4d1b-88E6-365A6E755758}:1.0
FF - prefs.js..extensions.enabledItems: {B13721C7-F507-4982-B2E5-502A71474FED}:2.2.0.102
FF - prefs.js..extensions.enabledItems: {972ce4c6-7e08-4474-a285-3208198ce6fd}:3.0.14
FF - prefs.js..network.proxy.no_proxies_on: "localhost"
FF - HKLM\software\mozilla\Firefox\Extensions\\{20a82645-c095-46ed-80e3-08825760534b}: c:\WINDOWS\Microsoft.NET\Framework\v3.5\Windows Presentation Foundation\DotNetAssistantExtension\ [2009/06/23 22:50:00 | 00,000,000 | ---D | M]
FF - HKLM\software\mozilla\Firefox\Extensions\\[email protected]: C:\Program Files\Java\jre6\lib\deploy\jqs\ff [2009/03/10 15:54:00 | 00,000,000 | ---D | M]
FF - HKLM\software\mozilla\Firefox\Extensions\\{ABDE892B-13A8-4d1b-88E6-365A6E755758}: c:\program files\real\realplayer\browserrecord\firefox\ext [2009/09/06 17:41:17 | 00,000,000 | ---D | M]
FF - HKLM\software\mozilla\Mozilla Firefox 3.0.14\extensions\\Components: C:\Program Files\Mozilla Firefox\components [2009/09/23 09:12:35 | 00,000,000 | ---D | M]
FF - HKLM\software\mozilla\Mozilla Firefox 3.0.14\extensions\\Plugins: C:\Program Files\Mozilla Firefox\plugins [2009/09/23 09:12:35 | 00,000,000 | ---D | M]
FF - HKLM\software\mozilla\Netscape Browser 8.0.3.4\Extensions\\Components: C:\Program Files\Netscape\Netscape Browser\Components [2009/09/23 09:12:35 | 00,000,000 | ---D | M]
FF - HKLM\software\mozilla\Netscape Browser 8.0.3.4\Extensions\\Plugins: C:\Program Files\Netscape\Netscape Browser\Plugins [2009/09/23 09:12:34 | 00,000,000 | ---D | M]


Taking some items from the above example we see:

  • FF - prefs.js..extensions.enabledItems: {CAFEEFAC-0016-0000-0007-ABCDEFFEDCBA}:6.0.07
  • FF - prefs.js..extensions.enabledItems: {CAFEEFAC-0016-0000-0012-ABCDEFFEDCBA}:6.0.12
  • FF - prefs.js..extensions.enabledItems: {CAFEEFAC-0016-0000-0013-ABCDEFFEDCBA}:6.0.13
  • FF - prefs.js..extensions.enabledItems: {CAFEEFAC-0016-0000-0014-ABCDEFFEDCBA}:6.0.14
  • FF - prefs.js..extensions.enabledItems: {CAFEEFAC-0016-0000-0015-ABCDEFFEDCBA}:6.0.15
    • these are related to Sun's Java Console
  • FF - prefs.js..extensions.enabledItems: [email protected]:1.0
    • is an Add-on for Java quick starter
  • FF - prefs.js..extensions.enabledItems: {20a82645-c095-46ed-80e3-08825760534b}:1.1
    • Microsofts .NET Framework Assistant for Firefox
  • FF - prefs.js..extensions.enabledItems: {ABDE892B-13A8-4d1b-88E6-365A6E755758}:1.0
    • Real Player
  • FF - prefs.js..extensions.enabledItems: {B13721C7-F507-4982-B2E5-502A71474FED}:2.2.0.102
    • Skype

Chrome

========== Chrome ==========

This area shows the Chrome browser internet settings.


CHR - default_search_provider: Google (Enabled)
CHR - default_search_provider: search_url = {google:baseURL}search?{google:RLZ}{google:acceptedSuggestion}{google:originalQueryForSuggestion}{google:searchFieldtrialParameter}{google:instantFieldTrialGroupParameter}sourceid=chrome&ie={inputEncoding}&q={searchTerms}
CHR - default_search_provider: suggest_url = {google:baseSuggestURL}search?{google:searchFieldtrialParameter}{google:instantFieldTrialGroupParameter}client=chrome&hl={language}&q={searchTerms}
CHR - plugin: Shockwave Flash (Enabled) = C:\Documents and Settings\admin\Local Settings\Application Data\Google\Chrome\Application\14.0.835.202\gcswf32.dll
CHR - plugin: Java Deployment Toolkit 6.0.240.7 (Enabled) = C:\Program Files\Java\jre6\bin\new_plugin\npdeployJava1.dll
CHR - plugin: Java™ Platform SE 6 U24 (Enabled) = C:\Program Files\Java\jre6\bin\new_plugin\npjp2.dll
CHR - plugin: Adobe Acrobat (Disabled) = C:\Program Files\Adobe\Reader 9.0\Reader\Browser\nppdf32.dll
CHR - plugin: Silverlight Plug-In (Enabled) = c:\Program Files\Microsoft Silverlight\4.0.60531.0\npctrl.dll
CHR - plugin: Windows Media Player Plug-in Dynamic Link Library (Enabled) = C:\Program Files\Windows Media Player\npdsplay.dll
CHR - plugin: Remoting Viewer (Enabled) = internal-remoting-viewer
CHR - plugin: Native Client (Enabled) = C:\Documents and Settings\admin\Local Settings\Application Data\Google\Chrome\Application\14.0.835.202\ppGoogleNaClPluginChrome.dll
CHR - plugin: Chrome PDF Viewer (Enabled) = C:\Documents and Settings\admin\Local Settings\Application Data\Google\Chrome\Application\14.0.835.202\pdf.dll
CHR - plugin: Microsoft\u00AE DRM (Enabled) = C:\Program Files\Windows Media Player\npdrmv2.dll
CHR - plugin: Microsoft\u00AE DRM (Enabled) = C:\Program Files\Windows Media Player\npwmsdrm.dll
CHR - plugin: Facebook Plugin (Enabled) = C:\Documents and Settings\admin\Application Data\Facebook\npfbplugin_1_0_3.dll
CHR - plugin: Move Media Player 7 (Enabled) = C:\Documents and Settings\admin\Application Data\Move Networks\plugins\071802000001\npqmp071802000001.dll
CHR - plugin: Google Update (Enabled) = C:\Documents and Settings\admin\Local Settings\Application Data\Google\Update\1.3.21.69\npGoogleUpdate3.dll
CHR - plugin: RIM Handheld Application Loader (Enabled) = C:\Program Files\Common Files\Research In Motion\BBWebSLLauncher\NPWebSLLauncher.dll
CHR - plugin: Google Earth Plugin (Enabled) = C:\Program Files\Google\Google Earth\plugin\npgeplugin.dll
CHR - plugin: Windows Presentation Foundation (Enabled) = c:\WINDOWS\Microsoft.NET\Framework\v3.5\Windows Presentation Foundation\NPWPF.dll
CHR - plugin: Default Plug-in (Enabled) = default_plugin
CHR - Extension: One Piece Theme = C:\Users\Joebloggs\AppData\Local\Google\Chrome\User Data\Default\Extensions\kkhkehkllpkocgnlbkmpkcicednmbfnp\2_0\
CHR - Extension: DivX Plus Web Player HTML5 \u003Cvideo\u003E = C:\Users\Joebloggs\AppData\Local\Google\Chrome\User Data\Default\Extensions\nneajnkjbffgblleaoojgaacokifdkhm\2.1.2.126_0\


Generally speaking the listings are self explanatory however taking some items as examples we see:

  • CHR - plugin: RIM Handheld Application Loader (Enabled) = C:\Program Files\Common Files\Research In Motion\BBWebSLLauncher\NPWebSLLauncher.dll
    • related to a BlackBerry handheld devices
  • CHR - plugin: Remoting Viewer (Enabled) = internal-remoting-viewer
    • This remoting feature is aimed at enabling Chrome and Chrome OS users to connect to "legacy" apps, which is what Google calls desktop applications, and run them inside the browser.
  • CHR - plugin: Chrome PDF Viewer (Enabled) = C:\Documents and Settings\admin\Local Settings\Application Data\Google\Chrome\Application\14.0.835.202\pdf.dll
    • Built-in PDF viewer that works inside Chrome's sandbox

Note See instruction about to how to remove items from Chrome in the :OTL section under Quick Reference of available Directives & Commands for fixes below.

O1 through to O38

GeekU students - For OTL reg points discussion GeekU students should go here.

O1 Hosts File

The Hosts File is used in an operating system to map hostnames to IP addresses. The file contains lines of text consisting of an IP address in the first text field followed by one or more hostnames. The importance from a malware viewpoint is that a hijacker may change an entry in the file to redirect an attempt to reach a particular web site to another web site chosen by the hijacker. Alternatively, a hijacker might modify the hosts file to block a connection if it exists e.g. an anti-virus update connection. If you suspect malicious activity here you can either remove individual entries under the :OTL directive or use the command [RESETHOSTS] (see under the :Commands section) to reset the Hosts File back to it's default value.

O2 Browser Helper Objects (BHO)

Browser Helper Objects (BHO) which extend the functionality of the Internet Explorer browser. Malware and Foistware makers can use this area to add their own functionality e.g. spyware. Because BHO's can be both legitimate and/or malicious, care needs to be exercised when analysing these objects. Usually if these items need fixing they will be placed under the :OTL directive.

O3 Internet Explorer Toolbars

Items related to Internet Explorer Toolbars are listed. Foistware will often add objects here.

O4 Automatic Start up Entries

A number of AutoStart entries are listed. Malware is often placed in these automatically starting keys.

O6 Local Machine Policies

Relates to registry keys for the Local Machine Policy settings. You can see how the registry entries OTL picks up (mostly under HKLM\software\microsoft\windows\currentversion\policies...) are configured. Malware can change these.

O7 User Policies

Relates to registry keys for User Policy settings.

(O8) Internet Explorer Context Menu

Lists items added to the Context Menu of Internet Explorer. Malware or Foistware may add items here. Many are legitimate though so, as always, take care in modifying or removing anything here.

O9 Internet Explorer buttons/Tools menu

Relates to additional buttons found on the Internet Explorer Toolbar or in the 'Tools' menu.

O10 Layered Service Providers (LSP)

Relates to LSP or Layered Service Providor DLLs. Malware inserted here can spy on Internet Traffic. OTL will remove the catalog entries included in the fix and then reorder the winsock stack so there won't be a broken LSP chain i.e. you can use OTL to fix these items. Care: a broken chain will prevent a machine connecting to the Internet.

O12 Internet Explorer Plugins

Lists Internet Explorer Plugins. Occasionally malware is added here.

O13 Internet Explorer Default prefix

Allows Internet Explorer to add the appropriate protocol prefix to URL when browsing. Similar behavior to adding http prefix to URLs starting with www. Malware can hijack this.

O15 Internet Explorer Trusted Zones

Lists items in the Internet Explorer Trusted Zone. Malware can add domains or IP addresses here.

O16 ActiveX objects

Lists ActiveX objects which add functionality to Internet Explorer. Many legitimate objects are here but many malicious and foistware objects can be added here also.

O17 Transmission Control Protocol (TCP)

Lists DNS (Domain Name System or Service) servers used by the computer. Occasionally you can find a malicious Domain Name here. Check the IP address before action.

O18 Extra Protocols

Lists extra protocols, handlers and filters. These can be changed by malware.

O19 User Style Sheet

Shows User Style Sheets. Malware can modify this key.

O20 AppInit_Dll's/Winlogon Notify

Lists files being loaded through AppInit_DLLs and the Winlogon Notify Subkeys.

O21 ShellServiceObjectDelayLoad

Lists files being loaded through the ShellServiceObjectDelayLoad registry key.

O22 SharedTaskScheduler

Lists files being loaded through the SharedTaskScheduler registry value.

O24 Windows Active Desktop Components

Lists Windows Active Desktop Components.

O27 Image File Execution Options

Lists items under HKey_Local_Machine\Software\Microsoft\Windows NT\CurrentVersion\Image File Execution Options

O28 Shell Execute Hooks

HKey_Local_Machine\SOFTWARE\Microsoft\Windows\CurrentVersion\Explorer\ShellExecuteHooks

These are loaded every time you launch a program (using Windows Explorer or by calling the ShellExecute(Ex) function). This startup module like the other startup DLL modules is notified of the program you launch and can perform any additional task before the the program is actually launched.

O29 Security Providers

Lists items under HKey_Local_Machine\SYSTEM\CurrentControlSet\Control\SecurityProviders\SecurityProviders

These are examples of bad ones. Care needs to be exercised as legitimate items will show here too.

O30 Lsa

Lists items under HKEY_LOCAL_MACHINE\system\currentcontrolset\control\lsa

The above is an example of a bad one.

Note: LSA items 32bit versus 64bit:

O30:64bit: - LSA: Authentication Packages - (msv1_0) - C:\Windows\SysNative\msv1_0.dll (Microsoft Corporation)
O30 - LSA: Authentication Packages - (msv1_0) - C:\Windows\SysWow64\msv1_0.dll (Microsoft Corporation)
O30:64bit: - LSA: Security Packages - (kerberos) - C:\Windows\SysNative\kerberos.dll (Microsoft Corporation)
O30:64bit: - LSA: Security Packages - (msv1_0) - C:\Windows\SysNative\msv1_0.dll (Microsoft Corporation)
O30:64bit: - LSA: Security Packages - (schannel) - C:\Windows\SysNative\schannel.dll (Microsoft Corporation)
O30:64bit: - LSA: Security Packages - (wdigest) - C:\Windows\SysNative\wdigest.dll (Microsoft Corporation)
O30:64bit: - LSA: Security Packages - (tspkg) - C:\Windows\SysNative\tspkg.dll (Microsoft Corporation)
O30 - LSA: Security Packages - (kerberos) - C:\Windows\SysWow64\kerberos.dll (Microsoft Corporation)
O30 - LSA: Security Packages - (msv1_0) - C:\Windows\SysWow64\msv1_0.dll (Microsoft Corporation)
O30 - LSA: Security Packages - (schannel) - C:\Windows\SysWow64\schannel.dll (Microsoft Corporation)
O30 - LSA: Security Packages - (wdigest) - C:\Windows\SysWow64\wdigest.dll (Microsoft Corporation)
O30 - LSA: Security Packages - (tspkg) - C:\Windows\SysWow64\tspkg.dll (Microsoft Corporation)

For items that are located in the HKLM\System branch of the registry, there is only one value but it will be interpreted differently by 32bit applications and 64bit applications. In the examples above you can see that the 64bit interpretations will look to files in the sysnative folder (the 64bit system32 folder) and the 32bit interpretations will look to the syswow64 folder (the 32bit system32 folder). Removing any of these items will affect both 32bit and 64bit operations. Removing one or the other matching lines will remove the item from the single registry location but will only move the file for the line selected. If you want to remove both files for matching items like these then include both in the fix. It is important to understand where items in the log are located in the registry to determine whether a single registry item is read by both 32bit and 64bit applications. What you could find in a situation like this is that the file pointed to by the 32bit interpretation is bad but the 64bit interpretation is fine (most malware only affects 32bit applications because the 64bit OS does not allow changes to its files). Since the registry value is shared by both you do not want to remove it because that could cause system issues.

Now take this example of the LSA items above:

O30:64bit: - LSA: Authentication Packages - (msv1_0) - C:\Windows\SysNative\msv1_0.dll (Microsoft Corporation)
O30 - LSA: Authentication Packages - (msv1_0) - C:\Windows\SysWow64\msv1_0.dll ()
O30:64bit: - LSA: Security Packages - (kerberos) - C:\Windows\SysNative\kerberos.dll (Microsoft Corporation)
O30:64bit: - LSA: Security Packages - (msv1_0) - C:\Windows\SysNative\msv1_0.dll (Microsoft Corporation)
O30:64bit: - LSA: Security Packages - (schannel) - C:\Windows\SysNative\schannel.dll (Microsoft Corporation)
O30:64bit: - LSA: Security Packages - (wdigest) - C:\Windows\SysNative\wdigest.dll (Microsoft Corporation)
O30:64bit: - LSA: Security Packages - (tspkg) - C:\Windows\SysNative\tspkg.dll (Microsoft Corporation)
O30 - LSA: Security Packages - (kerberos) - C:\Windows\SysWow64\kerberos.dll (Microsoft Corporation)
O30 - LSA: Security Packages - (msv1_0) - C:\Windows\SysWow64\msv1_0.dll ()
O30 - LSA: Security Packages - (schannel) - C:\Windows\SysWow64\schannel.dll (Microsoft Corporation)
O30 - LSA: Security Packages - (wdigest) - C:\Windows\SysWow64\wdigest.dll (Microsoft Corporation)
O30 - LSA: Security Packages - (tspkg) - C:\Windows\SysWow64\tspkg.dll (Microsoft Corporation)

In this example you can see that the msv1_0.dll file for the 32bit interpretation has been compromised. It should be a Microsoft file but in this case it has been replaced by an unknown file. In this situation you will want to only remove the file from C:\Windows\SysWow64\msv1_0.dll but NOT the registry entry. You would also need to replace the bad msv1_0.dll with a valid one because it is required for application support.


O31 SafeBoot

Lists items under HKEY_LOCAL_MACHINE\system\currentcontrolset\control\safeboot

O32 Autorun files on drives

Accessing an infected removable device such as a thumb drive or flash drive through "My Computer" (clicking on the drive) will cause that autorun.inf to run.

Depending on the AutoRun/AutoPlay settings, then, when the autoplay screen comes up on insertion; the user can be tricked into running a bad file. By clicking an icon in the "use this program to run"... dialogue, a non legitimate program added to the autorun.inf file on that drive can be run.

Some malware adds autorun.inf files to the root of all logical drives.

O33 MountPoints2

The registry key that keeps track of all USB devices that have been connected to the computer.

Lists items under HKEY_CURRENT_USER\Software\Microsoft\Windows\CurrentVersion\Explorer\MountPoints2

O34 BootExecute

Specifies the applications, services, and commands executed during startup.

Lists items under HKEY_LOCAL_MACHINE\SYSTEM\CurrentControlSet\Control\Session Manager

O35 shell spawning values

Lists shell spawning values for .com and .exe registry settings (no other extensions).

O35 items (like any other items in the Registry Scan) can simply be placed in the :OTL section of a fix (where the ones from the Extras log cannot).

With Win Police Pro you will see a file name instead of the "%1" %*. If you see that, include those lines in the fix.

O36 appcert dlls

Lists items under HKEY_LOCAL_MACHINE\system\currentcontrolset\control\session manager\appcertdlls key

O37 file associations (for comfile and exefile shell spawning values)

Lists file associations for shell spawning values for .com and .exe registry settings.

Shell spawning and file associations are intimately intertwined. The O35 items show the shell spawning values (comfile and exefile) and the O37 items show the file associations (.com and .exe).

You can see these values if you run the Extra Registry scan but when you don't get that then these values can be hidden. The O37 line gives you the ability to see these even when the Extras Registry scan is not run.

The file association value is a single default value that will point to the shell spawning value. It is the shell spawning value where additional executables can be set to run for specific file types through the association. For example the user's file association for .exe files should be pointing to exefile but malware can change it to point to a new spawning key which is loading a "badfile". The file should show up in the file scans, but only moving that file and not fixing the association value will create a situation where .exe files cannot run.

When fixing items here OTL will set any HKLM .com or .exe file association settings back to the defaults but delete any user's .com or .exe file association keys and always set the HKLM shell spawning settings back to normal.

Note: If the spawning key is in the user's branch of the registry, then it will always be removed automatically but you will need to remove the file separately. The file should show up in the file scans and you can take care of it there. If the spawning key shows up with Reg Error: Key error, and it is malware, then you should also include a line in the :REG section to delete it from the HKLM hive just to be safe.

Example of removing a key named bad key from an HKLM hive

:reg
[-hkey_local_machine\software\classes\bad key]

and take care of the file from the file scans or the :Files section.

O38 session manager\subsystems

Lists the values in "session manager\subsystems" key

This value deals with the za infection. It is where za changes an entry for its conserv.dll file. A clean machine will look like this:

O38 - SubSystems\\Windows: (ServerDll=winsrv:UserServerDllInitialization,3)
O38 - SubSystems\\Windows: (ServerDll=winsrv:ConServerDllInitialization,2)
O38 - SubSystems\\Windows: (ServerDll=sxssrv,4)

The example above is taken from a Win 7 machine (XP and Vista will only have the first two lines). If you see ServerDll=conserv in one of the lines you will know that za was or is present. You can fix the value by including the line in the :OTL section of a fix just like any other registry line. OTL will check the OS version and update the registry with the correct values for that OS. This will only fix the registry and you will still need to remove the conserv.dll and any other portions of the infection(s) present.


NetSvcs

Lists entries under HKEY_LOCAL_MACHINE\Software\Microsoft\Windows NT\CurrentVersion\Svchost - netsvcs

Note: Microsoft places a default list of services in this registry value during setup. Not all of the services are necessarily installed on every machine. 'Service not found'/'File not found' entries are common.

Pay particular attention to the signatures of any files that are listed under this scan.

In the example above we see:

helpsvc - C:\WINDOWS\PCHealth\HelpCtr\Binaries\pchsvc.dll (Microsoft Corporation) This is legitimate
BtwSrv - C:\WINDOWS\System32\BtwSrv.dll (X-Ways Software Technology) This is not legitimate. Careful - while this one is bad, not all non Microsoft files are bad. Always check for authenticity.
6to4 - C:\WINDOWS\System32\6to4v32.dll () This is not legitimate

File Scans

There are a number of options that you can choose for the standard file created/modified scans (these do not apply to any custom scans):

  • File Age - By default this is set to 30 days (90 days for a Quick Scan) but this can be changed to any number of pre-defined ranges from 1 day to 360 days (available settings are 1,7,14,30,60,90,180,360) when the File Age option is chosen within the Files Created Within or Files Modified Within scans.
  • Use Company Name WhiteList - off by default for the standard scans and on by default for a Quick Scan. The company name whitelist is a list of about 150 company names that will filter out files containing these names if this option is selected.
  • Skip Microsoft Files - off by default for the standard scans and on by default for a Quick Scan. If on, all files with a company name including Microsoft will be filtered out of the output.
  • No-Company-Name Whitelist - on by default for all Files Created/Modified scans. This is a list of files that have no company name but are safe and includes files like ntuser.dat, .hlp files, .nls files, etc. If you want to see those types of files you will need to uncheck the box beside Use No-Company-Name Whitelist.
  • Files Created Within/Files Modified Within - The standard file scans. These will be turned off if the None option is chosen; use the File Age setting above if the File Age Option is chosen (the default); and include all files if the All option is chosen.
  • LOP Check - off by default for the standard scans and on by default for the Quick Scan. This scan scans the All Users Application Data folder and the user's Application Data folder and lists all files, and all folders present not on the LOP Whitelist (a list of about 160 folders that have been deemed safe) and all files in the Windows Tasks folder.
  • Purity Check - off by default for the standard scans and on by default for the Quick Scan. This scan will search for all the known locations in which Purity creates files and folders and list anything found.
  • You can instruct the user to set any of these options to whatever values you desire to achieve whatever results you are looking for.

In a log

========== Files/Folders - Created within 30 Days ==========

Shows files/folders created within a selected period.

The default period is 30 days but there is a range of options available extending out to 360 days old.

========== Files - Modified within 30 Days ==========

Shows files modified within 30 days. Again there is an option for different periods from 1 to 360 days.

Note: OTL will show the company name of the file. Just because it says, for example, that it is from Microsoft Corporation, does not necessarily mean it's valid. Malware can be written with signatures from all kinds of different valid companies.

Note 2: In some logs a file will show up in the Files Created/Modified scans but also say "File handle not seen by OS". This happens when a file handle to the file cannot be provided by the OS. This is how the file properties like company name and attributes are collected. The file is there but something is preventing opening a handle to it. This can be an indicator of some sort of stealth or rootkit activity. Further investigation is required.

Note 3: The files created/modified scans also include ALL files in the Application Data folders, Program Files folder, and Common Program Files folder. There should normally not be any files directly in these folders. Many infections modify the file date attributes to something much older than what they actually are to hide their presence from scanners that only look at file date/times. This should pick those up.


========== Files - No Company Name ==========

Lists any .exe, .dll, .ini, etc files of any date that do not have a company name.

========== LOP Check ==========

The Lop check lists all files and folders in the Application Data folders as well as any files in WINDOWS\Tasks .

Any O4 running from the Application Data folder where files and folder names are completely random and make no sense are likely to be LOP.

A LOP filter is included to filter out known good folders during the LOP scan

========== Purity Check ==========

Purity check is a simple scan with no output if nothing is found. the Purity infection has been quite consistent over the years and has a set list of folders it creates in set locations. OTL checks all of the locations for all of the folders and only reports on any found items.

========== Alternate Data Streams ==========

Alternate Data Streams are listed.

Any file or folder found that contains an alternate data stream during any scan (standard or custom) will be placed on this list. ADSs of ZONE.IDENTIFIER, FAVICON, and ENCRYPTABLE are ignored.

To remove an ADS simply copy/paste the line into the :OTL section of a fix.

========== Files - Unicode (All) ==========

An example might look like this:

[1999/09/10 00:00:00 | 00,483,780 | ---- | M] ()(c:\N?mesList.txt) -- c:\N?mesList.txt

Any files or folders found that contain Unicode characters during any scan (standard or custom) will be placed on this list. Just include the line in the :OTL section and OTL will take care of them like any other file.

Extras log

========== Extra Registry ==========

========== File Associations ==========

Shows the file type that each file extensions is associated with along with the application used in the Open command (e.g. .txt files or .reg files)

========== Shell Spawning ==========

Lists shell spawning values for All the file extensions.

Example below shows the result of a scan that shows no infection;


[HKEY_LOCAL_MACHINE\SOFTWARE\Classes\<key>\shell\[command]\command]
batfile [open] -- "%1" %* File not found
chm.file [open] -- "C:\WINDOWS\hh.exe" %1 (Microsoft Corporation)
cmdfile [open] -- "%1" %* File not found
comfile [open] -- "%1" %* File not found
exefile [open] -- "%1" %* File not found
htmlfile [edit] -- Reg Error: Key error.
htmlfile [open] -- "C:\Program Files\Internet Explorer\iexplore.exe" -nohome (Microsoft Corporation)


This one shows Win Police Pro
 

[HKEY_LOCAL_MACHINE\SOFTWARE\Classes\<key>\shell\[command]\command]
batfile [open] -- "%1" %* File not found
chm.file [open] -- "C:\WINDOWS\hh.exe" %1 (Microsoft Corporation)
cmdfile [open] -- "%1" %* File not found
comfile [open] -- "%1" %* File not found
exefile [open] -- "C:\WINDOWS\System32\desote.exe" %* ()
htmlfile [edit] -- Reg Error: Key error.
htmlfile [open] -- "C:\Program Files\Internet Explorer\iexplore.exe" -nohome (Microsoft Corporation)


The first item (e.g. exefile) is the key and the second item (e.g. open) is the command. If you see that, you must fix the <key>\[command] key's default value manually in the fix. For the comfile and exefile settings you can use the O35 lines from the Standard Registry scan and simply include them in the :OTL section.

When preparing a fix, ALWAYS include a :reg section to fix the shell spawning values. Include the following as part of the fix:

:reg
[HKEY_LOCAL_MACHINE\SOFTWARE\Classes\exefile\shell\open\command]
""=""%1" %*"

If you don't do that, the user might be able to boot back into Windows without any problems but they still will not be able to run any .exe files. Note: For .com and .exe files, if you have fixed this through the O35 item then you do not have to include the :reg fix for those two types.

Example of an incorrect fix:
 

:OTL
PRC - C:\WINDOWS\svchasts.exe ()
SRV - (AntipPro2009_100 [Auto | Running]) -- C:\WINDOWS\svchasts.exe ()
O2 - BHO: (ICQSys (IE PlugIn)) - {76DC0B63-1533-4ba9-8BE8-D59EB676FA02} - C:\WINDOWS\System32\dddesot.dll (ASC - AntiSpyware)
[2009/09/08 09:53:11 | 00,000,036 | ---- | C] () -- C:\WINDOWS\System32\sysnet.dat
[2009/09/08 09:53:09 | 00,000,004 | ---- | C] () -- C:\WINDOWS\System32\bincd32.dat
[2009/09/08 09:53:05 | 00,498,688 | ---- | C] (ASC - AntiSpyware) -- C:\WINDOWS\System32\dddesot.dll
[2009/09/08 09:53:05 | 00,163,840 | ---- | C] () -- C:\WINDOWS\svchasts.exe
[2009/09/08 09:53:05 | 00,000,058 | ---- | C] () -- C:\WINDOWS\ppp4.dat
[2009/09/08 09:53:05 | 00,000,009 | ---- | C] () -- C:\WINDOWS\System32\bennuar.old
[2009/09/08 09:53:05 | 00,000,003 | ---- | C] () -- C:\WINDOWS\ppp3.dat
[2009/09/08 09:53:04 | 00,440,320 | ---- | C] () -- C:\WINDOWS\System32\desote.exe
[2009/09/08 09:53:02 | 00,001,708 | ---- | C] () -- C:\Documents and Settings\some user\Desktop\Windows Police Pro.lnk
[2009/09/08 09:52:54 | 00,000,000 | ---D | C] -- C:\Program Files\Windows Police Pro

:commands
[Reboot]

Example of a correct fix:
 

:OTL
PRC - C:\WINDOWS\svchasts.exe ()
SRV - (AntipPro2009_100 [Auto | Running]) -- C:\WINDOWS\svchasts.exe ()
O2 - BHO: (ICQSys (IE PlugIn)) - {76DC0B63-1533-4ba9-8BE8-D59EB676FA02} - C:\WINDOWS\System32\dddesot.dll (ASC - AntiSpyware)
[2009/09/08 09:53:11 | 00,000,036 | ---- | C] () -- C:\WINDOWS\System32\sysnet.dat
[2009/09/08 09:53:09 | 00,000,004 | ---- | C] () -- C:\WINDOWS\System32\bincd32.dat
[2009/09/08 09:53:05 | 00,498,688 | ---- | C] (ASC - AntiSpyware) -- C:\WINDOWS\System32\dddesot.dll
[2009/09/08 09:53:05 | 00,163,840 | ---- | C] () -- C:\WINDOWS\svchasts.exe
[2009/09/08 09:53:05 | 00,000,058 | ---- | C] () -- C:\WINDOWS\ppp4.dat
[2009/09/08 09:53:05 | 00,000,009 | ---- | C] () -- C:\WINDOWS\System32\bennuar.old
[2009/09/08 09:53:05 | 00,000,003 | ---- | C] () -- C:\WINDOWS\ppp3.dat
[2009/09/08 09:53:04 | 00,440,320 | ---- | C] () -- C:\WINDOWS\System32\desote.exe
[2009/09/08 09:53:02 | 00,001,708 | ---- | C] () -- C:\Documents and Settings\some user\Desktop\Windows Police Pro.lnk
[2009/09/08 09:52:54 | 00,000,000 | ---D | C] -- C:\Program Files\Windows Police Pro

:reg
[HKEY_LOCAL_MACHINE\SOFTWARE\Classes\exefile\shell\open\command]
""=""%1" %*"

:commands
[Reboot]

========== Security Center Settings ==========

========== System Restore Settings ==========

Lists policy settings for System Restore.

Example below shows settings set to disable System Restore.

[HKEY_LOCAL_MACHINE\SOFTWARE\Policies\Microsoft\Windows NT\SystemRestore]
"DisableSR" = 1
"DisableConfig" = 1

[HKEY_LOCAL_MACHINE\SOFTWARE\Microsoft\Windows NT\CurrentVersion\SystemRestore]
"DisableSR" = 1

[HKEY_LOCAL_MACHINE\SYSTEM\CurrentControlSet\Services\Sr]
"Start" = 4

[HKEY_LOCAL_MACHINE\SYSTEM\CurrentControlSet\Services\SrService]
"Start" = 2

System Restore may be turned off if the user is using an alternative restore utility such as ERUNT or simply to conserve resources. A question needs to asked of the user to ascertain if they are aware of the settings.

Whenever you see a Group Policy key and it is not legitimate, you want to delete the key and not just change the settings. For example, our first inclination here might be to change each of these settings to zero to turn the policies off. That would be good, wouldn't it? Well, yes and no. Yes it would be good because then System Restore would function again, but no because the user would not have any control over it. If DisableSR is set to zero the user cannot turn it off even if they want to. If DisableConfig is set to zero then the configuration screen will be visible but the user won't be able to make any changes to any of the settings. The system will always enforce the default settings. So what we want to do is make these settings "Not Configured" and we do that by deleting the entire key.

The next three settings should always be there and can be set by the user through the System Restore control panel:

[HKEY_LOCAL_MACHINE\SOFTWARE\Microsoft\Windows NT\CurrentVersion\SystemRestore]
"DisableSR" = 1

[HKEY_LOCAL_MACHINE\SYSTEM\CurrentControlSet\Services\Sr]
"Start" = 4

[HKEY_LOCAL_MACHINE\SYSTEM\CurrentControlSet\Services\SrService]
"Start" = 2

If the user unchecks the box for "Turn system Restore On" then the DisableSR setting will be on and the SR service Start value will be set to 4 (meaning disabled). The SRService service Start value will normally stay at 2 (meaning Auto) but the service will not run when the SR service is disabled. The SR service is the filter driver for the System Restore system. In some cases of malware, the SRService Start value might be set to 4 as well. These settings will all be set when the Group Policy editor is used to disable System Restore but malware could directly change any one or more of these keys/values.

To fix these settings we do not want to simply delete the keys like we do for Group Policy settings. What we want to do with these is set the DisableSR value to zero (meaning the disable is turned off and thus System Restore is enabled); set the SR Start value to zero (meaning that it will start at Boot); and if needed set the SRService Start value to two (meaning that it will auto-start). A reboot is required to make the changes take effect.

Note: An example fix for System Restore and Firewall settings can be found below at the end of the Firewall Settings explanation.

========== Firewall Settings ==========

Lists policy settings for Windows Firewall.

Example below shows settings set to disable Windows Firewall.

[HKEY_LOCAL_MACHINE\SOFTWARE\Policies\Microsoft\WindowsFirewall]

[HKEY_LOCAL_MACHINE\SOFTWARE\Policies\Microsoft\WindowsFirewall\DomainProfile]
"EnableFirewall" = 0

[HKEY_LOCAL_MACHINE\SOFTWARE\Policies\Microsoft\WindowsFirewall\StandardProfile]
"EnableFirewall" = 0

[HKEY_LOCAL_MACHINE\SYSTEM\CurrentControlSet\Services\SharedAccess\Parameters\FirewallPolicy\DomainProfile]
"EnableFirewall" = 0
"DoNotAllowExceptions" = 0
"DisableNotifications" = 0
"DisableUnicastResponsesToMulticastBroadcast" = 0

[HKEY_LOCAL_MACHINE\SYSTEM\CurrentControlSet\Services\SharedAccess\Parameters\FirewallPolicy\DomainProfile\GloballyOpenPorts\List]
"139:TCP" = 139:TCP:*:Enabled:@xpsp2res.dll,-22004
"445:TCP" = 445:TCP:*:Enabled:@xpsp2res.dll,-22005
"137:UDP" = 137:UDP:*:Enabled:@xpsp2res.dll,-22001
"138:UDP" = 138:UDP:*:Enabled:@xpsp2res.dll,-22002

[HKEY_LOCAL_MACHINE\SYSTEM\CurrentControlSet\Services\SharedAccess\Parameters\FirewallPolicy\StandardProfile]
"EnableFirewall" = 0
"DoNotAllowExceptions" = 0
"DisableNotifications" = 0
"DisableUnicastResponsesToMulticastBroadcast" = 0

[HKEY_LOCAL_MACHINE\SYSTEM\CurrentControlSet\Services\SharedAccess\Parameters\FirewallPolicy\StandardProfile\GloballyOpenPorts\List]
"139:TCP" = 139:TCP:LocalSubNet:Enabled:@xpsp2res.dll,-22004
"445:TCP" = 445:TCP:LocalSubNet:Enabled:@xpsp2res.dll,-22005
"137:UDP" = 137:UDP:LocalSubNet:Enabled:@xpsp2res.dll,-22001
"138:UDP" = 138:UDP:LocalSubNet:Enabled:@xpsp2res.dll,-22002

Unless the computer is on a domain it is highly likely that malware set any Group Policy settings. However, for the user settings, some users will, for one reason or another, knowingly turn off the Windows Firewall. Windows Firewall should be turned off if a third party firewall is in use. If a third party firewall is not seen in the services/drivers section and the user settings for the firewall show that it is disabled, then a question to the user is in order to find out if they are aware of the situation.

The Group Policy settings are always under the HKEY_LOCAL_MACHINE\SOFTWARE\Policies\ key. In this case there could be a key for Domain settings, a key for Standard settings, and a key for Public settings (on Vista and Win7):

[HKEY_LOCAL_MACHINE\SOFTWARE\Policies\Microsoft\WindowsFirewall]

[HKEY_LOCAL_MACHINE\SOFTWARE\Policies\Microsoft\WindowsFirewall\DomainProfile]
"EnableFirewall" = 0

[HKEY_LOCAL_MACHINE\SOFTWARE\Policies\Microsoft\WindowsFirewall\StandardProfile]
"EnableFirewall" = 0

Here, the EnableFirewall values are set to zero meaning that they are turned off, thus disabling the Windows Firewall. Unless the computer is on a company network, it is highly unlikely that these settings should be there. Maybe a user used the Group Policy editor to set them but for the vast majority of users they won't even know what that is. Because they are Group Policy keys, we want to delete the key. Setting these settings to one (thus enabling the Windows Firewall) will force the Firewall to on and not allow the user to make any changes through Security Center. This would be very bad if they were running a third party firewall. Even if the Windows Firewall should be disabled, there are user settings to do that and (unless required by a company IT department) for a home user these Group Policy settings should be removed.

The user controllable settings will show up in the SYSTEM hive:

[HKEY_LOCAL_MACHINE\SYSTEM\CurrentControlSet\Services\SharedAccess\Parameters\FirewallPolicy\DomainProfile]
"EnableFirewall" = 0
"DoNotAllowExceptions" = 0
"DisableNotifications" = 0
"DisableUnicastResponsesToMulticastBroadcast" = 0

[HKEY_LOCAL_MACHINE\SYSTEM\CurrentControlSet\Services\SharedAccess\Parameters\FirewallPolicy\DomainProfile\GloballyOpenPorts\List]
"139:TCP" = 139:TCP:*:Enabled:@xpsp2res.dll,-22004
"445:TCP" = 445:TCP:*:Enabled:@xpsp2res.dll,-22005
"137:UDP" = 137:UDP:*:Enabled:@xpsp2res.dll,-22001
"138:UDP" = 138:UDP:*:Enabled:@xpsp2res.dll,-22002

[HKEY_LOCAL_MACHINE\SYSTEM\CurrentControlSet\Services\SharedAccess\Parameters\FirewallPolicy\StandardProfile]
"EnableFirewall" = 0
"DoNotAllowExceptions" = 0
"DisableNotifications" = 0
"DisableUnicastResponsesToMulticastBroadcast" = 0

[HKEY_LOCAL_MACHINE\SYSTEM\CurrentControlSet\Services\SharedAccess\Parameters\FirewallPolicy\StandardProfile\GloballyOpenPorts\List]
"139:TCP" = 139:TCP:LocalSubNet:Enabled:@xpsp2res.dll,-22004
"445:TCP" = 445:TCP:LocalSubNet:Enabled:@xpsp2res.dll,-22005
"137:UDP" = 137:UDP:LocalSubNet:Enabled:@xpsp2res.dll,-22001
"138:UDP" = 138:UDP:LocalSubNet:Enabled:@xpsp2res.dll,-22002

Example of a fix for System Restore/Firewall policy settings:

There will normally be two keys: DomainProfile and StandardProfile. If the system is from a home user the DomainProfile settings can be anything and it won't matter because they only apply to computers on a domain. Under the StandardProfile key, the EnableFirewall value is the one we want to check. If it is set to zero as shown above, then the Windows Firewall will not run. This will be set as above if the user goes into the Security Center control panel and sets the Windows Firewall to Off, and this might be legitimate. Check for the presence of a third party firewall and if there are no signs of one, ask the user if they turned the firewall off on purpose. If they did not (or don't know what you are talking about) then set the StandardProfile EnableFirewall value back to one (meaning it is enabled). Once again, a reboot is required for the changes to take effect. So assuming that this is a home user, and the user did not turn off System Restore or the Windows Firewall, we will want to perform the following fix:

:reg
[-HKEY_LOCAL_MACHINE\SOFTWARE\Policies\Microsoft\Windows NT\SystemRestore]
[-HKEY_LOCAL_MACHINE\SOFTWARE\Policies\Microsoft\WindowsFirewall]
[HKEY_LOCAL_MACHINE\SOFTWARE\Microsoft\Windows NT\CurrentVersion\SystemRestore]
"DisableSR" = DWORD:0
[HKEY_LOCAL_MACHINE\SYSTEM\CurrentControlSet\Services\Sr]
"Start" = DWORD:0
[HKEY_LOCAL_MACHINE\SYSTEM\CurrentControlSet\Services\SrService]
"Start" = DWORD:2
[HKEY_LOCAL_MACHINE\SYSTEM\CurrentControlSet\Services\SharedAccess\Parameters\FirewallPolicy\StandardProfile]
"EnableFirewall" = DWORD:1

:commands
[reboot]

Additional note: On some systems a situation can occur where after performing the above fix System Restore will still not start and the control panel for System Restore might or might not show up in the Properties dialog. This seems to be associated with the SR driver's ImagePath value. It should read "system32\DRIVERS\sr.sys". But after running the fix and rebooting the computer the value changes for some reason to "systemroot\\systemroot\system32\DRIVERS\sr.sys". When an attempt is made to start the SRService service an error generates stating "File not found". Since the SR driver is not running the SRService service cannot start. Setting the value that way does not occur on every system and appears to happen on those it does during the bootup. It is easily fixable however. Just run the following fix:

:reg
[HKEY_LOCAL_MACHINE\SYSTEM\CurrentControlSet\Services\Sr]
"ImagePath" = "system32\drivers\sr.sys"

:files
net start srservice /c

Everything should be back to normal. As a precaution, if you need to fix the SR driver entry, you might want to run a scan for all services and all drivers. That will show you whether the SRService is running and the SR driver is running (and the paths to their files). If needed, fix the item shown above and start the SRService.

========== Authorzed Applications List ==========

========== HKEY_LOCAL_MACHINE Unistall List ==========

< End of report >
 

Custom Scans - Standalone Commands

Standalone commands to use in a scan without any other parameters.

activex - lists entries under HKEY_LOCAL_MACHINE\software\microsoft\active setup\installed components

baseservices - to show service information for a list of base services that affect a variety of normal system operations.

drives - to obtain some basic drive/partition information. Output will look like this:

========== Custom Scans ==========

========== Drive Information ==========


Physical Drives
---------------

Drive: \\\\.\\PHYSICALDRIVE0 - Fixed hard disk media
Interface type: IDE
Media Type: Fixed hard disk media
Model: WDC WD64 00AAKS-65A7B SCSI Disk Device
Partitions: 2
Status: OK
Status Info: 0

Drive: \\\\.\\PHYSICALDRIVE1 - Removable Media
Interface type: USB
Media Type:
Model: Generic USB CF Reader USB Device
Partitions: 0
Status: OK
Status Info: 0

Drive: \\\\.\\PHYSICALDRIVE2 - Removable Media
Interface type: USB
Media Type:
Model: Generic USB MS Reader USB Device
Partitions: 0
Status: OK
Status Info: 0

Drive: \\\\.\\PHYSICALDRIVE3 -
Interface type: USB
Media Type:
Model: Generic USB SD Reader USB Device
Partitions: 0
Status: OK
Status Info: 0

Drive: \\\\.\\PHYSICALDRIVE4 -
Interface type: USB
Media Type:
Model: Generic USB SM Reader USB Device
Partitions: 0
Status: OK
Status Info: 0

Drive: \\\\.\\PHYSICALDRIVE5 -
Interface type: USB
Media Type: Removable Media
Model: Kingston DataTraveler 2.0 USB Device
Partitions: 1
Status: OK
Status Info: 0

Drive: \\\\.\\PHYSICALDRIVE6 -
Interface type: USB
Media Type: Removable Media
Model: SanDisk Cruzer USB Device
Partitions: 1
Status: OK
Status Info: 0

Partitions
---------------

DeviceID: Disk #0, Partition #0
PartitionType: Installable File System
Bootable: True
BootPartition: True
PrimaryPartition: True
Size: 583.00GB
Starting Offset: 32256
Hidden sectors: 0

DeviceID: Disk #0, Partition #1
PartitionType: Installable File System
Bootable: False
BootPartition: False
PrimaryPartition: True
Size: 13.00GB
Starting Offset: 626248143360
Hidden sectors: 0

DeviceID: Disk #2, Partition #0
PartitionType: Win95 w/Extended Int 13
Bootable: False
BootPartition: False
PrimaryPartition: True
Size: 1.00GB
Starting Offset: 16384
Hidden sectors: 0

DeviceID: Disk #1, Partition #0
PartitionType: Unknown
Bootable: False
BootPartition: False
PrimaryPartition: True
Size: 7.00GB
Starting Offset: 16384
Hidden sectors: 0

First, all of the physical drives will be listed and then all of the partitions found.

After the drives, all partitions found will be listed. In the DeviceID the Disk listed will point to the physical drive shown first. For Example, Disk #0 Partition #0 is the first partition on the first physical drive. Disk #0 Partition #1 is the second partition on the first physical hard drive. Etc.

The other partition information is just some basic information that might be useful i.e. Bootable, BootPartition, PrimaryPartition, Size, etc.

The partitions will not necessarily be listed in order of the drives (notice that Disk #1 comes after Disk #2 in the partition section) but partitions on the same drive should be next to each other.

drivers32 - lists entries under HKEY_LOCAL_MACHINE\software\Microsoft\Windows NT\CurrentVersion\Drivers32

hijackthisbackups - lists HijackThis backups

msconfig - lists entries under HKEY_LOCAL_MACHINE\software\microsoft\shared tools\msconfig

restorepoints - list restorepoints

safebootminimal - lists entries under HKEY_LOCAL_MACHINE\system\currentcontrolset\control\safeboot\Minimal

safebootnetwork - lists entries under HKEY_LOCAL_MACHINE\system\currentcontrolset\control\safeboot\Network

SaveMBR - saves a physical drive's MBR to a file named PhysicalMBR.bin in the root of the system drive. It works on 32- and 64-bit OS's.

This is how it works:

SaveMBR:n

where n is the physical drive to use. For most systems this will be SaveMBR:0 for the first (and usually only) physical drive. If there are multiple physical drives then change n to the appropriate boot drive. This has nothing to do with the logical drives (C:, D:, E:, etc).

A copy of the mbr will be saved at:

<SystemDrive>:\PhysicalMBR.bin

in most cases this will be C:\PhysicalMBR.bin

You can then have the file submitted to a malware scanning site for checking.

showhidden - shows hidden files on system drive


Quick Reference of available Directives & Commands

The directives/commands are not case sensitive.

:processes

Either individual or all processes can be stopped using this directive.

If you do not include the [EMPTYTEMP] command but still want to kill all processes before running a fix then the command killallprocesses can be placed in this section.

Examples of individual processes you might want to use this directive for might be - TeaTimer, SpywareGuard or another anti-malware program, or any malware related processes.

:OTL

Any lines in a log from any of the standard scans or custom scans for files/folders can be copy/pasted directly into the :OTL section of a fix for removal. Generally :OTL will remove the entry and move the file at the same time. For processes, though, the file will not be moved and will need to be dealt with in the :FILES section.

Individual items in the HOSTS file (O1 lines) can only be removed in the :OTL section. If you want to reset the HOSTS file to the default (only the 127.0.0.1 localhost and ::1 localhost lines) then use the command [resethosts] in the :commands section.

IE items that have files (like the URLSearchHooks) will have the registry entry deleted and the file moved. For other IE registry items the rule of thumb is this:

- if the entry contains "ProxyEnable" then the value is set to 0 (zero)

- if the entry contains "AutoConfigURL" then it is deleted

- if you include the DefaultScope line then the value will just be set to nothing and you will need to include a :REG section to set it to something else.

- all other entries are set to blank

For Chrome items the extensions folder is removed. This is not the preferred way to remove extensions since OTL will only delete the extension folder but cannot edit the prefs file. Deleting the extension folder does effectively remove the extension and it cannot run and does not do any harm to Chrome's operation but the extension name remains in the prefs file. Use OTL as a last resort only for removing extensions from Chrome.

The preferred method of removing plugins and extensions in Chrome is through Chrome itself.

For plugins, just have the user type the following into the address box:

chrome:pluginsThis will display a page of all of the installed plugins. There is no option to remove a plugin but a plugin can be disabled from this page. If you want to actually remove the plugin or it doesn't showup in the list of plugins then just delete the file (or possibly folder) shown on the plugin line.

For extensions, have the user type the following into the address box:

chrome:extensionsThis will show all of the installed extensions and each extension can be either disabled or uninstalled from this page. If the extension doesn't show or uninstalling it doesn't remove the files then just delete the folder shown on the extension line.


:Services

OTL will try to stop and disable any running services before deleting them. However, it is important to note that it may have trouble doing this against some of the nastier pieces of malware. In the event that this directive is unable to stop the service then you will need to disable the process in Safe Mode or via another method.

You can also delete any drivers under this directive. Make sure to use the name when deleting any services or drivers and not the description.

:Reg

You can do any sort of registry fix here. A handy feature is that you don't have to deal with hex values. For those complex fixes you aren't sure about you can use the plain text for what you want the key/value to have.

See example below:

Bad entry:-

[HKEY_LOCAL_MACHINE\SYSTEM\CurrentControlSet\Control\Lsa]
"authentication packages"=msv1_0 C:\WINDOWS\system32\byXoMcbC

to fix this in a .reg file you would need to do this:

REGEDIT4

[HKEY_LOCAL_MACHINE\SYSTEM\CurrentControlSet\Control\Lsa]
"Authentication Packages"=hex(7):6D,73,76,31,5F,30,00,00

If you weren't sure what hex value to use and didn't want to risk messing up that key, you could just do this instead

Fix:-

:reg
[HKEY_LOCAL_MACHINE\SYSTEM\CurrentControlSet\Control\Lsa]
"Authentication Packages"=hex(7):"msv1_0"

OTL will handle the conversion and the registry key will then be fixed.

:Files

All manually entered files and folders are put underneath this directive. Do not copy/paste any file/folder lines from the log in this area (those go under the :OTL directive). This is only for any additional files or folders you may need to move (i.e. the files from a process that you want moved or those that come from other logs).

Note: You do not have a separate command for folders when using OTL. Just include the folder under the :Files directive and it will be taken care of.

:Commands

Commands must be placed under the :Commands directive.

[CLEARALLRESTOREPOINTS] - this will remove all current restore points and create a new restore point after the fix is completed.

[CREATERESTOREPOINT] - this will create a new restore point.

With either of the commands for restore points, OTL will check to see if the appropriate services are running which are required for creating a restore point and attempt to start them if they are not. If the required services are not running and cannot be started you will see a line in the fix log pertaining to the reason why and will need to pursue that at a later time.

Note: You can also use these two commands in a scan. It's important to remember that if used in a scan the brackets are not included i.e. if run in a scan they would look like this:-

clearallrestorepoints or createrestorepoint

Put either CREATERESTOREPOINT or CLEARALLRESTOREPOINTS in the Custom Scans/Fixes box along with any other custom scans you are running (i.e. SAFEBOOTMINIMAL or NETSVCS). The commands are not case sensitive and can be run along with any other scans you might want to run. A line in the log file will show you what the result was (either successful or the reason why it failed).


[EMPTYFLASH] - to remove all Flash cookies.
Note: Not all flash cookies are bad. Some only contain various settings for specific websites but you can't tell what ones do what. If you use the above command all cookies will be removed regardless of what they do.
Note 2: The emptytemp command includes emptyflash and emptyjava so these commands are used when for some reason you wish only to clear flash or java without removing other temp files.


[EMPTYJAVA] - to clear Java cache.
Use this command if you wish to clear Java cache without clearing other temp files.
Note: The emptytemp command includes emptyflash and emptyjava so these commands are used when for some reason you wish only to clear flash or java without removing other temp files.

[EMPTYTEMP] - to empty all of the user, system, and browser temp folders.
Note: if this command is included in a fix then all processes will be killed automatically at the beginning of a fix and a reboot will be required at the end so you do not need to explicitly include the [REBOOT] command in the :COMMANDS section.

[PURITY] - will automatically remove any Purity infection on the system. Purity has a consistent pattern of folders created using Unicode characters and this command will remove all those found without needing to list each folder individually.

[REBOOT] - to force a reboot of the system after a fix completes.
Note: this is not required if KILLALLPROCESSES is used in the :PROCESSES section or [EMPTYTEMP] is used in the :COMMANDS section because a reboot will automatically be forced anyway. It can be included but it will be ignored in these cases.

[RESETHOSTS] - to reset the HOSTS file back to its default value of:
127.0.0.1 localhost
::1 localhost

The current HOSTS file will be moved into a subfolder of the MovedFiles folder, the one which is associated with the fix.
 

Switches

Switches are additional parameters that can be used with both custom scans or fixes to enhance the output or outcome of the results.

Note: If an invalid switch is included; a line (Invalid Switch:...) will simply be placed in the log and the scan will continue on. If the switch being shown as invalid is in fact correct, then check the version number of OTL the poster is using.

Switches that can be used when performing a custom scan:

/C - to run a DOS command line command
Example:
set /c - to return all environment variables
net stop <servicename> /c - OTL will not start or stop services (only delete them) so you can use this switch with the net command to perform any service management tasks (start, stop, pause, continue)
netstat -r /c - will display the routing tables

Any command that you need to be used at a command line can be used within a custom scan using the /C switch and the output will be included in the log. This can eliminate the need to have the user create and run batch files and then find and post the output files created from them.

/FN - to run a file/folder name matching search.

Example:
<starting path>|<name(s)>;<recurse>;<list sub-folders>;<files>;<required folder(s)> /FN

You need to supply a specific name or names to match and if a file, folder, or file extension matches one of the patterns then it will be included in the output. The syntax is similar to that used by the /FP switch (see below) with the following differences:

- you can include multiple items to search for (separated by commas).
- you can optionally also supply a required pattern that must be included somewhere in the full path.

Useful for scanning for some of the latest infections. Examples of use can be found by searching the Malware Removal Forum threads. Students and visiting malware removal experts who are registered at G2G can go here for futher explanation.

/FP - to run a file/folder name pattern search and return all files and folders found
Example:
c:\windows|myfile;true;true;true /FP

Parameters:
myfile is the pattern to look for (will return items like c:\windows\myfile.exe, c:\windows\123myfile456.dat, c:\windows\notmyfileeither)
recurse folders (will also include items like c:\windows\system32\helpmyfile.dll, c:\windows\msagent\intl\closetomyfile.ocx)
include child folders (if true and a folder is found that matches the pattern then the immediate folders underneath it will be shown as well)
include files (if true files with names that match the pattern will be shown; if false then only folders will be shown)

The /FP switch is used internally for some unique scans that are required during the standard scans and most helpers probably won't have a need for it but you can do some really cool things with it so I thought I would just make it available to use. It eliminates the need to run two separate scans (one for folders and one for files) if you need to find all items of both.

/MD5 - to include MD5 values for all files
You will see this being used extensively in the Malware Cleaning Guide to find patched files. There are currently infections that modify OS files in a way that are difficult to detect in any other manner. MD5s are a unique mathematical value that can be calculated for a file to determine whether or not it has been changed. If even one byte in a file is changed the calculated MD5 will also change. Some examples from the Guide are:
%SYSTEMDRIVE%\iaStor.sys /s /md5
%SYSTEMDRIVE%\nvstor.sys /s /md5
%SYSTEMDRIVE%\atapi.sys /s /md5
%SYSTEMDRIVE%\IdeChnDr.sys /s /md5MD5 values are not stored within files, they are calculated on the fly from the files. The scans above search the entire system drive for the specified file and return all files found with their calculated MD5 values. If the MD5 of the file in the normal operating folder (i.e. system32 or system32\drivers) is different than that in the backup folders (i.e the dllcache folder or the i386 folder) then the file is most likely patched. If the MD5 comes back as nothing, then it is almost a surety that the file has been patched and should be replaced with a valid copy from one of the other locations using the /replace switch. Using the MD5 value you can be assured that the file is legitimate.


/MD5START and /MD5STOP - to wrap around files to look for.

Example:
/md5start
eventlog.dll
scecli.dll
netlogon.dll
cngaudit.dll
sceclt.dll
ntelogon.dll
logevent.dll
iaStor.sys
nvstor.sys
atapi.sys
IdeChnDr.sys
viasraid.sys
AGP440.sys
vaxscsi.sys
nvatabus.sys
viamraid.sys
nvata.sys
nvgts.sys
iastorv.sys
ViPrt.sys
/md5stop

This allows you to check files you wish without the need to include any paths because if the scan sees these switches it will always start at the root of the systemdrive and scan the entire drive. It batches all of the files togther and looks for each file as it passes through each folder so only one pass of the hard drive is needed.

If there are a number of files you are looking for to check the MD5s then using /md5start and /md5stop is much more efficient and produces a cleaner log. If you just have one or two items then /md5 will surfice.

Note: Whenever the /md5start /md5stop block is used the searches will also look for any servicepack .cab files. If any of these are found, it will look inside for the file being searched for, and if one is found, it will list it in the output. This is not the case if /md5 search alone is used.

/LOCKEDFILES - to find locked files that MD5 can't be calculated for.

The scan simply grabs the file and attempts to calculate the MD5 and if it can't, reports the output, skipping any files that it can get an MD5 on.

Note: You need to supply a path/file specification just like any other file scan and the /S switch if you want to go through the sub-folders as well. So if you wanted to see what .dll files are locked just in the system32 folder you would use:

%systemroot%\system32\*.dll /lockedfiles


If for some reason all files need to be checked (Windows will normally have a number of locked files by default and unless there is a particular reason it isn't necessary to see all of those) then simply add the /all switch:

%systemroot%\system32\*.dll /lockedfiles /all/RS - to perform a registry search for a pattern
Example:
hklm\software\microsoft\windows\currentversion|somepattern /RS

The /rs switch will search for and return all keys, value names, and data found for the pattern included. If a starting point is not included (e.g. somepattern /rs) then the following areas will be searched:
hklm\software\classes
hklm\software\microsoft
hklm\software\policies
hklm\system\currentcontrolset
hkcu\software\classes
hkcu\software\microsoft
hkcu\software\policies

It is always preferred to specify a starting point for the search.

/RP - to search for all types reparse points

Example: c:\windows\*.* /RP or c:\windows\*. /RP

or

Example: c:\windows\*. /RP /s

Using this switch will show all reparse points (like those used by the current max++ infection) and the results can be simply placed in the :OTL section of a fix to be removed. With /s it will recurse through all sub folders.

/HL - to search for only hard links

Example: c:\windows\*.* /HL or c:\windows\*. /HL

/JN - to search for only junctions

Example: c:\windows\*.* /JN or c:\windows\*. /JN

/MP - to search for only mount points

Example: c:\windows\*.* /MP or c:\windows\*. /MP

At time of writing a very useful scan that you could add to your custom scans would be:

%systemroot%\*. /mp /s

This would find all of the current max++ mount points on a system with your initial scan (or a subsequent scan) and you could remove them with your initial fix.

/SL - to search for only symbolic links

Example: c:\windows\*.* /SL or c:\windows\*. /SL/SP - to perform a string pattern search within files
Example:
c:\windows\*.*|somepattern /SP

Back in the days of WinPFind, this command was used quite often to find malware signatures in files. It is not used often today but is still available.

/S - to recurse sub-folders in a file search or sub-keys in a registry search
Example:
c:\windows\*.dat /S
HKEY_LOCAL_MACHINE\SYSTEM\CurrentControlSet\Services\ACPI /S

This switch is also often used in conjuction with the /MD5 or /U switch to recurse sub-folders in those searches as well.

/U - to only include Unicode files in a search
Example:
c:\windows\*.* /U

Files and folders with Unicode values in their names often look like legitimate items in Explorer. During the standard scans, OTL will automatically place any files or folders found with Unicode values in the Unicode section of a log and these can be fixed as easily as any other file or folder by simply placing the lines in the :OTL section of a fix. With many scanners, the names of these files or folders are not properly interpreted and will show up with a ? where the Unicode characters are which makes it impossible to determine what to remove. OTL takes care of that for you. Using the /U switch in a custom scan will return only those files and folders found that contain Unicode characters in their names.

An example of a return is:
< c:\*.* /U >

========== Files - Unicode (All) ==========
[1999/09/10 00:00:00 | 00,483,780 | ---- | M] ()(c:\N?mesList.txt) -- c:\NamesList.txt

/X - to exclude files from a search
Example:
c:\windows\*.exe /X

This will exclude all .exe files and return everything else.

/64 - to specifically search in 64bit folders or registry keys on 64bit OSs
Example:
c:\windows\system32\*.dat /64
hklm\software\microsoft\windows\currentversion\run /64

Because OTL is a 32-bit application, if the /64 switch is not used when scanning on a 64-bit OS, the OS will automatically redirect the scan to the 32-bit areas of the file system or registry where applicable. This switch will override that default behavior and force the scan to the 64-bit areas when needed.

/<some number> - to only include files or folders a certain amount of days old
Example:
c:\windows\system32\*.* /3

The above custom scan will only return files created within the last 3 days.

/CREATED - to change the modified file date to the created date. Normally in a custom scan the file information includes the modified file date. Using this switch will change that to include the created date.
Example (no switch):

< c:\temp2\*.exe >
[2002/04/23 16:42:00 | 000,379,392 | -H-- | M] () -- c:\temp2\ps.exe
[2008/03/17 21:39:00 | 000,173,688 | ---- | M] () -- c:\temp2\tscc.exe

Example (with /created switch):

< c:\temp2\*.exe /created >
[2010/03/03 22:26:30 | 000,173,688 | ---- | C] () -- c:\temp2\tscc.exe
[2011/01/15 06:28:46 | 000,379,392 | -H-- | C] () -- c:\temp2\ps.exe

/DRIVER - to list the same driver information in a driver scan but for a single driver. You need to supply the driver name.
Example:
cdrom /driver

========== Custom Scans ==========
DRV - [2008/04/14 01:10:48 | 000,062,976 | ---- | M] (Microsoft Corporation) [Kernel | System | Unknown] -- C:\WINDOWS\system32\drivers\cdrom.sys -- (Cdrom)

/NCN - to only list files that do not have a company name.
Example:

< c:\windows\*.exe /ncn >
[2005/02/10 20:14:18 | 000,098,816 | ---- | M] () -- c:\windows\sed.exe

/SERVICE - Used to list the same service information in a service scan but for a single service. You need to supply the service name. If on a 64-bit OS and a 64-bit and 32-bit service exist it will list both.
Example:
cryptsvc /service

========== Custom Scans ==========
SRV:64bit: - [2012/04/23 12:25:30 | 000,174,592 | ---- | M] (Microsoft Corporation) [Auto | Running] -- C:\Windows\SysNative\cryptsvc.dll -- (CryptSvc)
SRV - [2012/04/23 12:00:53 | 000,133,120 | ---- | M] (Microsoft Corporation) [Auto | Running] -- C:\Windows\SysWOW64\cryptsvc.dll -- (CryptSvc)

/VERSION - to include the file version information.
Example:

< c:\windows\*.exe /version >
[2008/04/14 06:42:20 | 001,033,728 | ---- | M] (Microsoft Corporation - Version = 6.00.2900.5512 (xpsp.080413-2105)) -- c:\windows\explorer.exe
[2008/04/14 06:42:22 | 000,010,752 | ---- | M] (Microsoft Corporation - Version = 5.2.3790.2453 (srv03_sp1_qfe.050525-1536)) -- c:\windows\hh.exe
[1998/10/29 16:45:06 | 000,306,688 | ---- | M] (InstallShield Software Corporation - Version = 5, 51, 138, 0) -- c:\windows\IsUninst.exe
[2008/04/14 06:42:30 | 000,069,120 | ---- | M] (Microsoft Corporation - Version = 5.1.2600.5512 (xpsp.080413-2105)) -- c:\windows\notepad.exe
[2008/04/14 06:42:34 | 000,146,432 | ---- | M] (Microsoft Corporation - Version = 5.1.2600.5512 (xpsp.080413-2111)) -- c:\windows\regedit.exe
[2005/02/10 20:14:18 | 000,098,816 | ---- | M] ( - Version = ) -- c:\windows\sed.exe
[2008/04/14 06:42:36 | 000,032,866 | ---- | M] (Smart Link - Version = 3.80.01MC15) -- c:\windows\slrundll.exe
[2004/08/03 20:07:00 | 000,015,360 | ---- | M] (Microsoft Corporation - Version = 5.1.2600.0 (xpclient.010817-1148)) -- c:\windows\TASKMAN.EXE
[2004/08/03 20:07:00 | 000,049,680 | ---- | M] (Twain Working Group - Version = 1,7,0,0) -- c:\windows\twunk_16.exe
[2004/08/03 20:07:00 | 000,025,600 | ---- | M] (Twain Working Group - Version = 1,7,1,0) -- c:\windows\twunk_32.exe
[2005/06/29 22:34:40 | 000,024,576 | ---- | M] (JSWare - Version = 1.05.0629) -- c:\windows\uninjssv.exe
[2004/08/03 20:07:00 | 000,256,192 | ---- | M] (Microsoft Corporation - Version = 3.10.425) -- c:\windows\winhelp.exe
[2008/04/14 06:42:40 | 000,283,648 | ---- | M] (Microsoft Corporation - Version = 5.1.2600.5512 (xpsp.080413-0852)) -- c:\windows\winhlp32.exe

/VERIFYSIG - to verify if a file is digitally signed and has not been modified. The caveat here is that you need to know if the file is supposed to be digitally signed. If a file is supposed to be digitally signed but has been altered in any way then it will show as not being properly signed. See below.
Example (most Windows files are not digitally signed but the Windows defender files are):

< C:\Program Files\Windows Defender\*.* /verifysig >
[2006/11/02 11:01:34 | 000,018,536 | ---- | M] (Microsoft Corporation is properly Signed) -- C:\Program Files\Windows Defender\MpAsDesc.dll
[2008/01/20 22:47:32 | 000,491,576 | ---- | M] (Microsoft Corporation is properly Signed) -- C:\Program Files\Windows Defender\MpClient.dll
[2008/01/20 22:47:32 | 000,494,136 | ---- | M] (Microsoft Corporation is properly Signed) -- C:\Program Files\Windows Defender\MpCmdRun.exe
[2006/11/02 11:01:36 | 000,065,640 | ---- | M] (Microsoft Corporation is properly Signed) -- C:\Program Files\Windows Defender\MpEvMsg.dll
[2008/01/20 22:47:32 | 000,114,232 | ---- | M] (Microsoft Corporation is properly Signed) -- C:\Program Files\Windows Defender\MpOAV.dll
[2008/01/20 22:47:32 | 001,099,832 | ---- | M] (Microsoft Corporation is properly Signed) -- C:\Program Files\Windows Defender\MpRtMon.dll
[2008/01/20 22:47:32 | 000,063,032 | ---- | M] (Microsoft Corporation is properly Signed) -- C:\Program Files\Windows Defender\MpRtPlug.dll
[2008/01/20 22:47:32 | 000,185,912 | ---- | M] (Microsoft Corporation is properly Signed) -- C:\Program Files\Windows Defender\MpSigDwn.dll
[2009/04/11 03:11:27 | 000,805,336 | ---- | M] (Microsoft Corporation is properly Signed) -- C:\Program Files\Windows Defender\MpSoftEx.dll
[2008/01/20 22:47:32 | 000,383,544 | ---- | M] (Microsoft Corporation is properly Signed) -- C:\Program Files\Windows Defender\MpSvc.dll
[2008/01/20 22:47:32 | 001,584,184 | ---- | M] (Microsoft Corporation is properly Signed) -- C:\Program Files\Windows Defender\MSASCui.exe
[2008/01/20 22:47:32 | 000,295,480 | ---- | M] (Microsoft Corporation is properly Signed) -- C:\Program Files\Windows Defender\MsMpCom.dll
[2006/11/02 11:01:35 | 000,011,368 | ---- | M] (Microsoft Corporation is properly Signed) -- C:\Program Files\Windows Defender\MsMpLics.dll
[2006/11/02 11:01:34 | 000,654,440 | ---- | M] (Microsoft Corporation is properly Signed) -- C:\Program Files\Windows Defender\MsMpRes.dll

If a file is supposed to be digitally signed but has been altered or does not contain a digital certificate then it will show as not being properly signed. The deployjava1.dll file is digitally signed:

< c:\windows\system32\deployjava1.dll /verifysig >
[2012/05/13 15:56:14 | 000,472,864 | ---- | M] (Sun Microsystems, Inc. is properly Signed) -- c:\windows\system32\deployJava1.dll

and one not properly signed:

< c:\temp1\deployjava1.dll /verifysig >
[2012/08/25 20:07:33 | 000,472,864 | ---- | M] (Sun Microsystems, Inc. is NOT properly Signed) -- c:\temp1\deployJava1.dll

Note: This will look the same as a file that is not digitally signed:

< c:\windows\explorer.exe /verifysig >
[2009/04/11 03:10:17 | 003,079,168 | ---- | M] (Microsoft Corporation is NOT properly Signed) -- c:\windows\explorer.exe

To see if a file is supposed to be digitally signed you can right-click on it a go to the Properties page. If it includes a digital certificate there will be a tab for Digital Signatures with details of the certificate.
 

Commands/Switches

Commands/Switches that can be used in the :FILES section when performing a fix:

[override] and [stopoverride] - to override the internal list of non-movable files and folders
Example:
:FILES
[override]
c:\windows\system32\userinit.exe
[stopoverride]

OTL includes a list of about 100 files and folders that cannot be moved by default. This is to prevent inadvertantly moving core OS files and folders which could potentially render a system unbootable or unusable. This feature can be overridden using these commands but be very careful when including them. A [stopoverride] command should always be included as soon as possible whenever the [override] command is used to prevent moving a required system file by mistake.

/<some number> - just like in the custom scans, this switch will include all files that match the pattern and also limit the moves to files or folders that have been created within the specified number of days.
Example:
:FILES
c:\windows\system32\*.dll /2

This will move all .dll files in the system32 folder that have been created within 2 days. Can be very useful but can also be dangerous. Be careful with using this switch here.

/64 - to access the 64-bit specific folder locations instead of the default 32-bit locations on 64-bit OSs and if the file is found move it from there.
Example:
:FILES
c:\windows\system32\badfile.exe /64

This will cause OTL to look in the 64-bit system32 folder instead of in the 32-bit system32 folder.

@ - to delete alternate data streams.
Example:
:FILES
@c:\windows\system32:somedatastream

Normally you would not need to use this in OTL if a scan has been performed using OTL because any files with ADSs will be listed in the Alternate Data Streams section of the log and you can simply copy/paste the lines into the :OTL section of the fix. If a scan was performed with another tool that does not allow fixes or cannot remove ADSs then you can fix those files with this command in the :FILES section.

/alldrives - to remove a specified file from all drives
Example:
:FILES
somefile.txt /alldrives

This will move all of the copies of a file from the root location of all drives.

If the file is in the same folder on all drives then include that folder as well like this:
:FILES
somefolder\somefile.txt /alldrives

To remove a folder on all drives use just the folder name like this:
:FILES
somefolder /alldrives

If you want to remove all copies from all locations on all drives then include the /s switch like this:
:FILES
somefile.txt /s /alldrives
or
somefolder /s /alldrives
or
somefolder\somefile.txt /s /alldrives


/C - to run a DOS command line command

It is unlikely that this switch will be used often. Other switches/commands cover most things... for example to copy a file you would usually use the /replace switch rather than a DOS command. Nevertheless there may be occasions when it would be useful. For example, you might want to stop a service temporarily (rather than delete it - which the :Services command is intended to facilitate) in which case you can use a DOS command.
Example:
:files
net stop <service> /c
<do something here>
net start <service> /c

/D - to delete the file instead of moving it
Example:
:FILES
%programfiles%\*.dll /D

This will delete all files found matching the specification instead of moving them. A common place to use this is with .tmp files but it can be used with any file or folder move. Be careful!

/E - To extract a specified file from a .cab file.
Example:
:FILES
C:\WINDOWS\Driver Cache\i386\sp3.cab:atapi.sys /E

It will always be extracted to the root of the system drive, there is no option to extract it anywhere else. From there, you can use the /replace switch to replace the current active file with extracted file. This will always be a two-step process because the active file might not be able to immediately be replaced and in that case a reboot will be required and the /replace step will take care of that.

The full process to extract a file and replace the current active file in the drivers folder would go like this:
Example:
:files
C:\WINDOWS\Driver Cache\i386\sp3.cab:atapi.sys /e
C:\WINDOWS\system32\drivers\atapi.sys|c:\atapi.sys /replace

Note: Always make sure to put the extraction step before the replace step or it will not work.

/lsp - To delete a file from the LSP stack.
Example:
:Files
helper32.dll /lsp
winhelper86.dll /lsp

For each line, OTL will go through the entire stack, remove any entries that include that file, and if any are removed will rebuild the stack.

/replace

<original file>|<new file> /replace

Example:

:files
C:\WINDOWS\System32\drivers\atapi.sys|c:\atapi.sys /replace

If the file cannot be replaced immediately (it might be in-use) then a reboot will be required to finish the move.

The original and new files do not need to have the same name or even be the same type.

Note: Care this works differently to FCopy:: in ComboFix i.e. the new file comes last - the other way around to ComboFix.

Note 2: If you are attempting to move a file from a cab file it will have to be extracted before you can replace the bad file - see /E above.

/S - to recurse sub-folders and remove all files found that match the specification
Example:
:FILES
c:\windows\*.dat /S

This will remove all .dat file in the c:\windows folder and all sub-folders

/U - to only move files or folders with Unicode characters in their names
Example:
:FILES
c:\windows\?ystem32 /U
%commonprogramfiles%\s?stem /U
c:\windows\expl?rer.exe /U /S

Each of these commands will only move the file or folder that has Unicode characters in the position of the ? and will not touch any legitimate files or folders with a name matching the pattern. You will normally see files or folders like this with a Purity infection (where you can simply use the [purity] command in the :commands section) but there could be other files or folders that require this type of move also.

Any of these switches can be mixed and matched to meet the specific needs of the situation.


CleanUp

Use CleanUp in OTL when clearing away. This is preferable to downloading OTC which should only be used when no other OldTimer tool is on the machine.

Here is a list of the tools that CleanUp removes:

!Killbox
*.run
_backupD
_OTL
_OTListIt
_OTM
_OTMoveIt
_OTS
_OTScanIt
404fix.exe
aswMBR.exe
aswMBR.txt
Avenger
avenger.*
AWF.txt
BFU
bfu.zip
catchme
catchme.exe
ckfiles.txt
CKScanner.exe
cleanup.txt
ComboFix
ComboFix*.txt
combofix.*
combo-fix.*
dds.*
Deckard
Defogger*.log
Defogger.exe
delete.bat
deljob
deljob.exe
dss.exe
dumphive.exe
erdnt\subs
exeHelper.com
exeHelperlog.txt
Extras.txt
fdsv.exe
FindAWF.exe
fixwareout
fixwareout.exe
Flash_Disinfector.exe
frst
frst.exe
frst.txt
frst64.exe
fsbl*.log
fsbl.exe
FSS.exe
FSS.txt
gmer
gmer.*
gmer_uninstall.cmd
GooredFix.exe
GooredFix.txt
grep.exe
haxfix.*
iedfix.exe
killbox.exe
logit.txt
Lop SD
lopR.txt
LopSD.exe
mbr.exe
MBRCheck*.txt
MBRCheck.exe
MBRFix*.*
minitoolbox.exe
moveex.exe
nircmd.exe
NoLop.*
NoLopOLD.txt
OTH.*
OTL.*
OTListIt.txt
OTListIt2.exe
OTLPE.exe
OTM.*
OTMoveIt.exe
OTMoveIt2.exe
OTMoveIt3.exe
OTS.*
OTScanIt
OTScanIt.exe
OTScanIt2
OTScanIt2.exe
OTViewIt.*
pev.exe
QooBox
rapport.txt
results.txt
RK_Quarantine
RKreport*.txt
RogueKiller.exe
Rooter$
Rooter.*
RSIT
RSIT.exe
Runscanner
Runscanner.*
Rustbfix
rustbfix.exe
SDFix
sdfix.exe
search.txt
sed.exe
Silent Runners.vbs
SmitfraudFix
SmitfraudFix.exe
swreg.exe
Swsc.exe
Swxcacls.exe
SysInsite
SystemLook.*
TDSSKiller
TDSSKiller.*
tmp.reg
vacfix.exe
vcclsid.exe
VFind.exe
VundoFix Backups
VundoFix.*
win32delfkil.exe
windelf.txt
WinPfind
winpfind.exe
WinPFind35u
WinPFind35u.exe
WinPFind3u
WinPFind3u.exe
WS2Fix.exe
WVCheck*.txt
WVCheck.exe
zip.exe


This tutorial was last amended 9th June, 2015


  • 19


#1305436 How to Build Your Own Computer

Posted by Troy on 12 August 2008 - 01:39 AM

How To Build Your Own Computer
Text by Troy, Pictures by Artellos.
A guide brought to you by the Geeks to Go Tech Academy

To build your own computer – it's a dream many a geek has had. Many have also fulfilled this – and also many non-geeks too. If you have a technically-inclined mind, can follow instruction, are patient, and are in need (or want) of a computer, then why not follow our guide and build your own? If you don't know what parts are all compatible, or if you're wanting the best “bang for your buck” in the component choices, or even if you're stuck half-way through the build and need a guided response - feel free to post a thread right here in our System Building and Upgrading forum, and we'll help you! There are many different uses for a computer system, so make sure you let us know why you want to use it, and a budget, and you'll be bragging to your mates in no time about your self-built system. :)

A quick note – like there are many different uses for a computer system, there are also many different ways to build a computer system. Die-hard Geeks may wish to debate the order here, but the reality is that this way works. Other ways work also. And, of course, this tutorial was written up to go with some photos that one of our very own Tech Apprentices took when he built his own computer. So you may find that your system looks different from the pictures – for example, you may not have a discrete video card, and you may have two hard drives, and so on. If your system is markedly different from our example here, please feel free to post a thread and we can tell you any differences you need to incorporate into the build. For example, some aftermarket CPU heatsink/fans need a bracket on the underside of the motherboard, so this would need to be installed before the motherboard is fitted in the case.

Update to the Quick Note: Lately I have been installing the CPU, CPU heatsink, and RAM into the motherboard before putting the motherboard into the case. I find it much easier to work on by itself. As I've said above, either way works...


1. Gather all Components
First things first – we need to ensure we have all the pieces. Here is a list of things you'll need:
  • Case (and any extra Case Fans)
  • Power Supply
  • Motherboard
  • CPU (Processor) and Heatsink/Fan (and thermal paste, if not included)
  • RAM (Memory)
  • Hard Drive
  • Optical Drive (e.g. DVD Burner)
  • Video Card (may be integrated into Motherboard)
  • Sound Card (may be integrated into Motherboard)
  • Networking Card (may be integrated into Motherboard)
  • Keyboard
  • Mouse
  • Speakers
  • Monitor
  • Any extra add-on cards you may have for the build (eg. TV Tuner Card)
  • OS Installation Disc (eg. Windows, Linux)

Posted Image

The idea is to get the bunch of parts into a working computer :)

2. Gathering Your Tools
Once you have gathered your components, you need to ensure you have the right tools:

  • Proper screwdrivers. (flat and philips)
  • A pair of pointy-nose pliers
  • Zip ties
  • Scissors or snips for cutting off loose zip tie ends
  • Patience and common sense :)

These tools should be all you need when building a computer. It is important to take anti-static precautions. Some people may wish to use an anti-static wriststrap. Once you have all the components and tools, read on and we'll explain how to build your own computer!

3. The Build
First, the case. Open both side panels, then install the standoffs that will keep the motherboard off the metal plate.

Posted Image
Ensure you only install to align with the holes on the motherboard

In the picture above you can see where the standoffs are installed. Use a set of pliers to make sure the standoffs are driven in firmly. Once you have installed the standoffs, next install the back panel I/O bracket that came with the motherboard. Usually, you'll find that the case's generic one is incorrect. Pop the old one out, and insert the one that came with the motherboard. Ensure that it is properly installed, as the motherboard will be hard up against it. Now it's time to install the motherboard. Simply position the motherboard in the correct position and slowly lower it down into the case. To ensure the motherboard is rotated the right way, the CPU socket should be toward the top-left of the case. Make sure you position it right on top of the standoffs so you can properly lock it in by driving screws in the holes on the motherboard where the standoffs are positioned. Put the screws in firm – not tight – so the motherboard is fastened securely.

Posted Image

After the motherboard, install the PSU. Slide the unit from inside the case, and sit it up flush against the back of the case. You'll see where you need to install the 4 screws that hold it in tight. Once it's in firmly, put the cables out of the way so you have as much room as possible inside the case (I.e. hang them up and outside the case).

Posted Image

Posted Image

Next, finish preparing the case for the rest of the components. If you are installing any add-on cards (such as a discrete video card), you'll need to remove the metal backing plate aligning with the corresponding installation slot.

Now move onto any case fans that need to be installed. Most cases come with at least one fan pre-installed on the back, such as our example did. We've also added one in front of where the hard drive will be located. Once the hard drive is installed, it's almost impossible to fit a fan in or out of there, so it's important to do this first. Make sure the case fan is facing so that the air is blown into the case over where the hard drive will be installed – this is an intake fan, and the fan on the back is an exhaust fan.


Posted Image

Posted Image

On the front of the case, you'll need to remove the bezel plates to make room for inserting any optical drives and floppy drives. In our example computer, you can see we have one DVD burner, but no floppy drives – so only one plate was removed.


Posted Image

Now there is room for the optical drive to fit, go ahead and install it. The unit should slide in from the front until it is sitting flush with the case. Some cases may have a “screw-less” or “tool-less” design, whereby a bracket needs to be removed to slide the unit in, and then returned into place and clipped into the lock position. This is how the Cooler Master case works in our example. Other cases will simply have holes ready, and you need to align them up and screw in firm.


Posted Image

Posted Image

After the optical drive, install the hard drive in the same manner. The only difference is that the hard drive should slide in to the lower cage from inside the case. Make sure the you insert it the correct way, so that the power and data connectors are facing the back of the case, ready to connect up at a later point. If you are installing a large graphics card (I.e. for a gaming computer), you may want to ensure you put the hard drive in the lower space to make as much room as possible for the graphics card and PSU cables. And – of course – if this build is using multiple graphics cards (SLI or Crossfire), then careful planning is needed prior to fitting the parts.


Posted Image

By now, the inside of the case should be starting to take shape. The motherboard, power supply, optical drive, and hard drive are all installed. Next we'll move on to the components that connect to the motherboard directly.

CPU – in our example, we have used a Socket 775 (Intel E8400) processor and motherboard combination. Other combinations may look different, such as having pins on the processor itself and not on the motherboard. Either way, take extreme caution, as even a slight bend to one of these pins can render the component useless.

Using the lever next to the CPU socket, unhinge it and then open the metal gate surrounding the socket. Most will have a protective cover that needs removing.


Posted Image

Handling the CPU gently by the edges, place the CPU into the socket, ensuring it is aligned the correct way.

Posted Image

This is the CPU sitting in place with the gate open

Gently close the metal gate surround.

Posted Image

Finally, use the lever to lock the metal gate surround into place – you may need to use firm pressure.

Posted Image

After the CPU is installed, fit the CPU heatsink/fan. If you have purchased a retail CPU, most come with thermal paste pre-applied to the heatsink. If this is the case, then you do not need to worry about putting your own paste on. If this is not the case, then you'll need to squeeze a small amount (about the size of a grain of rice) onto the CPU before mounting the heatsink on top.

Once the thermal paste is organised, and the CPU is ready to go, line up the heatsink and sit it in place. (If you are using a 3rd-party heatsink, you will need to follow the instructions provided with it). Press down firmly on the 4 corner clips to properly attach the heatsink to the motherboard, which puts the proper amount of pressure onto the CPU for maximum heat dissipation.


Posted Image

While we're on the CPU, we'll finish off the job by attaching the heatsink/fan power and sensor connector to the motherboard, and the 4-pin CPU power connector from the PSU to the motherboard close to the CPU. (Some newer variants may have an 8-pin power connector - this is for new high-powered CPU and motherboard combinations - consult your motherboard manual for which one you should use).


Posted Image

Posted Image

The RAM sticks are relatively easy to install. If your motherboard supports a dual-channel configuration, then it will most likely have the dual-channel slots already marked as such. In our example, we can see the slots are colour-coded - so install matching pairs of RAM sticks into matching slots. For our example, this means slots 1 and 3 will then be populated.

Once you've sorted out where the sticks are being installed, unlock the slots by moving the end levers outward.

Posted Image

Open the side locks, ready to install the RAM

Line the module up (the off-centre notch will ensure it only fits one way) and use steady, firm pressure to push it in. When it is in place, the slots at the end will have "snapped" into each side of the stick, securing it.

Posted Image

Now add any discrete cards for the build – in our example photo, we have one video card to be installed. Be sure to line up each card properly into the installation slot on the motherboard. Push cards in firm to ensure a proper fit.

Posted Image

Now all the physical components should be installed for your system. All that's left to do is connect everything up. SATA data cables (or IDE ribbon cables for components that connect in that way) need to run from the device to the motherboard. Power cables from the PSU need to connect up to each component as necessary.


Posted Image

It is especially important to take care when running the cables from the PSU to each component – always try and get the “mess” minimised as much as possible, for a nicer look and better in-case airflow. Use zip ties to clean up loose ends, especially where the fans are located. It is in this regard that a modular PSU makes all the difference – only connect what is needed and the rest can be left in the box, instead of having to zip tie it all together and tuck the bundle out of the way as much as possible... Even so – with careful planning, a non-modular PSU can still be routed efficiently for good air-flow.

You should have already connected the CPU 4-pin (or 8-pin) connector, so next install the 24-pin ATX motherboard power connector, the DVD drive, the hard drive, the graphics card, and anything else in your specific system that needs a power cable.


Posted Image
Note from Artellos (Olrik): As you might see, I made a little mistake here. I didn't install the second RAM module in the other Yellow slot. This way the RAM doesn't run in Dual-Channel configuration. I should have placed the second one in the other yellow slot.

The final connections to be made are the case connectors to the motherboard. These are for the power and reset button, power and HDD light, and USB and other data connectors for the ports on the front of the case. As every case and motherboard is different, you'll need to carefully follow the instructions in the motherboard manual. Every manual should have wiring diagrams in detail. You may find it under the heading “Front Panel Connectors” or F_PANEL.


Posted Image

Posted Image

The Photo above is showing a very clean, simple look with the cables tied up nicely

4. The Result

And there you have it. Everything should now be complete, and ready for installation of the operating system. In the photo below, we can see the system in all its glory, although a few more zip-ties to minimise the bunch of black cables from the PSU into a smaller bundle would be nice. Nonetheless, for a first-time build, this Tech Apprentice received top marks! (Well, the system worked, so that's good!)

Posted Image

The job complete!

All thats left to do is close the case side panels, to protect the important components inside, and to create the proper environment for in-case airflow – to keep all the components nice and cool.
If you are installing an OEM version of Windows, you need to put the COA sticker on the case
That's all there is to it! Enjoy your new computer.

Unfortunately for some, it might not be over just yet - sometimes components can be DOA (dead on arrival). If you don't know why the computer isn't working, start a new thread right here in System Building and Upgrading, include as much information about what issue you have and what you have tried to fix it.

Best Regards,
The Geeks to Go! Tech Academy
  • 13


#22286 Would you like to learn to fight malware?

Posted by admin on 10 November 2004 - 12:06 AM

Geek University (or GeekU) is a training course that teaches the techniques and tools of malware removal. Graduates will be able to completely remove most infections without assistance. The training is geared toward removal in an online environment. Other methods likely work better if you're in front of the infected system. Students that complete training are expected to "pay it forward" by assisting in the forums, where they can continue to keep abreast of evolving malware and removal techniques. All training is free...

Learn more about Geek University!
  • 8


#94 Free Antivirus and Antispyware Software

Posted by admin on 12 September 2003 - 06:43 AM

Last updated on March 2013

Use the links below to find free resources to scan and remove viruses, and to scan and remove spyware from your computer. Includes: Free Antivirus Software, Free Online Virus Scanners, Free Virus Removal Tools for Specific Infections, Free Spyware Detection and Removal, Free Firewalls, Free Rootkit Detection and Removal, Other Free Tools.


Free Antivirus Software

Important note: Geeks to Go highly recommends uninstalling any other antivirus software BEFORE installing another antivirus application. Antivirus programs often conflict and can cause system slowdowns, crashes, or even leave you unprotected. Here are some uninstall programs that you can download directly from the publisher's website: Symantec (Norton) | McAfee | Trend Micro
  • Microsoft Security Essentials: - Recommended!
    Click Here for Microsoft Security Essentials
    Microsoft Security Essentials is 100% free. Free download, free updates, and advertising free. There isn't even a paid option available. Don't let the price fool you, it's a great offering. Based on their former OneCare Antivirus, and utilizing a unified detection database shared with their Forefront enterprise security product, it's feature complete, with great definitions. Above all, it uses fewer system resources than any other antivirus tested (free or paid). Simple to install, easy to use, runs silently in the background. Compatible with Windows XP 32-bit, Windows Vista/Windows 7 32-bit or 64-bit. Many languages offered.

    Your PC must run genuine Windows to install Microsoft Security Essentials Learn more about genuine.
    • mse_main.png
      Home Screen
    • mse_detection.png
      Virus detected
  • AntiVir Personal:
    Click Here for AntiVir
    AntiVir has a clean and pleasant interface. It has a small footprint and is easy on system resources. Based on active infections in our malware removal forum, it's definitions are among the best. It is also more effective against rootkits than most. However, this free product aggressively promotes the paid version. A pop-up displayed after ever definition update (shown below) is sometimes confused as an unwanted popup. Compatible with Windows XP/Vista/7, including 64-bit and Linux.

    This free AntiVir® Personal Edition is intended exclusively for private use on a single workstation. You may copy the complete program package and pass it on to others for private use only. The free AntiVir® Personal Edition may not be used for commercial or professional purposes.
    • antivir_main.png
      Home Screen
    • antivir_nag.png
      Nag screen pop-up
    • antivir_detection.png
      Virus detected
  • avast! Free Antivirus:
    Click Here for Avast
    Avast is light on system resources, and it's unobtrusive. For the most part it runs silently in the background. It's the only free antivirus with boot scan options. Definitions based on our experience are just average.

    While still one of our favorite free antivirus, previous versions only required email registration. The registration must be renewed every year or definition updates will stop, annoying. The latest version received a much needed new interface, unfortunately it also comes with nagging ads to upgrade to the paid version, more annoying. Unless you opt-out, setup will install the Google Chrome browser. Too much annoyance.

    Avast could be used only by home users which do NOT use their computer for profit. If you do not meet this condition, you will need to buy a commercial license of Avast. Use it for up to 30 days before being required to register (for free) and you'll be sent a license key via email. Compatible with Windows XP/Vista/7, 32 or 64-bit.
    • avast_main.png
    • Home Screen

      avast_detection.png
    • Virus Detected
  • AVG?
    Click here for AVG
    The once often recommended AVG is no longer recommended that often on security sites like this. It's become too big, too bloated, consumes too many system resources. It does silly things. Installs the Yahoo Toolbar unless you opt out. Definition updates appear to come from different servers for free versus paid versions, and the free updates have a history of being unavailable too often. Add some embarrassing false positive detections, and below average detection rates. There are simply better free alternatives.
========================================================


Free Spyware / Malware Detection and Removal
  • Malwarebytes' Anti-Malware (MBAM) - Recommended!
    Click here for Malwarebytes' Anti-Malware
    The Malwarebytes team is made of up many people who have helped, or still help on forums like this. Their detection database may not be the deepest, but they know which infections you need help removing, and they are good at it. It excels at removing rogue, or fake antivirus programs. The free version has quick scan times, free manual updates, and free removal. Paid version adds active protection, and IP based website blocking. You can learn more about Malwarebytes' Anti-Malware PRO here.

    The popularity of MBAM also sometimes works against it. If MBAM refuses to run it's usually because malware is blocking it. If so, try running exeHelper, or rkill, and then try MBAM again.

    mbam.png

  • SUPERAntiSpyware
    Click here for SUPERAntiSpyware
    Despite the rogue sounding name, this boasts one of the best detection and removal engines available. Free manual updates and removal. Makes a great compliment to MBAM. They also offer a portable scanner that doesn't need to be installed, and is great for downloading to a flash drive, or CD from a clean system. Note, the portable scanner is downloaded using a random name to deter blocking.

    superantispyware.png
========================================================


Free Online Virus Scanners

An online virus scan allows you to scan your system using an antivirus detection database, without having to install the entire application, or uninstall an existing antivirus program. These three have among the best detection rates, and are recommended:========================================================


Free Virus Removal Tools for Specific Infections========================================================


Free Firewalls
  • Note: Do NOT run more than ONE firewall.

  • Online Armor Free: - Recommended!
    Click Here for Online Armor Free Firewall
    Easy to use. Nice looking interface. Impressive performance and great protection against both inbound and outbound threats.

    Online_Armor_Free.png

  • ZoneAlarm Free Firewall:
    Click Here for ZoneAlarm Free Firewall
    One of the first free firewall available. With its nice new interface and sleak design, ZoneAlarm Free Firewall has been updated to provide the latest protection against hackers.

    zonealarm_free_9_main_610x433.png

  • Outpost Security Suite FREE
    Click Here for Outpost Security Suite FREE
    A terrific free firewall, but it only comes in a security suite, so make sure if you install Outpost Security Suite FREE, you disable the AntiVirus portion if you are already running another AntiVirus software.

    Outpost_Firewall_Free.jpg
========================================================


Free Recovery Disks

What do you do when your system won't boot, or not any malware removal tool will run? These bootable recovery disks offer alternate boot environments, scan, and removal.
  • AVG Rescue CD - A Free bootable CD that includes AVG AntiVirus and a toolkit for the rescue and repair of infected machines.
  • Avira AntiVir Rescue System - A Linux-based application that allows you to access infected computers by using AntiVir Antivirus and a bootable cd.
  • Kaspersky Rescue Disk - Designed to scan and disinfect computers that have been infected to the point where traditional tools are not usable.
========================================================


Other Free Tools
  • Norton SafeWeb - Toolbar that warns you of dangerous Web sites right in your search results, so you can search, browse, and shop online without worry or fear of threats.
  • K9 Web Protection - A free Internet filtering and control solution that puts YOU in control of the Internet so you can protect your kids.
  • SpywareBlaster - SpywareBlaster will added a large list of programs and sites into your Internet Explorer settings that will protect you from running and downloading known malicious programs.
  • SpywareGuard - SpywareGuard offers realtime protection from spyware installation attempts. Make sure you are only running one real-time anti-spyware protection program or there will be a conflict.
  • MVPS Hosts file - The MVPS Hosts file replaces your current HOSTS file with one containing well know ad sites etc. Basically, this prevents your coputer from connecting to those sites by redirecting them to 127.0.0.1 which is your local computer.
  • WinPatrol - Alerts you to any system changes made without your knowledge.
  • VirusTotal - Single file upload virus scanning and submission.
========================================================


dry.gif If you think that your computer may be infected, visit our Virus, Spyware & Malware Removal forum and follow the Malware and Spyware Cleaning Guide so we can take a look.

Also, view our How did I get infected in the first place? thread.
  • 7


#489 How-to repair Windows XP

Posted by admin on 02 December 2003 - 04:28 PM

One of the best kept secrets of Windows XP is its built in repair feature!

In previous versions of Windows, correcting an operating system error, or installing a new motherboard, usually meant formating and reinstalling, resulting in loss of all data. Don't worry; Windows XP repair feature won't delete your data, installed programs, personal information, or settings. It just repairs the operating system!

Note: The system repair function will remove any updates you have previously installed that are not included on the CD. Drivers will also be reverted to their original XP versions, as well as some settings (network & performance settings may sometimes be reset to their defaults). It may be necessary to reactivate your Windows XP as well. When finished, you will have to download all of the updates from Microsoft Windows Update, because they are all replaced during repair.

Why would I want to reinstall Windows XP?
1) Can't start Windows XP in safe mode.
2) You have problems caused by a recently installed system update (Windows Update, hotfix, Windows XP service pack, or Microsoft Internet Explorer update).
3) Your problems can't be solved with system restore, or you can't access system restore.
4) You've installed a new motherboard, or made other major hardware changes and need to reinstall Windows.

Let's get started!

Step 1: Rule out hardware issues. Windows Repair will only fix software problems. Hardware issues can also cause boot problems (i.e. bad hard drive, memory, CPU, or power supply).

Step 2: Backup. It's always a good idea to backup your important data before making changes to Windows XP. Relax, if you follow these instructions your data will be perfectly safe.

Step 3: Boot from your Windows XP CD. Insert the Windows XP CD into your computer's CD-ROM or DVD-ROM drive, and then restart your computer. When the "Press any key to boot from CD" message appears on the screen, press a key to start your computer from the Windows XP CD. Can't boot from your CD? Please see the note at the bottom of this page (Configuring Your Computer to Boot from CD).

Step 4: A blue screen will appear and begin loading Windows XP Setup from the CD.

Note: RAID/SCSI/Unsupported UDMA users:
You will be prompted to "press F6 to install any third party SCSI or RAID drivers". Most users will not have to press F6, but if you are running RAID, SCSI or unsupported UDMA controllers, then you will have to have your controller drivers on a floppy disk. If you are unsure whether you have RAID/SCSI, then simply let the CD load without pressing F6.

When completed loading files, you will be presented with the following "Windows Setup" screen, and your first option. Select "To set up Windows XP now, press ENTER". DO NOT select Recovery Console.

XPWelcome.png


When presented with the screen below. press the F8 key to continue.

XPF8.png


Next, Windows Setup will find existing Windows XP installations. You will be asked to repair an existing XP installation, or install a fresh copy of Windows XP.

If no installations are found, then you will not be given the option to repair. This may happen if the data or partition on your drive is too corrupted.

Note: If you install a fresh copy, all data on that partition will be lost!

XPPressR.png


Your almost finished! Windows XP will appear to be installing itself for the first time, but it will retain all of your data and settings. Just follow the prompts, and have your CD-KEY ready if needed.

Do you have more than one system, or lost your CD-KEY? Visit the keyfinder page to retrieve your CD-KEY.

Update: Due to the proliferation of the Blaster and Welchia Worm/Virus be aware that a Repair Install will leave your system vulnerable. You can get infected within seconds. Do not go on line until you have enabled XP's firewall first.

Remember to run Windows Update! (install critical updates first)

-----------------------------

Configuring Your Computer to Boot from CD

Many computers are not configured to boot from the CDROM. If you cannot boot from the CDROM, this is probably due to the boot order of your devices being incorrect. You can change this in the BIOS.

You enter the BIOS from the first screen you see when you turn your computer on. To enter your BIOS, most users here will press the DEL key.

Most Dell, Toshiba, Gateway, Sony & HP systems will press F2.

Compaq users will usually have to press F10.

IBM typically uses F1 or F2.

Other brands may have different keys to press to enter setup, F1, F2, Del, Tab and CTRL+S. If possible see the manual for your computer or motherboard. Also, the BIOS will usually display which button to press to "enter setup" during POST (if it flashes by too fast, press the Pause key).

When you enter the BIOS setup, you need to change the boot order. The CDROM should be setup before the Hard Drive. Each BIOS is different, but here is an example:

XPBIOS.png

Note: If you need assistance with a repair installation, please start a new topic in our Windows XP Forum. This topic is also open for comments, but not all will receive a reply.


  • 7


#1913779 Malware Removal Tools Won't Run Tutorial

Posted by admin on 15 October 2010 - 10:53 AM

Notes:
  • Use at your own risk: Geeks to Go, does not take responsibility for any outcome of following these directions. Every computer is different, so we cannot guarantee the outcome.
  • DO NOT use for Google (browser) Redirects!! See HERE
 

When you find that your computer is so bogged down with malware and nothing works, please read through this tutorial. Likely one of the options will work.

1. The first thing we want to do is to download and run Malwarebytes' Anti-Malware (MBAM) which you probably can't do....that's why you're here.

Common Issues, Questions, and their Solutions for MBAM HERE and HERE

The malware is preventing you from downloading any programs, running any files such as .exe (executable) and even preventing you from using safe mode. We will attempt to terminate the malware that's running on your computer and restore some of the functions by using rkill or exehelper, they both do a good job at it, it's just a matter of finding out which one will run on your computer.
Please Note: The purpose of these tools is to stop certain processes and fix certain reg keys that stop you from using our normal clean up tools. They're NOT designed to remove infections in their entirety and not designed to fix all problems.
You can try running these in safe mode also if possible.
If needed you can download them to a usb flash drive and then transfer them to the sick computer.
There's 3 versions of exehelper and 5 versions of rkill.
When you find a version that does run, immediately download and run MBAM.

exeHelper.com exehelper.scr
explorer.exe<----exehelper with a different file name

rkill.exe rkill.com rkill.scr
WiNlOgOn.exe uSeRiNiT.exe <-----these are rkill with different file names

If you can't connect to the internet, here's how to fix that:

  • Open up Internet Explorer, and when the program is open, click on the Tools menu and then select Internet Options.
  • Now click on the Connections
  • Now click on the Lan Settings
  • Under the Proxy Server section, please uncheck the checkbox labeled Use a proxy server for your LAN. Then press the OK button to close this screen. Then press the OK button to close the Internet Options screen.
  • Now that you have disabled the proxy server you will be able to browse the web again with Internet Explorer.

2. If that doesn't work....try running VIPRE Rescue Program

VIPRE Rescue Program is a new anti-malware utility that runs from the command prompt that will scan for and remove most malware including rootkits. It will run when other programs won't.

Please note: Windows must load for this scanner to work.

It's easy to use:

1. Download VIPRE Rescue to your desktop (it's a big download about 80mb.....takes about 4-5 minutes on broadband and always download a fresh copy as it is updated frequently)

2. Double click on the VIPRE Rescue icon, it will ask if you want to extract VIPRE Rescue Scanner to your computer, click yes.

3. The "WinZip Self- Extractor" window will pop-up, click Unzip
It should by default unzip to C:
Make sure the checkbox for "When done unzipping open: .\deep_scan.bat" is checked
After the files are unzipped, click OK

4. VIPRE Rescue will now run automatically and perform a deep (full) scan.

5. When it's done, type exit and press enter to close the program.

6. The log isn't that good but will be in the VIPRERESCUE folder and listed as a CSV file.

7. Now see if you can run MBAM.

Note: If you find that you can't download any programs to the infected computer, you can download VIPRERescue to a usb flash drive on another computer.
Then plug the drive into the infected computer, navigate to the drive and double click on VIPRERescue****.exe and follow the directions above starting at #2.

3. Try using SUPERAntiSpyware Portable Scanner.

It's easy to use, just download SAS Portable Scanner to the sick computer, double click on it and then run it.
If you can't download it on the sick computer, download it onto another computer and then put it on a usb pen drive or cd and run it from there.
Please note: Windows must load for this scanner to work and also the scanner is saved under a random filename so that malware infections won't block the scanner.


Good Luck and Thanks for using the forum

--
Credit MrC
  • 7


#1802025 Index for the Malware removal guides and tutorials (discontinued)

Posted by heir on 08 April 2010 - 04:42 AM

Please note that this topic is no longer being kept up to date.

Index of Malware Removal Guides and Tutorials
(alphabetized subsections)

The sections are
Rogue and PUP Removal instructions
How to remove (some specific malwares)
Tool Tutorials

About Rogues
These so-called "rogues" use intentional false positives to convince users that their systems have been compromised. Then they try to sell you their software, claiming it will remove these threats. In extreme cases the false threats are actually the very trojans that advertise or even directly install the rogue. You are strongly advised to follow our removal instructions.


Rogue Removal instructions for...

123HD-Ready
1SaleADay

ACommander
AdCare
Additional Guard
AdSafer
AdStop
Advanced Antispyware Solution
Advanced Defender
Advanced Security Tool 2010
A-Fast Antivirus
Amazon Mini Saver
Anticare
AKM Antivirus
Anti Avoid
AntiGuard
AntiMalware
Antimalware Doctor
Antimalware PC Safety
AntiMalwarePro
AntiPrivacy
AntiProtect
AntiVermins
Antivir Solution Pro
AntiVir2010
Antiviral Factory 2013
Antivirii 2011
Antivirus 2009
AntiVirus AntiSpyware 2011
Anti Virus Armor
Antivirus Clean 2011
Antivirus7
Antivirus 2010
Antivirus 2011 Edition limitée
Antivirus Plus
AntiVirus Plus 2014
Antivirus Protection
Antivirus Protection Trial
Antivirus Smart Protection
Antivirus Soft
AntiVirus Studio
Antivirus Suite
Antivirus System
Antivirus XP 2008
AnyBoan
AnyCop
AnySecu
APcSafe
APCProtect
AppStein
AutoCleaner
AVASoft Antivirus Professional
AV Guard Online
AV Protection 2011
AV Protection Online
AV Security 2012
AV Security Suite

BasicPrivacy
BasicSafe
BeatTool
Best Antivirus Software
Best Virus Protection
BestBoan
BestSpeed
B-Information
BitClean
BizBoan
Blasteroids
BlueFlare Antivirus
BoanCatch
BoanClear
Boan Click
BoanCode
BoanCop
BoanCup
BoanFile
BoanGuide
BoanK
Boan Killer
BoanKing
BoanKorea
BoanLite
BoanN
BoanPlay
BoanPlus
BoanPro
Boan Safe
BoanService
BoanShield
BoanSite
Boan Solution
BoanSupport
Boan System
BoanTab
Boan119
Booster-Clean
BootCare
Booting-Pro
BringStar
Browser Apps +
Browsers+_App+_Pro+
ByteDefender

Cant Miss Coupons
CareLive
CatchCode
Cen Protect
Check119
CheckBoan
CinemaBig
Cinema-DPlus2
CinemaHDplus
CinemaHD-V1.1
Cinema-Plus
CleanBoan
CleanCatch
Cleancert
CleanerCom aka ClenerCom aka MCleanerCom
CleanUp Antivirus
CleanScan
CleanV
CleanVirus
ClearBoan
ClearPC
ClearProtect
Click Vaccine
Clinic Vaccine
Cloud AV 2012
CloudDesktop extension
Cloud Protection
CodeScan
CodeSecure
CodeSecurity
Com-doumi
Comet Arcade
COM Faster
CommonShare
ComSafeguard
Content Cleaner
Control center
Control Components
ControlPC
Coolbird
Cool-PC
CoreScan
CoreSecure
Coupon Clipster
Coupon Locker
CryptoLocker
Cryptowall
CS Browser Assistant aka CouponScout
CYAK
CyberBoan

DataProtect
DataSave
Ddosclean
Deal Drop Down
DeepDyve Plugin
Defence Privacy
DefendAPC
Defense Center
Delve
Desktop Security 2010
DeskVaccine
Digital Protection
Disk Antivirus Professional
DiskBoan
DiskClean
DoctorCom
DoctorSecurity
DoctorV
dr.Boan
Dream Scan Soft
Dr. Guard
DualBoan
DualVaccine

EasyProtect
EasyVaccine
Eazelbar
eClean
enformation
Enterprise
erezMonetization
ErrorDoctor
ErrorSmart
ErrorWiz
Essential Cleaner
EveryClear
EzPrivacy

FastCure
FastScan
File Restore
FireBoan
FireDive
Fiv_en
FLV Player Addon
focusbase
Freenpro25
Free Ven
Freeven Pro
Free Video Grabber
Frieven_s_Prox

GabyAppName
General Antivirus
Ghost Antivirus
GhostVaccine
GoodScan
GoPhoto.it
GreatDefender
GreenVaccine
Guard Online
GuardWWW

HardBoan
Hardclean
HDDdefragmenter
HDDLow
HDDTools
HDPureV9.5
HDS-Total
HDview
HelpInfo
HelpPrivacy
HiProtect
Home Malware Cleaner
Home Safety Essentials
Home Security Solutions
HomeBoan
HomeClean
HomeVaccine
HQPureHD1.0
HQ-Video-Professional (Crossrider)
HQVid1.9h
HQvidPv1.1
HQ-Vpro
HypeNet

I-Cinema
IDboan
IE Defender
ilivid
InfoBoan
InfoDoctor
InfoHold
InfoKeeper
InfoManager
InfoSave
InfoSecret
InfoSeven
InfoShield4
Inprivacy
InSysSecure
InterBoan
Internet Antivirus Pro
Internet Security, aka trojan spm/lx, worm.win32.netsky
Internet Security, 2012 version
Internet Security Guard
InternetBoan
InternetVaccine
iON internet security from cloud
IScan
Isis
iWebar1

jlnjln staging
Jotzey

KeyCop
Klip Pal
Kotech-Protect
Kryptik Trojan.Agent
KSecurity

Laflurla
LimitVaccine
LitePC
Live Security Platinum
Live Security Professional
Live Security Suite
Live PC Care
LiveBoan

MacroVirus On-call
Magnet Downloader
MainPrivacy
MainVaccine
MalwareDefense
Malware Destructor 2011
Malware Protection Center
MalwareRemovalBot
MasterBoan
MaxBoan
MediaaPlyar+
MediaBuzz
Media_Play_AIR+
Mediaplayer+
Media Enhance
MedicCop
MegaVaccine
MemoryOptimizer
Mezaa
Micorsoft Essential Security Pro 2013
MicroPC
fake Microsoft Security Essentials alert
MicroVaccine
Milestone Antivirus
Mp3 Fabulous
MPP
MS Removal Tool
My Security Engine
My Security Wall
My Security Shield
MyCing
myClip-HD
MyComGuard
MyDefender
MyDisk
MyInfoBoan
MyInfoGuard
MyPCcheck
MyScanner

NeoProtect
Net Protector AntiVirus 2010
Neurowise
NewClean
NewProtect
NewVaccine

OffersWizard
OMG Music Plus
OMG Plus
OneClean
OneCleaner
OneSoftPerDay
OpenCloud Antivirus
OpenCloud Security
Optima-Speed

Paladin Antivirus
PatchUp_Plus
PC Bug Finder Pro
PcCare
PCclear
PC Defender
PC Defender 360
PC Defender Plus
PC-Essence
PC Secure
PC Spider
PC Sweeper
PCGuard
PCGuarder
PC Health Kit
PCMaster Antispyware
PCMedic
PCommander
PCoptimizer
PCOptimum
PCPlus
PCPrivacy
PCScan Antispyware
PCspeed
PcsSecure
PC Supporter
PCupgrade
PcVaccine
PC-Safe
Personal Security
PC Speed Up
Personal Shield Pro
PlusGuard
PodoWeb
PointBoan
PortalMore
POS Malware
Poup Alerta
PowerBoan
PowerCure
PowerPc
PowerScan
PowerVaccine
Pricora
Pricora 12.0
PrivacyAlpha
PrivacyBoho
PrivacyCare
Privacy Center
PrivacyClear
PrivacyClick
PrivacyCode
PrivacyControl
PrivacyCut
PrivacyG
PrivacyGate
PrivacyGuard
PrivacyGuard 2010
PrivacyHidden
Privacy.I
Privacy Info
PrivacyKey
PrivacyManager
Privacy Protection
PrivacyRight
PrivacyTop
PrivacyUp
PrivacyView
Pr012
ProPrivacy
ProSpeed
Protect Boan
Protect Keep
ProtectCode
Protect Cop
ProtectInfo
ProtectMine
ProtectOn
ProtectOne
ProtectPC
ProtectSurf
Protect Top
PSX Extension 1
Punctis Plugin

Quiknowledge
Qone8 hijacker
Qscan
Quantum Look

Rad Rater
Ransom.AI trojan
RealBoan
RealBoan (2)
RealCleaner
RealSpeed
Remote Javascript staging
RegistryClever
ResetInfo
Reveal Staging
RRSavings

Safecare
SafePrivacy
Safe-Saver
SafetyBoan
SafetyPC
SafetySearch
Sales Delivery Tseniq.ru
SaveCom
SaveInfo
SavePass
Savepath Deals
Savings Wave
Scan119
ScanTack
ScanZero
SearchCon
Search Defence
SearchGuard
SecureGuard
Security119
Security Antivirus
Security essentials 2010
Security Essentials 2011
Security Central
Security Guard
Security Inspector 2010
Security Master AV
Security Monitor 2012
Security Protection
Security Scanner
Security Shield
Security Shield (2011)
Security Shield 2012
Security Solution 2011
Security Sphere
Security Tool
SelfPrivacy
Senses
SerialTrunc
ServiceUpdate
Shop_an_Up
Shop_and_Up
Shopping Assistant
Sinergia cleaner
SpyAxe, SpywareStrike, SpySheriff, Winhound, Smitfraud, using noahdfear's smitRem.exe removal tool
Sm23mS
SmartCure
Smart Engine
Smart Fortress 2012
SMART HDD
Smart Protection 2012
Smart Security
SmartBoan
SmartHDD
SmartProtect
SmartSaver1+12
SmartScan
Smart Security
Smart-Splus
SmileCheck
SolutionPC
SP Center
SpecialGuard
SpecialVaccine
Speed-Booster
SpeedCleaner
SpeedManager
SpeedPlus
SProtect
Spunch.tv
SpyCare
Spycheck Anti-Spyware 2010
SpyCrush
Spydawn
SpyFalcon
SpyHeal.
SpyLocked
Spyware Cease
Spyware Cleaner 2010
Spyware Protect 2009
Spyware Protection
SpywareQuake
Star Boan
Super AV
Super Boan
Supra Savings
SweeperLab
SysProtector
System Care Antivirus
System Live Protect
System Progressive Protection
System Security 2011
System Tool

Tellurium Generate
TheDefend
The weDownloads Manager+
Titan Antivirus 2013
Top Faster
Topic Torch
TotalBoan
Total Anti Malware Protection
Total PC Defender

Ukash Ransomware
UltraDefragger
UpgradePC
Urausy Ransomware
User Protection
UserVaccine

Vaccine2010
Vaccine-365
Vaccine7
VaccineCenter
VaccineChecker
VaccineClean
VaccineClear
VaccineCom
VaccineCore
Vaccine Engine
VaccineForce
VaccineHome
VaccineKiller
VaccineLab
Vaccine Lite
VaccinePower
VaccineProgram
VaccineQ
VaccineScan
VaccineSecure
VaccineSet
Vaccine Smart
Vaccine Speed
VaccineStar
VaccineTek
VaccineTools
VaccineTop
VaccineTree
VaccineU
Vaccine Up
VDoctor
VDoctorPro
VeeHD
video MediaPlay-Air
videos+Media+Player
VirtualVaccine
VirusBye
VirusCatch
VirusCure
VirusKorea
Virus Protector
VirusScan
VirusSecurity
Vista Antispyware Pro 2013
Vista Antivirus Pro 2013
Vista Defender
Vista Defender 2013
VitaVaccine
Volcano Security Suite
VProtect
Video HD Helper

w1p1
Web Guard
Web Protect for Windows
Web Safeguard
WebSpades
WebVaccine
WhiteVaccine
Win 7 Antispyware Pro 2013
Win 7 Antivirus 2014
Win 7 Antivirus Pro 2013
Win 7 Defender
Win 7 Defender 2013
Win 7 Protection 2014
Win 7 Security Cleaner Pro
Win 8 Antivirus 2014
Win 8 Defender 2013
Win 8 Protection 2014
Win 8 Security Cleaner Pro
Win 8 Security System
Win Antispyware Center
Win Security 360
Win Server Defender
WinAntiSpyware 2007
Winboan
WinDefrag
  • 7


#1429077 Preventing Malware and Safe Computing

Posted by Rorschach112 on 14 January 2009 - 05:17 PM

Preventing Malware and Safe Computing


The following are some valuable tips for maintaining a secure PC and ensuring that your PC will not get infected in the future.


Backups :


It is extremely important that you make regular backups. Having these can make all the difference if your PC ever has a problem.


Backup Your Registry with ERUNT
  • Please use the following link and scroll down to ERUNT and download it.
    http://aumha.org/freeware/freeware.php
  • For version with the Installer:
    Use the setup program to install ERUNT on your computer
  • For the zipped version:
    Unzip all the files into a folder of your choice.
Click Erunt.exe to backup your registry to the folder of your choice.

Note: to restore your registry, go to the folder and start ERDNT.exe


Now create a fresh system restore point

Download SysRestorePoint to your desktop and unzip it to it's own folder.
  • Double click SysRestorePoint.exe so that we can make a new system restore point.
  • A box will pop up after it has made a new point, usually after a few seconds. Close that window and exit the program.

  • Keep a backup of your important files - Now, more than ever, it's especially important to protect your digital files and memories. This article is full of good information on alternatives for home backup solutions.


If you run Vista Premium, Business or Ultimate you have the ability to set automatic backups of your files.
  • Click Start > All Programs > Accessories > System Tools > Backup Status and Configuration
  • Click Back up files, and then follow the steps in the wizard.
  • Select where you want to back up to ... another partition,hard drive, CD or DVD.
  • Select which files you want to back up :

    Pictures, Music, Videos, E-mail, Documents, etc

  • Select how often to back up:

    Daily, Weekly or Monthly.

  • Select the day/time

    Then click on Save settings and Exit.

To restore the files:

Click Restore files and then follow the steps in the wizard.


Note:
The ability to set up automatic backups is not included in Windows Vista Home Basic ; however, Windows will periodically remind you to back up your files. It is NOT recommended to backup to the same drive that your Operating System is located on.


Now if you ever have a PC problem, you should easily be able to restore your PC to a previous time.


Peer-to-Peer ( p2p ) programs :


Peer-to-peer programs, eg : LimeWire, Bitlord, Kazaa, are the most common way to get infected. Malware writers use these programs to spread infections as it is the easiest way for them. The majority of infections we see in the Malware Removal forum are due to people using p2p programs to download cracks/keygens/warez. These are not only illegal, but will always contain some form of malware.

You have no way of verifying that the things you download are legitimate or that they don't contain malware. Even with an up to date anti-virus and firewall, these things will still infect you. It is highly recommend that you uninstall all peer-to-peer programs. It just isn't worth it.


Note :

Other common ways of getting infected are dis-reputable sites forcing you to download and install a codec. Or viruses using Instant Messaging programs (msn, AIM) to send a file claiming it to be "photos" from a friend, only for it to turn out to be a virus.


Security Programs :


It is essential these days to have a few security programs installed and running on your machine. However, there are a few caveats, you should not install more than one anti-virus or firewall. This actually does more harm than good, and will cause a lot of issues for your PC.


It is important to keep these programs up to date. I would recommend using them once every 10 days.


Internet Browsers :


Picking the right internet browser is very important. You need to find one that suits your needs but that is also safe.
  • Mozilla's Firefox browser is fantastic, as is Opera and Chrome. They are far more secure than Internet Explorer, immune to almost all known browser hijackers, and also have the best built-in pop up blockers (as an added benefit!) that I have ever seen. If you are interested, Firefox may be downloaded from Here

    While Opera can be downloaded from Here. I personally use Chrome


If you choose to use Firefox, I highly recommend these add-ons to keep your PC even more secure.
  • NoScript - for blocking ads and other potential website attacks
  • Norton Safeweb - this tells you whether the sites you are about to visit are safe or not. A must if you do a lot of Googling


Although, if you prefer staying with Internet Explorer I highly recommend you do this :

Make Internet Explorer more secure
  • Click Start > Run
  • Type Inetcpl.cpl & click OK
  • Click on the Security tab
  • Click Reset all zones to default level
  • Make sure the Internet Zone is selected & Click Custom level
  • In the ActiveX section, set the first two options ("Download signed and unsigned ActiveX controls) to "Prompt", and ("Initialize and Script ActiveX controls not marked as safe") to "Disable".
  • Next Click OK, then Apply button and then OK to exit the Internet Properties page.


Special recommendation :

This recommendation is particularly suited to people who require extra privacy online, for example if you do online banking or use a paypal account for buying/selling items ( eg : ebay ).

KeyScrambler is an extension that "scrambles" your keystrokes so keyloggers can record only meaningless keys. Most infections these days have keystroke logging capability, having this program installed will prevent your private details being stolen and used by hackers.


Extras :


Below are a few more steps that we highly recommend

  • OpenDNS is a very valuable feature that we strongly endorse here. It gives your PC the benefit of extra safety and increased browser speed. Enabling this takes hardly any time and is not complicated at all, even novice users will be able to set it up with the guide below.

    Another huge advantage of using OpenDNS is that it blocks phishing websites from loading on your computer. It uses data from Phishtank, a community site that is also used by Yahoo! Mail to determine if some particular website is part of any online phishing scam.

    To set this just have a look at the easy-to-use guide here

  • There are certain programs that are security vulnerabilities, it is recommended that you keep everything updated. Two of the main vulnerabilities are Java and Adobe Reader. You can find the latest version of Java here, you will want the Java SE Runtime Environment (JRE) one. Make sure to uninstall all previous versions of Java as well since they can be exploited.

    You can also find the latest version of Adobe Reader here


    Suggestion :

    Foxit is a great free PDF alternative. It uses fewer system resources and is not vulnerable to the exploits affecting Adobe Reader. Providing full PDF functionality, Foxit is rapidly becoming the PDF reader of choice for many. Get it here

  • Keep Windows updated by regularly checking their website at :
    http://windowsupdate.microsoft.com/
    This will ensure your computer has always the latest security updates available installed on your computer.

  • TFC - Cleans temporary files from IE and Windows, empties the recycle bin and more. Great tool to help speed up your computer and knock out those nasties that like to reside in the temp folders.

  • FileHippo Update Checker is an extremely helpful program that will tell you which of your programs need to be updated. Its important to keep programs up to date so that malware doesn't exploit any old security flaws.

  • Recovery Console - Recent trends appear to indicate that future infections will include attacks to the boot sector of the computer. The installation of the Recovery Console in the computer will be our only defense against this threat. For more information and steps to install the Recovery Console see This Article. Should you need assistance in installing the Recovery Console, please do not hesitate to ask.

Advanced Tips :


The following suggestions are considered to be rather complicated for the average user, so I only recommend them if you know what you are doing or have a desire to learn more complicated procedures. A few of these programs listed below are paid products, I have tried to use free alternatives but it hasn't always been possible.

I have also tried to link to tutorials for each of the tools recommended. This tutorial is not to answer questions on how to use them


Image Backups

What is an image backup ? To put it simply, it will back up all your data into a single file, including system and registry data, allowing you to do an easy, fast, and complete PC restore should your computer ever crash.

Here are some suggestions

DriveImage ( my personal recommendation, it is also free )
Acronis
Macrium Reflect


Limited User Account

Using a Limited User Account can help decrease the effect of malware and other potential damaging things for your PC. A Limited User account lets you use most of the capabilities of the computer, but only an Administrator can make changes that affect other users of the computer.

Have a read of the following article for more detailed instructions on how to go about setting it up

Click


Tip : This sort of account would be very beneficial to use among any children in your family, or among those who are not comp savvy that have access to your PC.


DropMyRights

The following program is only for use on on Windows XP machines, this tool is not needed on Windows Vista or Windows Server 2008, because by default users are not administrators.

It can be downloaded from here


This program greatly increases the security of Windows XP by running selected programs in a restricted environment ( i.e. with lower rights ) even when logged on to Windows XP as an Administrator. It simply blocks them from performing certain security-breaking functions.


You can find a guide here on how to use it here


Sandbox Programs

One of the best forms of protection that you can use for your PC is a sandbox program. In laymans terms, what they do is let you install and run programs in a virtual environment, so any changes made will happen in the virtual environment and not in the real PC.

So if your PC was to get infected by a piece of malware while in this virtual setting, or anything else that may damage the machine, all you have to do is close this virtual session, reboot the PC, and it will be back to normal.


Here are some sandbox programs that I recommend

Returnil
Sandboxie


HIPS

These programs may conflict with your other security protection programs. If this is the case ( ie : you notice massive slow down or BSODs ) then uninstall them.


HIPS ( Host Based Intrusion Prevention System ) is considered as one the best steps in protecting your PC. What these programs do are prevent changes made to your PC by unauthorised sources. It allows you to very closely monitor what runs on your PC.

Here are some recommendations

ProcessGuard
Threatfire ( there is a tutorial located in this link as well )
DriveSentry ( this is a firewall so it will conflict with other firewalls )


Now after all these steps, your PC will be extremely secure. However it is important to note that you can still get infected if you are not careful. One of the best security programs you can have is common sense. As malware gets more sophisticated, you need to be more wary. If you do get caught though and the above steps cant help fix it, we will be here to help you out


Regards

The GeeksToGo Team
  • 7


#104266 Not getting help?

Posted by admin on 03 May 2005 - 10:57 AM

If your topic is 3 days old or more, and you haven't received a reply, please Start a new thread in The Waiting Room with ONLY:
  • a link to your topic
  • Brief description of your issue i.e Malware - Hardware- Application - Operating system.
  • the date it was posted
This way the proper staff member will reply to your original topic and then will remove your post from this topic and move it to an archive once it's received a reply.

PLEASE NOTE: This topic is only for posts that are 3 days or older. If it hasn't been 3 days, please don't even bother replying here. It will just be deleted and receive no response. It's not fair to others that are patiently waiting.

I just wanted to add to everyone that if your post has been overlooked, it is not because you have done anything "wrong" in posting. We do try very hard not to let anyone "slip through the cracks", but with a forum this busy, it does tend to happen. We apologize for the wait, if it's been three days and you post here, please be assured we will get to you quickly!
Thanks!


If you keep getting emails to notify you of a reply in this topic, use the Unsubscribe option.
You can unsubscribe at any time by logging into your control panel and clicking on the "View Subscriptions" link.

You will find the My Controls link under the header of the board.
Click that one and under the header Subscriptions on the left side click on "View topics"
In the list of topics find the section Off-Topic
There will be a link to this one. Put a checkmark in the box behind it and scroll down untill you see Unsubscribe.
Click the "With selected" button behind it.

View the waiting room forum.
  • 7


#1018995 Malware FAQ

Posted by admin on 30 July 2007 - 10:32 AM

1. What is malware?
“Malicious software”; a generic term covering a range of software programs and types of programs designed to attack, degrade or prevent the intended use of an individual computer terminal or network. Types of malware can include viruses, worms, Trojans, malicious active content and denial of service attacks. In the case of invasion of privacy for the purposes of fraud or the theft of identity, software that passively observes the use of a computer is also malware (“spyware”). (source)

2. Why do people create malware?
Why do badware providers make the effort? Because it is big business, amounting to a $2 billion-a-year industry. It's the Wild West of aggressive marketing and an industry supported by shadowy online marketers, small application vendors, and website operators. (source)

3. What are the consequences of malware?
At a minimum it's a nuisance, displaying unwanted advertising, or using your computer to send spam. At its worse, it has potential to steal personal and financial information. This can range from your browsing habits, and email address list, to online banking passwords and even identity theft.

4. How can I protect my personal information?
If you suspect you're infected with malware, stay away from sites like online banking, PayPal, or any site where you're required to enter personal information. Once the infection is removed from your system, change any passwords used to access online sites.

5. With your help, I've removed infection(s) from my system. Is it clean?
That's not an easy answer. Unfortunately, we can never say with a 100% certainty that a system is clean. This is especially true when dealing with systems that have been infected with rootkits, and backdoor trojans. Every Geeks to Go staff member has extensive training before they're allowed to reply to malware topics, and we do our best to remove every infection. However, we're usually careful to say, "your log looks clean", or "no more infections found", and not "your system is clean". The potential exists for some very well hidden malware, or brand new infection to be present. Almost every expert agrees there's only way to know for certain that an infected system is clean, and that's to low-level format the hard drive (overwrite with all zeros). Then reinstall the operating system and all applications. However, this means that all data is lost. Most home users and small businesses do not have adequate backups. It's also very time consuming to reinstall and restore everything. For this reason, most people try to remove infections.

6. How did I get infected?
See Microsoft Security MVP Tony Klein's: How did I get infected in the first place?

7. Malware Glossary: (source)
  • Adware: A type of Advertising Display Software that delivers advertising content potentially in a manner or context that may be unexpected and unwanted by users.
  • Backdoor Trojan: A software program that gives an attacker unauthorized access to a machine and the means for remotely controlling the machine without the user's knowledge. A Backdoor compromises system integrity by making changes to the system that allow it to by used by the attacker for malicious purposes unknown to the user.
  • Botnet: A type of Remote Control Software, specifically a collection of software robots, or “bots”, which run autonomously. A botnet's originator can control the group remotely. The botnet is usually a collection of zombie machines running programs (worms, trojans, etc.) under a common command and control infrastructure on public or private networks.
  • Browser Helper Object (BHOs)/Browser Plug-in: A software component that interacts with a Web browser to provide capabilities or perform functions not otherwise included in the browser. Typical examples are plug-ins to display specific graphic formats, to play multimedia files or to add toolbars which include search or anti-phishing services. Plug-ins can also perform potentially unwanted behaviors such as redirecting search results or monitoring user browsing behavior, connections history, or installing other unwanted software like nuisance or harmful adware.
  • Dialer/Dialing Software: Any program that utilizes a computer’s modem to make calls or access services. Users may want to remove dialers that dial without the user’s active involvement, resulting in unexpected telephone charges and/or cause access to unintended and unwanted content.
  • Hacker Tool: Security Analysis Software that can be used to investigate, analyze or compromise the security of systems.
  • Hijacker: System Modification Software deployed without adequate notice, consent, or control to the user. Hijackers often unexpectedly alter browser settings, redirect Web searches and/or network requests to unintended sites, or replace Web content.
  • Keylogger (or Keystroke Logger): Tracking Software that records keyboard and/or mouse activity. Keyloggers typically either store the recorded keystrokes for later retrieval or they transmit them to the remote process or person employing the keylogger.
  • Rootkit: A program that fraudulently gains or maintains administrator level access that may also execute in a manner that prevents detection. Once a program has gained access, it can be used to monitor traffic and keystrokes; create a backdoor into the system for the hacker's use; alter log files; attack other machines on the network; and alter existing system tools to circumvent detection. Rootkit commands replace original system command to run malicious commands chosen by the attacker and to hide the presence of the Rootkit on the system by modifying the results returned by suppressing all evidence of the presence of the Rootkit.
  • Screen Scrapers/Screen Capturers: Tracking Software that records images of activity on the computer screen. Screen Scrapers typically either store the recorded images and/or video for later retrieval or they transmit them to the remote process or person employing the Screen Scraper.
  • Tracking Cookies: A Tracking Cookie is any cookie used for tracking users’ surfing habits. Tracking Cookies are a form of Tracking Technology. They are typically used by advertisers wishing to analyze and manage advertising data, but they may be used to profile and track user activity more closely. However, tracking cookies are simply a text file, and far more limited in capability than executable software installed on users’ computers.
  • Trojan: A program that appears to do one thing but actually does another (a.k.a. Trojan Horse).
  • Virus: Code that recursively replicates a possibly evolved copy of itself. Viruses infect a host file or system area, or they simply modify a reference to such objects to take control and then multiply again to form new generations.
  • Worm: Worms are network viruses, primarily replicating on networks. Usually, a worm will execute itself automatically on a remote machine without any extra help from a user.

  • 6


#59136 Joke of the Day

Posted by Resident_Blonde on 21 March 2005 - 09:00 PM

Lets share some laughter and smiles ;) :tazz:


Dinner with the Girlfriend's Parents (PG)

Prom Night was coming up, and a girl announced to her boyfriend that she wanted to make it special and take a hotel room for the night.

Being the responsible type, the boy went to the Pharmacy to purchase protection. The pharmacist was very helpful and guided the boy for about an hour and told him everything there was to know.

The boy came early to pick his girlfriend, and her Mother invited him to join them for dinner. When they sat down, the boy, looking to impress her parents, offered to say grace then bowed his head. A minute passed, and the boy was still deep in prayer...5 minutes passed, and still no movement from the boy.

Finally, after 10 minutes with his head down, the girlfriend leaned over and whispers to the boyfriend, "I had no idea you were so religious."

The boy turns, and whispers back, "I had no idea your father was a pharmacist."

  • 5


#2350712 FRST Tutorial - How to use Farbar Recovery Scan Tool

Posted by emeraldnzl on 18 November 2013 - 05:47 PM

Introduction


One of FRST's strengths is its simplicity. It is designed to be user friendly. Lines containing references to infected items can be identified, copied from the log, pasted into Notepad and saved. Then with a press of a button the tool does the rest. This allows for great flexibility, as new infections appear they can be identified and included in a fix.
 
 
What it will work with

Farbar's Recovery Scan Tool is designed to run on Windows XP, Windows Vista, Windows 7, Windows 8, Windows 10 and Windows 11 Operating Systems. There are two versions, a 32-bit and a 64-bit version.
 
Note: FRST64 is not designed to run on XP 64-bit systems.
 
 
Diagnosis

FRST creates a log covering specific areas of the Windows Operating System. This can be used for initial problem analysis and to tell you some information about the system.

The tool is under constant development, part of which includes the addition of new malware identification labels. Accordingly, it is strongly recommended to regularly update. If the computer is connected to the internet there will be an automatic check for available updates when FRST is opened. A notification will appear and the latest version can then be downloaded.  

Where new infection manifests or update is not possible e.g. no internet connection for whatever reason, the expert needs to be abreast of latest developments in the malware infection field to enable early pinpointing of the problem. The lay user should seek expert help when new infections appear or when they find difficulty in identifying the problem on their machine.

By default, like many other scanners, FRST applies whitelisting. This avoids very long logs. If you do want to see a full log; then the relevant box on the Whitelist section should be unchecked. Be prepared for a very long log that may have to be uploaded as an attachment for analysis.

  • Default Microsoft entries are whitelisted.
  • In the case of Services and Drivers the whitelist covers not only the default MS services but also other legitimate services and drivers.
  • Signed Microsoft executables are whitelisted on the "One month (created)" list.
  • Entries with not signed files are not whitelisted.
  • No security program (AV or Firewall) is whitelisted.
  • The SPTD service is not whitelisted.


Preparation for use

Make sure FRST is run under administrator privileges. Only when the tool is run by a user that has administrator privileges will it work properly. If a user doesn't have administrator privileges you will see a warning in the header of FRST.txt about it.

In some cases a security program will prevent the tool from running fully. Generally there won't be a problem but be alert to the possibility that when a scan is requested that a security program may prevent the running of the tool. When fixing it is preferred to disable programs like Comodo that might prevent the tool from doing its job.

A general recommendation to everyone is that when you are dealing with a rootkit, it is better to do one fix at the time and wait for the outcome before running another tool.

It is not necessary to create a registry backup. FRST makes a backup of the registry hives the first time it runs. The backup is located in %SystemDrive%\FRST\Hives (in most cases C:\FRST\Hives). See the RestoreFromBackup: directive for more details.

FRST is available in a number of different languages. Helpers tend to use English as their language of choice for problem analysis. Where a helper or someone seeking help wishes to provide logs in English, just run FRST by adding the word English to the name e.g. EnglishFRST.exe or EnglishFRST64.exe or FRSTEnglish.exe or FRSTEnglish64.exe. The resultant log will be in English.
 
 
Running FRST

The user is instructed to download FRST to the Desktop. From there it is a simple matter to double click the FRST icon, accept the disclaimer, and run it. The FRST icon looks like this:


frsticon.png

 
Note: You need to run the version compatible with the user's system. There are 32-bit and 64-bit versions. If you are not sure which version applies, have the user download both of them and try to run them. Only one of them will run on the system, that will be the right version.

When FRST is opened the user is presented with a console looking like this:
 

frstconsole-org.png


Once FRST has completed its scan it will save notepad copies of the scan in the same location that FRST was started from. On the first and subsequent scans outside the Recovery Environment a FRST.txt log and an Addition.txt log will be produced.

Copies of logs are saved at %SystemDrive%\FRST\Logs (in most cases this will be C:\FRST\Logs).


Fixing
 
Care, Very Important: Farbar Recovery Scan Tool is non invasive and in scan mode it cannot harm a machine.

However FRST is also very effective at carrying out instructions given to it. When applying a fix; if it is asked to remove an item; in 99% of cases it will do so. While there are some safeguards built in they are necessarily broad based and designed not to interfere with removal of infection. The user needs to be aware of that. Used incorrectly (that is if requested to remove essential files), the tool can render a computer unbootable.
 

If you are unsure about any items in a FRST report always seek expert help before administering a fix.


FRST has a range of commands and switches that can be used both to manipulate the computer's processes and to fix problems you have identified.


Preparing Fixlist

1. Fixlist.txt method - To fix identified problems, copy and paste the lines from the FRST logs to a text file named fixlist.txt and saved in the same directory the tool is run from.

Note: It is important that Notepad is used. The fix will not work if Word or some other program is used.
 

2. Ctrl+y method - The keyboard shortcut can be used to automatically create and open an empty file to be filled. Launch FRST, press Ctrl+y to open the file, paste the fix, press Ctrl+s to save.


3. Clipboard method - Insert lines to be fixed between Start:: and End:: like so:

Start::
script content
End::

Let the user copy the whole content including Start:: and End:: and click Fix button.


Unicode

To fix an entry with Unicode characters in it, the script should be saved in Unicode otherwise the Unicode characters will be lost. Ctrl+y shortcut saves the text file in Unicode. But in case of fixlist.txt created manually a proper encoding has to be chosen in Notepad (see below).

Example:


S2 楗敳潂瑯獁楳瑳湡t; 㩃停潲牧浡䘠汩獥⠠㡸⤶坜獩履楗敳䌠牡⁥㘳尵潂瑯楔敭攮數 [X]
ShortcutWithArgument: C:\Users\Public\Desktop\Gооglе Сhrоmе.lnk -> C:\Users\User\AppData\Roaming\HPRewriter2\RewRun3.exe (QIIXU APZEDEEMFA) -> 1 0 <===== Cyrillic
2016-08-17 14:47 - 2016-08-17 16:23 - 00000000 _____ C:\ProgramData\Google Chrome.lnk.bat

 
Copy and paste the entries into the open Notepad, select Save As..., under Encoding: select UTF-8, give it fixlist name and save it.

If you save it without selecting UTF-8, Notepad will give you a warning. If you go on and save it, after closing it and opening it again you will get:


S2 ????????t; ??????????????????????????? [X]
C:\Users\Public\Desktop\G??gl? ?hr?m?.lnk
2016-08-17 14:47 - 2016-08-17 16:23 - 00000000 _____ C:\ProgramData\Google Chrome.lnk.bat

 
And FRST will not be able to process the entries.


Manipulated user names

Some users alter logs by removing or replacing a user name. To make sure that correct paths are processed you can replace the potentially manipulated user name in paths with CurrentUserName (for logged in user) or AllUserName (for all users). FRST will automatically translate the keywords to a correct user name.


Note: CurrentUserName is not supported in the Recovery Environment.


To prevent FRST from hanging for hours due to incorrect scripts, the cmd: and Powershell: directives execution time is limited to 60 minutes.


Items moved by the fix are kept in %SystemDrive%\FRST\Quarantine, in most cases this will be C:\FRST\Quarantine until clean up and deletion of FRST.

For detailed information about preparing fixes see sections below.


Removing FRST
 
To remove automatically all files/folders created by FRST and the tool itself rename FRST/FRST64.exe to uninstall.exe and run it. The procedure requires a reboot and works only outside of the Recovery Environment.


  • 5


#1988084 Welcome to Geeks to Go!

Posted by SpySentinel on 29 March 2011 - 11:53 PM

On behalf of all of us on the Geeks to Go Team, we would like to say :D

We offer free computer help for various tech related categories such as Malware Removal, Hardware and Software support, Web hosting and website design help, as well as discussion about new games, software, and tech related news. Geeks to Go is also a place to obtain answers from other people who offer their support and expertise on a completely volunteer basis. It's a fun place where you can meet others with similar interests, or just hang out and learn something new every day. It's all about sharing -- what you know, and what you want to know. The Staff here are very friendly, and if you need to contact us about anything, our doors are always open.


To get started, please Register if you have not done so already so you will be able to access and enjoy all of the features and information we have to offer and to receive help. If you need help registering, you can follow our Tour which will walk you through the easy steps and will help get you set up in no time.


Once you have registered, make sure you read our Terms of Use (TOU). It is very important that you read and understand these rules so that you will be able to enjoy your stay here. Also, if you need an Administrator or Moderator at any time, you can find a list here.


Now that you are an official member of Geeks to Go, and now that you have read our rules, you are ready to explore our site. Feel free to have a look around at our various tech forums such as our Virus, Spyware, Malware removal, Hardware/Software support, Operating Systems support, gaming reviews, and much more. These forums are here for you to post if you have any issues or problems that you would like help with. Post a topic in the appropriate forum so we can assist you in resolving your issue.

Think your computer may be infected? You can post in our Virus, Spyware, Malware removal forum so our Malware Experts can assist you in diagnosing and cleaning up your computer. To start, please read our Malware and Spyware Cleaning Guide to learn how to receive help and what logs we will need from you so we can diagnose the problem more quickly and efficiently. We also offer Malware Removal Guides, that will show you the latest infections out there, what they do, and how you can remove them, and other How-To Guides.

Interested in learning how to fight malware? Please read our About Geek University – An Introduction to learn how you can sign up for our Geek University (GeekU) where you will learn from our dedicated Teachers how to remove malware.

To learn how to your computer may have gotten infected in the first place and how to better keep it protected please read these two tutorials:


The forums offer endless possibilities and information for you to better understand technology in a technology driver world and we hope to empower you with the tools necessary to be able to better understand that technology. We are also here if you have technology issues and need assistance, and will gladly help you resolve them.
Please check out our other Site Orientation and FAQ tutorials to help you get more familiar with the site and its features:


On behalf of all of us, again I want to welcome everyone to Geeks to Go, and hope you have an enjoyable stay here. :D
  • 5


#1754524 How to fix Google Redirects

Posted by Rorschach112 on 02 February 2010 - 04:57 PM

Note: Your installed Security/Protection software may warn that anything advised to be downloaded in this tutorial is a potential threat.

This is not the case and will be what is known as a False Positive detection and not a cause for concern and or may be due to the malware present for example.

How to fix Google Redirects, aka Win32/Olmarik, Rootkit.Win32.TDSS.u, Win32/Alureon.F, Backdoor.Tidserv!.inf

This infection hijacks your browsers to divert search engines to malware sites. Another symptom is getting the error message "DCOM server protocol launcher server terminated". It is important that you do not try fix this infection manually, or to let your anti-virus program do it, as it can result in an unbootable machine if removed badly. This guide is designed to remove the infection easily and effectively, with no side-effects.


Lets get onto removing the infection now.


Step 1 : Safety precautions


Before we begin, you should save these instructions in Notepad to your desktop, or print them, for easy reference.


Backup Your Registry with ERUNT
  • Please use the following link and scroll down to ERUNT and download it.
    http://aumha.org/freeware/freeware.php
  • For version with the Installer:
    Use the setup program to install ERUNT on your computer
  • For the zipped version:
    Unzip all the files into a folder of your choice.
Click Erunt.exe to backup your registry to the folder of your choice.

Note: to restore your registry, go to the folder and start ERDNT.exe


Please download OTM
  • Save it to your desktop.
  • Please double-click OTM to run it. (Note: If you are running on Vista, right-click on the file and choose Run As Administrator).
  • Copy the lines in the codebox below to the clipboard by highlighting ALL of them and pressing CTRL + C (or, after highlighting, right-click and choose Copy):

    :Files
    ipconfig /flushdns /c
    
    :Commands
    [purity]
    [resethosts]
    [emptytemp]
    [CREATERESTOREPOINT]
    [EMPTYFLASH]
    [Reboot]
    
  • Return to OTM, right click in the "Paste Instructions for Items to be Moved" window (under the yellow bar) and choose Paste.
  • Click the red Moveit! button.
  • Copy everything in the Results window (under the green bar) to the clipboard by highlighting ALL of them and pressing CTRL + C (or, after highlighting, right-click and choose copy), and paste it in your next reply.
  • Close OTM and reboot your PC.
Note: If a file or folder cannot be moved immediately you may be asked to reboot the machine to finish the move process. If you are asked to reboot the machine choose Yes.


Step 2 : The fix


Please download GooredFix from one of the locations below and save it to your Desktop
Download Mirror #1
Download Mirror #2
  • Ensure all Firefox windows are closed.
  • To run the tool, double-click it (XP), or right-click and select Run As Administrator (Vista).
  • When prompted to run the scan, click Yes.
  • It doesn't take long to run, once it is finished move onto the next step


Please read carefully and follow these steps.
  • Download TDSSKiller and save it to your Desktop.
  • Extract its contents to your desktop.
  • Once extracted, open the TDSSKiller folder and doubleclick on TDSSKiller.exe to run the application, then on Start Scan.


    Posted Image

  • If an infected file is detected, the default action will be Cure, click on Continue.


    Posted Image

  • If a suspicious file is detected, the default action will be Skip, click on Continue.


    Posted Image

  • It may ask you to reboot the computer to complete the process. Click on Reboot Now.


    Posted Image


The infection should hopefully be removed after these steps. If this is not the case, please go to the Virus Removal forum here and follow the steps in this thread here


If this guide fixes your machine, then please read my guide on how to prevent malware and about safe computing here


Regards

GeeksToGo Team
  • 5


#2358080 Download official Windows 7 ISO from Microsoft partner

Posted by admin on 13 December 2013 - 01:19 AM

Microsoft does not provide Windows media downloads unless you subscribe to MSDN, or have other volume license agreements. However, if you purchase a retail copy of Windows directly from Microsoft's website, you will be directed to their digital distribution partner (Digital River) for download. Links below are direct from Digital River. You may need these links if: your original DVD was lost or damaged; you need a disk with SP1 integrated; you need a clean install in a different language; you perform a repair install on an OEM system. A modern alternative to borrowing a disk from a friend, these links offer genuine, unaltered, and virus-free software. A valid CD Key is required to activate all copies.

English, Service Pack 1:
Windows 7 Home Premium 32Bit: http://msft.digitalr...n/X17-58996.iso
Windows 7 Home Premium 64Bit: http://msft.digitalr...n/X17-58997.iso

Windows 7 Professional 32Bit: http://msft.digitalr...n/X17-59183.iso
Windows 7 Professional 64Bit: http://msft.digitalr...n/X17-59186.iso

Windows 7 Ultimate 32Bit: http://msft.digitalr...n/X17-59463.iso
Windows 7 Ultimate 64Bit: http://msft.digitalr...n/X17-59465.iso

Other languages and versions: http://www.shayatik....-digital-river/

How to tell if you need 32-bit or 64-bit version:
Click Start > right click My Computer > click Properties. Under the System header, next to System type you'll see 32-bit version, or 64-bit version. Bonus keyboard shortcut, click Windows key + Pause|Break button.

How to burn the ISO to a DVD: If using Windows 7, simply right-click the ISO image and chose, "Burn disc image". If using an older version of Windows, we recommend http://www.imgburn.com/

How to create a bootable USB: http://www.microsoft..._usbdvd_dwnTool

Activate online: Click Start, in the Search box type activate.
Activate by phone: Click Start, in the Search box type slui.exe 4
  • 4


#2350718 FRST Tutorial - How to use Farbar Recovery Scan Tool

Posted by emeraldnzl on 18 November 2013 - 06:45 PM

Default Scan Areas


On the first and subsequent scans outside the Recovery Environment a FRST.txt log and an Addition.txt log are generated. An Addition.txt log is not produced when FRST is run in the Recovery Environment.


Scans run in normal mode:

Main scan

Processes [digital signatures check]
Registry [digital signatures check]

Scheduled Tasks [digital signatures check]
Internet [digital signatures check]
Services [digital signatures check]
Drivers [digital signatures check]
NetSvcs
One month (Created) [Microsoft digital signatures check]
One month (Modified)
Files in the root of some directories

FLock
FCheck
SigCheck [digital signatures check]
LastRegBack

Additional scan

Accounts
Security Center
Installed Programs
Custom CLSID [digital signatures check]

Codecs [digital signatures check]
Shortcuts & WMI
Loaded Modules [digital signatures check]
Alternate Data Streams
Safe Mode
Association
Internet Explorer [digital signatures check]
Hosts content
Other Areas
MSCONFIG/TASK MANAGER disabled items
FirewallRules [digital signatures check]
Restore Points
Faulty Device Manager Devices
Event log errors
Memory info
Drives
MBR & Partition Table

Optional scans

List BCD
SigCheckExt [digital signatures check]
Shortcut.txt
Addition.txt
90 Days Files


Search Files [digital signatures check]

Search Registry


Note: [File not signed] will be printed for files without a digital signature or files with not verified signature.


Scans run in the Recovery Environment:

Main scan

Registry

Scheduled Tasks
Services
Drivers
NetSvcs
One month (Created)
One month (Modified)
KnownDLLs
SigCheck
Association
Restore Points
Memory info
Drives
MBR & Partition Table
LastRegBack


Optional scans

List BCD
90 Days Files


Search Files


Note: The digital signatures check is not available in the Recovery Environment.


  • 4


#2350710 FRST Tutorial - How to use Farbar Recovery Scan Tool

Posted by emeraldnzl on 18 November 2013 - 05:41 PM

Tutorial is now hosted on BleepingComputer: Link

This copy is no longer updated


farbarlogo.png

Farbar Recovery Scan Tool


The latest version may be downloaded from:

Link 1 | Link 2

 
Farbar Recovery Scan Tool (FRST) is a diagnostic tool incorporating the ability to execute prepared script solutions on malware infected machines. It will work equally well in normal or safe mode and where a machine has boot up problems it will work efficiently in the Windows Recovery Environment. Its ability to work in the recovery environment makes it particularly useful in dealing with problems associated with machines experiencing difficulty when booting up.
 

**********************************************************


Tutorial Information

This tutorial was originally created by emeraldnzl in consultation with farbar and with the kind co-operation of BC (Bleeping Computer) and G2G (Geeks to Go). emeraldnzl has since retired and now the tutorial is added to and maintained by picasso in consultation with Farbar. Permission of both picasso and Farbar is required prior to using or quoting from the tutorial at other sites. Also note this tutorial was originally authored to offer guidance to helpers offering malware removal assistance at various forums.


Translations
 
Dutch (Netherlands) | Dutch (Belgium)
French
German
Polish
Portuguese

Russian
Spanish
 

Table of Contents

1. Introduction
2. Default Scan Areas
3. Main scan (FRST.txt)

  • Processes
  • Registry
  • Scheduled Tasks
  • Internet
  • Services/Drivers
  • NetSvcs
  • One month (Created/Modified)
  • FLock
  • FCheck
  • KnownDLLs
  • SigCheck
  • Association
  • Restore Points
  • Memory info
  • Drives and MBR & Partition Table
  • LastRegBack

4. Additional scan (Addition.txt)

  • Accounts
  • Security Center
  • Installed Programs
  • Custom CLSID
  • Codecs
  • Shortcuts & WMI
  • Loaded Modules
  • Alternate Data Streams
  • Safe Mode
  • Association
  • Internet Explorer
  • Hosts content
  • Other Areas
  • MSCONFIG/TASK MANAGER disabled items
  • FirewallRules
  • Restore Points
  • Faulty Device Manager Devices
  • Event log errors
  • Memory info
  • Drives
  • MBR & Partition Table

5. Other optional scans

  • List BCD
  • SigCheckExt
  • Shortcut.txt
  • 90 Days Files
  • Search Files
  • Search Registry

6. Directives/Commands

  • CloseProcesses:
  • CMD:
  • Comment:
  • Copy:
  • CreateDummy:
  • CreateRestorePoint:
  • DeleteJunctionsInDirectory:
  • DeleteKey: and DeleteValue:
  • DeleteQuarantine:
  • DisableService:
  • EmptyEventLogs:
  • EmptyTemp:
  • ExportKey: and ExportValue:
  • File:
  • FilesInDirectory: and Folder:
  • FindFolder:
  • Hosts:
  • ListPermissions:
  • Move:
  • Powershell:
  • Reboot:
  • Reg:
  • RemoveDirectory:
  • RemoveProxy:
  • Replace:
  • RestoreFromBackup:
  • RestoreMbr:
  • RestoreQuarantine:
  • SaveMbr:
  • SetDefaultFilePermissions:
  • StartBatch: — EndBatch:
  • StartPowershell: — EndPowershell:
  • StartRegedit: — EndRegedit:
  • SystemRestore:
  • TasksDetails:
  • testsigning on:
  • Unlock:
  • VirusTotal:
  • Zip:

7. Canned Speeches


Trusted helpers and experts who have the requisite access may keep abreast of the latest tool developments at the FRST Discussion Thread.


  • 4


#2020959 What differs computers from 32-bit - 64-bit

Posted by underscor3 on 05 June 2011 - 04:36 PM

In answer to your question, a 32-bit system requires a 32-bit CPU and operating system, while a 64-bit system requires (surprise) a 64-bit CPU and 64-bit capable operating system.

Now, in detail:

The processor (CPU) is what handles all of the data moving into and out of the computer. Your computer uses memory (Random Access Memory, or RAM) to store data and make calculations. At the simplest level, data in a computer is represented as a bit. A bit can hold either two values; as humans we represent those as either a 1 or a 0. Similarly, the CPU addresses the RAM using bit addresses; that is, each location in memory is kept separate and given an individual address. This address, at the most simple level, is represented as a series of bits. Now, a 32-bit CPU can handle memory locations up to 32 bits long. I won't get into the binary math now, but a 32-bit address scheme allows for around 4 billion separate addresses. This equates to a maximum memory capacity of around 4 GB- if you add any more, the CPU simply lacks the ability to use all that RAM.

Now, in a 64-bit system, the processor is capable of using up to 64 bits to allocate memory; this means that the system can handle a lot more RAM (16 exabytes, or EB, which is way above what consumer PCs will ever use).

Operating systems are written to take advantage of the hardware that's built into the computer. For example, Windows XP was written as a 32-bit operating system because it ran on 32-bit hardware. When a program asks for memory, or the computer performs a calculation, everything is working together to know that memory addresses are going to be limited to 32 bits. A 64-bit operating system can only run on 64-bit hardware; otherwise, the computer could try to access memory or run programs that the CPU doesn't support, and that's when bad things start to happen! Thankfully, most 64-bit programs have safeguards built in so that if they detect they're running on a 32-bit system, they won't run. However, 32-bit programs can run on a 64-but system with no problem.

Prior to roughly 2005 or so, every production computer ran a 32-bit OS- 64-bit systems were still relatively expensive to produce, and the technology just hadn't matured. CPU maker AMD introduced the first 64-bit consumer CPU, the Athlon 64, in 2003, though 64-bit operating systems didn't make their way to the majority of the consumer market until the release of Windows Vista.
  • 4


#1655295 Corrupted 2GB .pst file, cannot be opened

Posted by YellowRubberDuck on 06 October 2009 - 02:32 AM

Hi,

I cannot open my pst file, which is over 2Gb.
When I wanna open it, an error message pop up:
"Properties for this information service must be defined prior to use."

I've tried to fix it using Inbox Repair Tool (SCANPST.EXE).
However, I get this message half way through:
"An error has occured which caused the scan to be stopped. No changes have been made to the scanned file."

Is there any way to fix & open this .pst file?
Your help is appreciated.
Thank you.
  • 4


As Featured On:

Microsoft Yahoo BBC MSN PC Magazine Washington Post HP